Chapter 2: Installation
Connecting devices to the unit
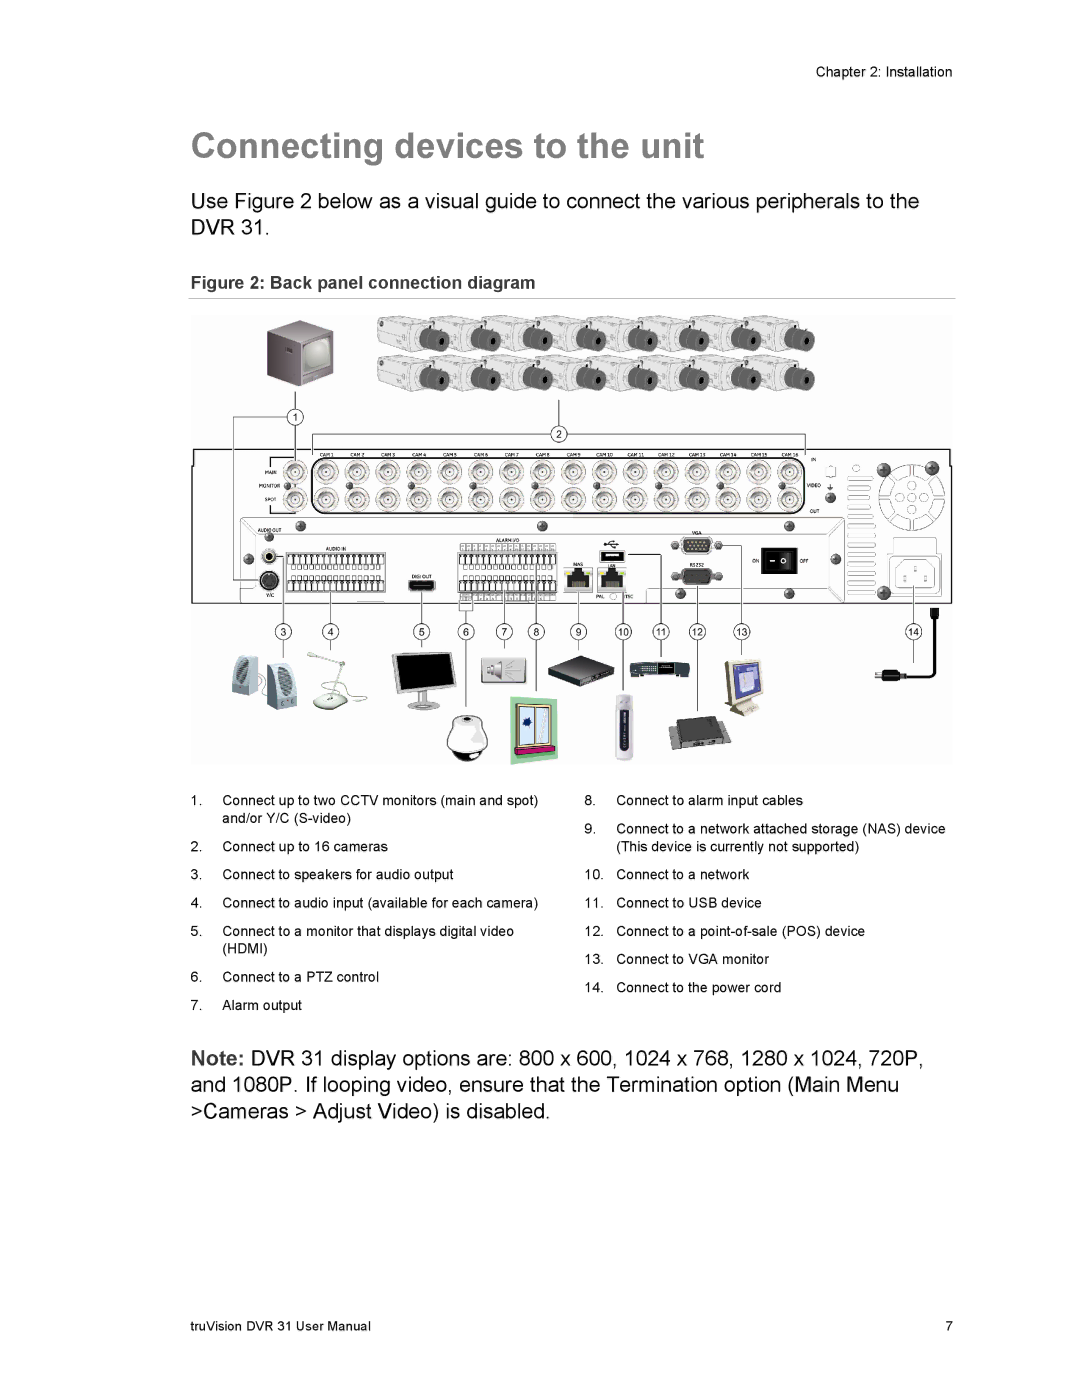
Use Figure 2 below as a visual guide to connect the various peripherals to the DVR 31.
Figure 2: Back panel connection diagram
1.Connect up to two CCTV monitors (main and spot) and/or Y/C
2.Connect up to 16 cameras
3.Connect to speakers for audio output
4.Connect to audio input (available for each camera)
5.Connect to a monitor that displays digital video (HDMI)
6.Connect to a PTZ control
7.Alarm output
8.Connect to alarm input cables
9.Connect to a network attached storage (NAS) device (This device is currently not supported)
10.Connect to a network
11.Connect to USB device
12.Connect to a
13.Connect to VGA monitor
14.Connect to the power cord
Note: DVR 31 display options are: 800 x 600, 1024 x 768, 1280 x 1024, 720P, and 1080P. If looping video, ensure that the Termination option (Main Menu >Cameras > Adjust Video) is disabled.
truVision DVR 31 User Manual | 7 |