DVD-R135
English
Getting Started
Precaution
Important Safety Instructions
Maintenance of Cabinet
Handling Cautions
Disc Specifications
Using CD-R/-RW
Using MPEG4 disc
Disc Storage
DVD-RW VR mode
DVD-RW Video mode
Reverse engineering or disassembly is prohibited
Disc Compatibility
Contents
Flexible Recording for Timer recording only
Recording the current TV programme you are
Recording from external equipment you are
Making a One Touch Recording OTR
This DVD Recorder can play MPEG4 formats within an avi file
General Features
See
Before reading the user’s
Manual Recorder
Select the disc type
Format the disc to start recording
When using a DVD-RW disc in VR Mode
When using a DVD-RW disc in Video Mode
When using a DVD-R disc
Creating a playlist DVD-RW in VR mode
Accessories
Preparing the Remote Control
Setting the Remote Control
Unpacking
01, 02, 03, 04, 05, 06, 07, 08
36, 37, 38, 39
67, 73, 75
72, 73
Front Panel
Description
Front Panel Display
Connect the output of external equipment using audio cables
Rear Panel
RF in / RF OUT Connects antenna cables
Video OUTgood video quality
Tour of the Remote Control
Connecting the DVD Recorder to other external
Components and required initial setting modes
Connecting the DVD Recorder
Quick Overview
Connecting the DVD
RF cable connection of this DVD
Case 1 Connecting to a Video Composite output jack
Case 2 Connecting to an S-Video output jack
If your TV has audio input jacks, use this connection
Case 3 Component Video output jacks
Component jacks will not output See pages 21
Case 2 Connecting to a stereo amplifier with AV output jacks
Connecting HDMI/DVI to a
Case 1 Connecting to a TV with Hdmi Jack
Case 2 Connecting to a TV
With DVI Jack
Connecting to AV 2 IN, DV input jack
Case 2 Connecting a Camcorder to the DV in jack
Case 2 Connecting a Camcorder to the DV in jack
If the input is not selected automatically
On-Screen Menu Navigation
On-screen Menu Press again to exit the on-screen Menu
Plug & Auto Set up
Connect the RF cable as indicated on
Plug the DVD Recorder into the mains
Auto Channel scan will be started
Setting the Clock
Press the OK button, then the date and time will be saved
Press the OK button to stop the Auto Setup
Press the OK button to continue
Channel scan will be started
If you want to exit, press the Menu button
Setting up the Language Options
CH Tune the channel using œ √ buttons
Language setup menu will be displayed
Edit You can add or edit PRprogramme
EP Mode Time Setting
Press the Return or œ button to return
System menu will be displayed
To the previous menu Press the Menu button to exit the menu
Automatic Chapter Creation
With the DVD Recorder in Stop mode, press the Menu button
Press the œ √ buttons to select Yes and press the OK button
Press the …† buttons to select Chapter
Setting up the Audio Options
Audio setup menu will be displayed
Off Doesn’t output DTS signal
Audio Options
Setting up the Progressive scan
This is only active when a Dolby Digital signal is detected
Dynamic Compression
Off You can enjoy the movie with the standard Dynamic Range
Canceling the Progressive scan
This function allows you to setup the TV screen settings
Video setup menu will be displayed
If you press the P.SCAN button by
HDMI/DVI Resolution
DisplayVideo Options
Output selection
TV Aspect
DivXR Registration Setting up the Parental Control
If you forgot your password
Press the OK or √ button to select Password
‘Create the password’ message will be displayed
About the Change Password
Press the …† buttons to select Change Password
See page 34 if you forgot your password
About the Rating Level
Before Recording
Recordable discs
Recording Formats
Recording Mode
Unrecordable video
Recording the current TV programme you are watching
About Info Button
Checking the available disc space Disc Information
Press the OPEN/CLOSE button to close the disc tray
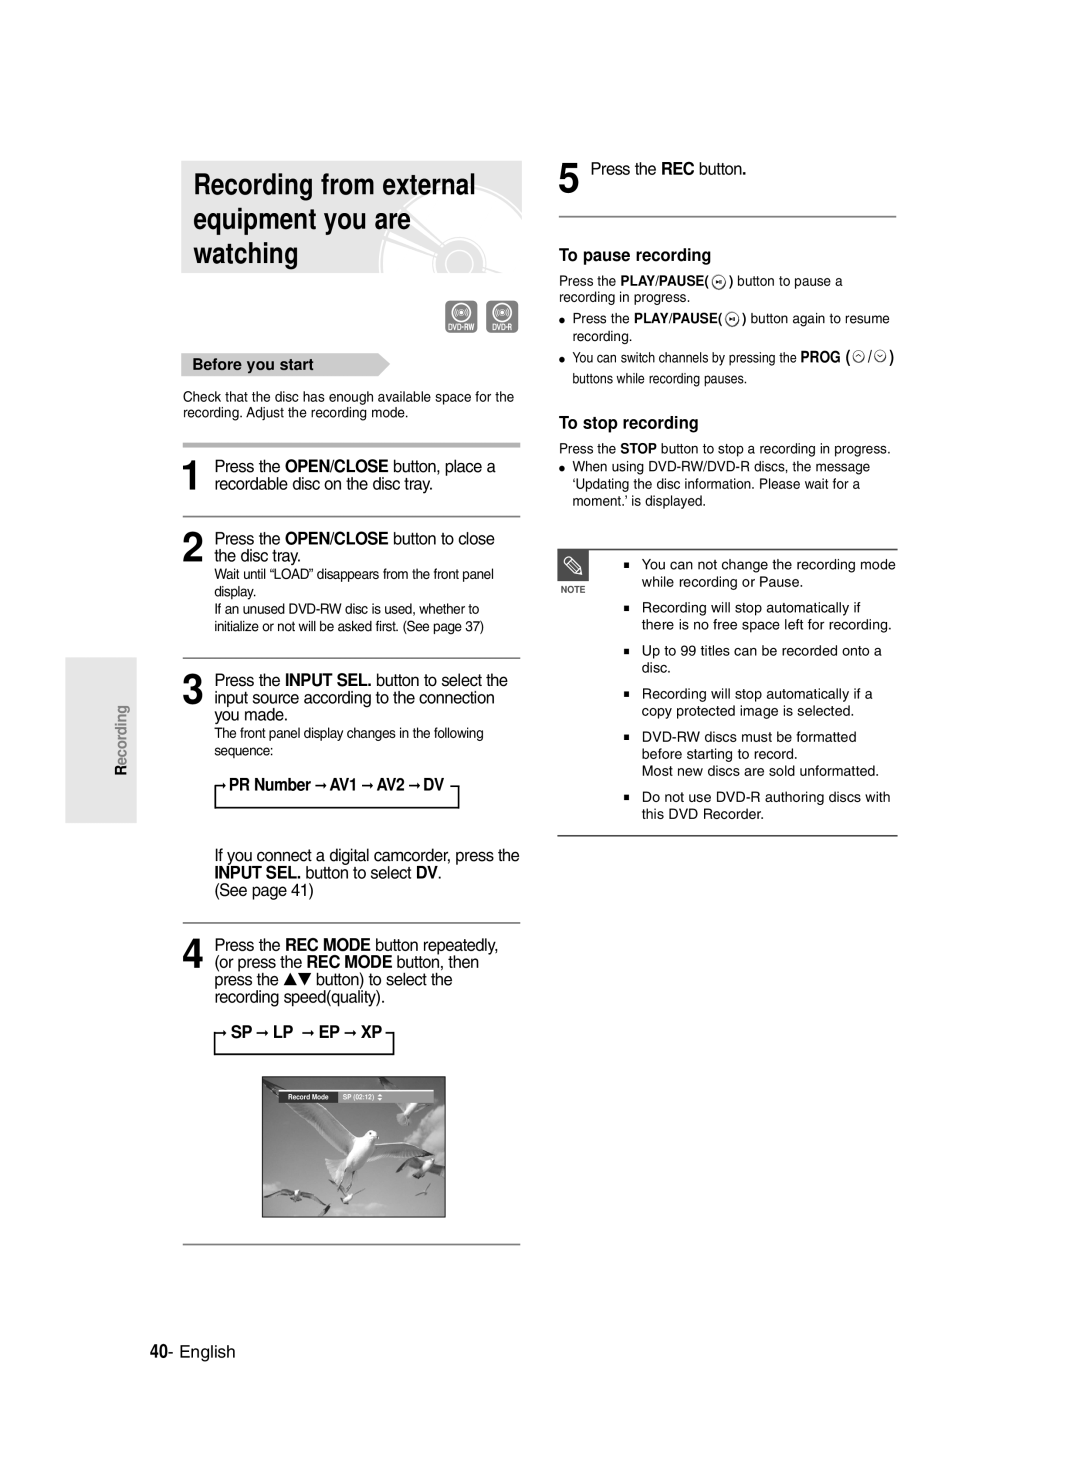
Press the REC button
Recording from external equipment you are watching
Front panel display changes in the following sequence
Copying from a Camcorder
TV Programme 1 to
Making a One Touch Recording OTR
Press the Stop button once more to stop recording
Making a Timer Recording
With the DVD Recorder in Stop mode, press the Timer button
Set timer recording option
Speed Recording Mode
If the timer settings overlap
Flexible Recording For Timer recording only
Press the OK button
Press the OK button to confirm the edited setting
Selected entry will be deleted from the list
Recording the Standard Timer List
Before Playing
Region code DVD-Video only
Disc types that can be played
Discs that cannot be played
Playing a Disc
Press the Stop button to stop playback
Using the Disc Menu & Title Menu
Using the Search Functions
Button on the remote control
Searching through a Chapter or Track
Moving to a scene directly using the Anykey
Slow Motion Play
Step Motion Play
About Anykey
Using the Repeat Function
Press the Cancel button to return to normal playback
Playing RepeatedlyRepeat Playback
Press the …† buttons to select Time
Unfinalised DVD-RW Video mode do not repeat a chapter
Repeat playback of the A-B section starts
Selecting the Subtitle
Selecting the Audio language
Press the Subtitle button during playback
Press the Audio button during playback
Changing the Camera Angle Zooming-In
Or pause
Playing back a bookmark
Using Bookmarks
Clearing a bookmark
Playing back a Marker
Using Markers
Clearing a Marker
Playing an Audio CD/MP3
Playing an Audio CD CD-DA/MP3
Playing an Audio CDCD-DA
Audio CDCD-DA Screen Elements
MP3 Screen Elements
Playing an MP3 Disc
Insert an MP3 Disc into the disc tray
Buttons on the Remote Control used for MP3 playback
Play Option Mode
For MP3 discs, you can select Track, Folder or Disc
Playing a Picture
To Programme Tracks
When MPEG4 file is played, you can use following functions
Playing a MPEG4
Insert a MPEG4 Disc into the disc tray
Returns to the Album screen
Playing the Title List
Press the Menu button
MPEG4 Function Description
Video compression formats
Edit menu is displayed on the right
Title List screen is displayed
Selected entry title will be played back
Title List Screen Elements
Limited editing function
Title List
Disc Manager
Playlist
RenamingLabeling a Title
Basic Editing Title List
Rename screen is displayed
LockingProtecting a Title
Deleting a Title
You will be prompted with a confirmation message
Deleting a Section of a Title
Edit Title List screen is display
OK button
Press the OK button at the starting point
Press the OK button at the end point
Creating a Playlist
Press the OK button at the start point
Playing Entries in the Playlist
APR/23/2006 Title
Enter the desired characters using the …† œ √ buttons
Renaming a Playlist Entry
Editing a Scene for the Playlist
Playing a Selected Scene
Edit Scene screen is displayed
Playlist entry to be played is selected
To setup, follow steps 1 to 3
Press the OK button at the start point of the scene
Press the OK button at the end point of the scene
Modify Scene screen is displayed
Press the OK button at the starting point of the scene
Adding a Scene
Selected scene is moved to the selected position
To setup, follow the steps 1 to 3
Copying a Playlist Entry to the Playlist
Deleting a Scene
Playlist that has been selected will be copied
Deleting a Playlist Entry from the Playlist
You can create up to 999 scenes on one
Disc Manager
Editing the Disc Name
Disc Protection
Formatting a Disc
Delete All Title Lists
All title lists are deleted
Finalising a disc
Disc is finalised
Unfinalising a disc V/VR mode
DVD-RW can be finalised or unfinalised in VR mode
Troubleshooting
Power
Recording
Cannot record TV programmes
Playback
Play mode settings are different from the settings
Video
Timer Recording
Sound
Forgot my password for parental supervision
Remote Control
Other
Specifications
Region Country Customer Care Centre Web Site
English
DVD-R135
ﺮﻳﺬﺤﺗ
ﺔﻴﻟوأ تﺎﻬﻴﺒﻨﺗ
ﺔﻨﻴﺑﺎﻜﻟا ﺔﻧﺎﻴﺻ
صﺮﻘﻟا لوﺎﻨﺗ
ﺔﻣﻼﺴﻟا ﻞﺟأ ﻦﻣ ﺔﻣﺎﻫ تﺎﻤﻴﻠﻌﺗ
صﺮﻘﻟا ﻆﻔﺣ
صاﺮﻗﻷا ﻖﻓاﻮﺗ
VR ﻊﺿو DVD-RW
صﺮﻗ ﻰﻠﻋ تﺎﻧﺎﻴﺒﻟا ﻞﻴﺠﺴﺘﻟ مﺪﺨﺘﺴﻳ ﻢﻴﻤﺼﺗ ﻮﻫ اﺬﻫ
ﻚﻳﺪﻟ ﻞﺠﺴﻤﻟا يد ﻲﻓ يد
تﺎﻳﻮﺘﺤﻤﻟا
ﻞﻳﺪﻌﺘﻟا
يﺬﻟا ﻲﻟﺎﺤﻟا ﻲﻧﻮﻳﺰﻔﻠﺘﻟا ﺞﻣﺎﻧﺮﺒﻟا ﻞﻴﺠﺴﺗ
ماﺪﺨﺘﺳﻼﻟ ﺔﻠﺑﺎﻘﻟا صﺮﻘﻟا ﺔﺣﺎﺴﻣ ﻦﻣ ﺪﻛﺄﺘﻟا
ةﻮﻄﺨﻓ ةﻮﻄﺧ تﺎﻛﺮﺤﻟا ضﺮﻋ
ﺔﻣﺎﻌﻟا ﺎﻳاﺰﻤﻟا
DVD-RW صﺮﻗ ماﺪﺨﺘﺳا
يد زﺎﻬﺟ ماﺪﺨﺘﺳا ﺔﻴﻔﻴﻛ مﺪﺨﺘﺴﻤﻟا ﻞﻴﻟد ةءاﺮﻗ ﻞﺒﻗ ﻞﺠﺴﻤﻟا يد ﻲﻓ
DVD-R صﺮﻗ ماﺪﺨﺘﺳا
VR ﻊﺿو ﻲﻓ DVD-RW صﺮﻗ ماﺪﺨﺘﺳا ﺪﻨﻋ
ﻮﻳﺪﻴﻔﻟا ﻊﺿو ﻲﻓ DVD-RW صﺮﻗ ماﺪﺨﺘﺳا ﺪﻨﻋ
DVD-R صﺮﻗ ماﺪﺨﺘﺳا ﺪﻨﻋ
VR ﻊﺿو ﻲﻓ DVD-RW ضﺮﻌﻟا ﺔﺤﺋﻻ داﺪﻋإ
ﺪﻌﺑ ﻦﻋ ﻢﻜﺤﺘﻟا زﺎﻬﺟ ﻂﺒﺿ تﺎﻘﺤﻠﻤﻟا
ةﻮﺒﻌﻟا ﻦﻣ زﺎﻬﺠﻟا جاﺮﺧإ
ﺪﻌﺑ ﻦﻋ ﻢﻜﺤﺘﻟا زﺎﻬﺠﻟ ﺔﻳداﺪﻌﺘﺳا تاءاﺮﺟ
ﺔﻳرﺎﺠﺘﻟا ﺔﻣﻼﻌﻟا
ﻞﻤﻌﻳ اﺪﺣاو ﺪﺠﺗ ﻰﺘﺣ ﺎﻳرود ﺎﻬﻨﻣ
ﺔﻔﻴﻇﻮﻟا رﺰﻟا ﻦﻋ ﻪﻓﺎﻘﻳإو نﻮﻳﺰﻔﻠﺘﻟا ﻞﻴﻐﺸﺘﻟ مﺪﺨﺘﺴﻳ
ﻞﻤﻌﻟا ﻲﺟرﺎﺧ رﺪﺼﻣ رﺎﻴﺘﺧﻻ مﺪﺨﺘﺴﻳ
ﻒﺻﻮﻟا
ﺔﻴﻣﺎﻣﻷا ﺔﺣﻮﻠﻟا
ﺔﻴﻣﺎﻣﻷا ﺔﺣﻮﻠﻟا ضﺮﻋ
Stop
ﻲﻔﻠﺨﻟا ﺔﺣﻮﻠﻟا
ﻞﻀﻓأ ﻮﻳﺪﻴﻓ ةدﻮﺟ S-VIDEO OUT
ﺪﻌﺑ ﻦﻋ ﻢﻜﺤﺘﻟا زﺎﻬﺟ ﻲﻓ ﺔﻟﻮﺟ
ﺔﻌﻳﺮﺴﻟا ﺔﻣﺎﻌﻟا ةﺮﻈﻨﻟا
ﺔﺑﻮﻠﻄﻤﻟا ﺔﻴﻟوﻷا ﻂﺒﻀﻟا
يد ﻲﻓ يد زﺎﻬﺟ ﻞﻴﺻﻮﺗ
ةرﻮﺼﻟا جوﺮﺧ ﻚﻠﺳ ﻞﺠﺴﻤﻟا
نﻮﻳﺰﻔﻠﺘﻟا ﺔﺷﺎﺷ ﻰﻠﻋ ﻞﺠﺴﻤﻟا
١٧-ﺔﻴﺑﺮﻌﻟا
جوﺮﺧ ﺲﺑﺎﻗ ﻰﻟا ﻞﻴﺻﻮﺘﻟا ٢ ﺔﻟﺎﺤﻟا قﻮﻔﺘﻤﻟا ﻮﻳﺪﻴﻔﻟا
جوﺮﺧ ﺲﺑﺎﻗ ﻰﻟا ﻞﻴﺻﻮﺘﻟا ١ ﺔﻟﺎﺤﻟا ﻂﻠﺘﺨﻣ ﻮﻳﺪﻴﻓ
AV تﻮﺻ ﺮﺒﻜﻣ وأ نﻮﻳﺰﻔﻠﺘﻟا ﺔﻴﻋﻮﻨﻟا ﺔﻴﻟﺎﻌﻟا ةرﻮﺼﻟﺎﺑ ﻊﺘﻤﺘﺘﺳ
ﺔﻴﺑﺮﻌﻟا-١٨
تﺎﻧﻮﻜﻣ جوﺮﺧ ﺲﺑﺎﻗ ٣ ﺔﻟﺎﺤﻟا ﻮﻳﺪﻴﻔﻟا
ﻞﻴﺻﻮﺗ ﻦﻣ ﺮﺧﻵا عﻮﻨﻟا تﻮﺼﻟا جوﺮﺧ ﻚﻠﺳ
ﻚﻧﻮﻳﺰﻔﻠﺗ ﻰﻟا ﻞﻴﺻﻮﺘﻟا ١ ﺔﻟﺎﺤﻟا
تﻮﺻ ﺮﺒﻜﻣ ﻰﻟا ﻞﻴﺻﻮﺘﻟا ٢ ﺔﻟﺎﺤﻟا AV جوﺮﺧ ﻲﺴﺑﺎﻘﺑ ﻮﻳﺮﻴﺘﺳﻻا
ﺔﻴﺑﺮﻌﻟا-٢٠
نﻮﻳﺰﻔﻴﻠﺘﻟﺎﺑ ﻞﻴﺻﻮﺘﻟا ١ ﺔﻟﺎﺤﻟا Hdmi ﺲﺑﺎﻗ ماﺪﺨﺘﺳﺎﺑ
HDMI/DVI ﻞﻴﺻﻮﺗ نﻮﻳﺰﻔﻴﻠﺘﻟﺎﺑ
نﻮﻳﺰﻔﻴﻠﺘﻟﺎﺑ ﻞﻴﺻﻮﺘﻟا ٢ ﺔﻟﺎﺤﻟا DVI ﺲﺑﺎﻗ ماﺪﺨﺘﺳﺎﺑ
،AV 2 in ﻰﻟا ﻞﻴﺻﻮﺘﻟا DV لﻮﺧد ﺲﺑﺎﻗ
AV 2 in ﺲﺑﺎﻗ ﻰﻟا ﻮﻳﺪﻴﻓ ةﺮﻴﻣﺎﻛ
زﺎﻬﺟ ﻲﻓ AV 2 in ﺲﺑﺎﻗ ﻰﻟا ﺔﻴﺟرﺎﺧ ةادأ وأ ﻮﻳﺪﻴﻓ زﺎﻬﺟ ﻞﻴﺻﻮﺗ
ﻮﻳﺪﻴﻓ ةﺮﻴﻣﺎﻛ وأ يد ﻲﻓ يد زﺎﻬﺟ
ﻢﺋاﻮﻘﻟا ﻲﻓ ﺔﺣﻼﻤﻟا ﺔﺷﺎﺸﻟا ﻰﻠﻋ ﺔﺿوﺮﻌﻤﻟا
، / رارزأ
ﻲﺋﺎﻘﻠﺘﻟا داﺪﻋﻹاو ﻞﻴﺻﻮﺘﻟا
ﻂﻐﺿا ﻢﺛ ،Setup راﻲﺘﺧﻻ يرز ﻰﻠﻋ ﻂﻐﺿا رز وأ OK رز ﻰﻠﻋ
ﻂﻐﺿا ﻢﺛ ،Install راﻲﺘﺧﻻ يرز ﻰﻠﻋ ﻂﻐﺿا رز وأ OK رز ﻰﻠﻋ
ﻊﺿو ﻲﻓ زﺎﻬﺠﻟا ﻊﻣ Menu رز ﻰﻠﻋ ﻂﻐﺿا صﺮﻗ مﺪﻋ ﻊﺿو/فﺎﻘﻳﻹا
ﻢﺛ ،Clock Set راﻲﺘﺧﻻ يرز ﻰﻠﻋ ﻂﻐﺿا رز وأ OK رز ﻰﻠﻋ ﻂﻐﺿا
ﻢﺛ ،Auto Setup راﻲﺘﺧﻻ يرز ﻰﻠﻋ ﻂﻐﺿا رز وأ OK رز ﻰﻠﻋ ﻂﻐﺿا
راﺮﻤﺘﺳﻼﻟ OK رز ﻰﻠﻋ ﻂﻐﺿا
تاﻮﻨﻘﻟا ﺢﺴﻣ أﺪﺒﻳ
Menu رز ﻰﻠﻋ ﻂﻐﺿا ،جوﺮﺨﻟا تدرأ اذإ
ﺔﻐﻠﻟا تارﺎﻴﺧ داﺪﻋإ
ﻢﺛ ،Manual Setup راﻲﺘﺧﻻ يرز ﻰﻠﻋ ﻂﻐﺿا رز وأ OK رز ﻰﻠﻋ ﻂﻐﺿا
وأ OK رز ﻰﻠﻋ ﻂﻐﺿا ﻢﺛ ،
EP ﻊﺿو ﻲﻓ ﺖﻗﻮﻟا ﻂﺒﺿ
رز وأ OK رز ﻰﻠﻋ
ﻂﻐﺿا ﻢﺛ ، System رﺎﻴﺘﺧﻻ يرز ﻰﻠﻋ ﻂﻐﺿا
مﺎﻈﻨﻟا ﺔﻤﺋﺎﻗ ضﺮﻌﺗ ﺎﻫﺪﻨﻋو
ﻲﺋﺎﻘﻠﺘﻟا ﻞﺼﻔﻟا عاﺪﺑإ
ﻮﻳدوﻷا تارﺎﻴﺧ
ﻮﻳدوﻷا تارﺎﻴﺧ داﺪﻋإ
ﻂﻐﺿا ﻢﺛ ،Audio رﺎﻴﺘﺧﻻ يرز ﻰﻠﻋ ﻂﻐﺿا رز وأ OK رز ﻰﻠﻋ
ﻲﻣﺪﻘﺘﻟاّ ﺢﺴﻤﻟا داﺪﻋإ
ﻲﻜﻴﻣﺎﻨﻳﺪﻟا ﺪﻳﺪﺸﺘﻟا Dynamic Compression
ضﺮﻌﻟا تارﺎﻴﺧ داﺪﻋإ ﻮﻳﺪﻴﻔﻟا
ﻲﻣﺪﻘﺘﻟاّ ﺢﺴﻤﻟا ءﺎﻐﻟإ
رز وأ OK رز ﻰﻠﻋ
ﻮﻳﺪﻴﻔﻟا داﺪﻋإ ﺔﻤﺋﺎﻗ ضﺮﻌﺗ ﺎﻫﺪﻨﻋو
جﺮﺨﻟا ﺪﻳﺪﺤﺗ
HDMI/DVI ﺔﻗد
DivXR ﻞﻴﺠﺴﺗ
يﻮﺑﻷا فاﺮﺷﻹا داﺪﻋإ
صﺮﻘﻟا جﺮﺧا
ﺞﻣﺎﻧﺮﺒﻟا Prog ﻦﻳرﺰﻟا ﻰﻠﻋ راﺮﻤﺘﺳﻻا ﻊﻣ ﻂﻐﺿا
ﺮﺴﻟا ﺔﻤﻠﻛ ﺮﻴﻴﻐﺗ لﻮﺣ ﺮﻳﺪﻘﺘﻟا ىﻮﺘﺴﻣ لﻮﺣ
ﻞﻴﺠﺴﺘﻠﻟ ﺔﻠﺑﺎﻘﻟا صاﺮﻗﻷا
ﻞﻴﺠﺴﺘﻟا ﻞﺒﻗ
ىﺮﺧﻷا ﺔﻛﺮﺸﻟا زﺎﻬﺟو ﺞﻧﻮﺴﻣﺎﺳ زﺎﻬﺟ ﻦﻴﺑ ﻖﻓاﻮﺘﻟا
ﻞﻴﺠﺴﺘﻠﻟ ﻞﺑﺎﻘﻟا ﺮﻴﻏ ﻮﻳﺪﻴﻔﻟا
ﻞﻴﺠﺴﺘﻟا ﻢﻴﻤﺼﺗ
ﻞﻴﺠﺴﺘﻟا ﻊﺿو
ﺦﺴﻨﻟا ﻲﻓ ﻢﻜﺤﺘﻟا تارﺎﺷإ
هﺪﻫﺎﺸﺗ يﺬﻟا ﻲﻟﺎﺤﻟا
ﻲﻧﻮﻳﺰﻔﻠﺘﻟا ﺞﻣﺎﻧﺮﺒﻟا ﻞﻴﺠﺴﺗ
ﺔﻠﺑﺎﻘﻟا صﺮﻘﻟا ﺔﺣﺎﺴﻣ ﻦﻣ ﺪﻛﺄﺘﻟا صﺮﻘﻟا ﻦﻋ تﺎﻣﻮﻠﻌﻤﻟا ماﺪﺨﺘﺳﻼﻟ
مﺪﻋ ﺔﻟﺎﺣ ﻲﻓ ﺎﻳذﺎﻘﻠﺗ ﻞﻤﻌﻟا ﻦﻋ ﻞﻴﺠﺴﺘﻟا ﻒﻗﻮﺘﻳ ﻞﻴﺠﺴﺘﻟﺎﺑ
ﻦﻋ تﺎﻣﻮﻠﻌﻤﻟا ةﺪﻫﺎﺸﻤﻟ ىﺮﺧأ ةﺮﻣ Info رز ﻰﻠﻋ ﻂﻐﺿا ﻞﻴﺠﺴﺘﻟا
ﻞﻴﺠﺴﺘﻟا فﺎﻘﻳﻹ
ﺔﺷﺎﺸﻟا ﻰﻠﻋ ﻚﻠﻀﻓ ٣٩-ﺔﻴﺑﺮﻌﻟا
زﺎﻬﺠﻟا ﻦﻣ ﻞﻴﺠﺴﺘﻟا هﺪﻫﺎﺸﺗ يﺬﻟا ﻲﺟرﺎﺨﻟا
REC رز ﻰﻠﻋ ﻂﻐﺿا
ﻪﺘﻠﻤﻋ يﺬﻟا ﻞﻴﺻﻮﺘﻠﻟ ﺎﻘﻓو
ﺔﻴﻋﻮﻨﻟاﻞﻴﺠﺴﺘﻟا ﺔﻋﺮﺳ
ﻮﻳﺪﻴﻔﻟا ةﺮﻴﻣﺎﻛ ﻦﻣ ﺦﺴﻨﻟا
فﺎﻘﻳﻹا ﻊﺿو ﻲﻓ ﻮﻳﺪﻴﻔﻟا اﺮﻴﻣﺎﻛ ﺖﻧﺎﻛ اذإ ﻞﻴﺠﺴﺗ REC
ﺔﻴﻨﻴﺑ ماﺪﺨﺘﺳﺎﺑ ﻮﻳﺪﻴﻔﻟا ةﺮﻴﻣﺎﻛ ﻲﻓ ﻢﻜﺤﺘﻟا ﻚﻨﻜﻤﻳ DV IEEE1394
ﻰﻠﻋ ﻮﻳﺪﻴﻔﻟا ةﺮﻴﻣﺎﻛ ﻂﺒﺿ ﻦﻣ ﻦﻜﻤﺗ ﻲﺘﻟا ﻞﻴﺠﺴﺘﻟا ﺔﺷﺎﺸﻟا ﻰﻠﻋأ
ﺎﻬﻄﺒﺿ
ﺔﺴﻤﻠﺑ ﻞﻴﺠﺴﺘﻟا ﻞﻤﻋ OTR ةﺪﺣاو
DV وأ AV 2، AV 1 ﺐﺳﺎﻨﻤﻟا ﻲﺟرﺎﺨﻟا ﻞﺧﺪﻤﻟا
ﺖﻗﺆﻤﻟﺎﺑ ﻞﻴﺠﺴﺘﻟا ﻞﻤﻋ
فﺎﻘﻳﻹا
ﺞﻣﺮﺒﻤﻟا
ﻞﻴﺠﺴﺘﻟا ﺔﺤﺋﻻ ﻞﻳﺪﻌﺗ
نﺮﻤﻟا ﻞﻴﺠﺴﺘﻟا ﻂﻘﻓ ﺖﻗﺆﻤﻟﺎﺑ ﻞﻴﺠﺴﺘﻠﻟ
ﻞﻳﺪﻌﺘﻟا ﺪﻴﻛﺄﺘﻟ OK رز ﻰﻠﻋ ﻂﻐﺿا
ﻞﻴﺠﺴﺘﻟا ﺔﺤﺋﻻ ﻮﺤﻣ ﺞﻣﺮﺒﻤﻟا
ﺔﻤﺋﺎﻘﻟا ﺔﺷﺎﺷ ﺮﻬﻈﺗ ﺎﻫﺪﻨﻋو
ﻞﻴﺠﺴﺘﻟا ﻒﻗﻮﺘﻳ ،ﻞﻴﺠﺴﺘﻟا
ﺖﻗﺆﻤﻟا ﺔﺤﺋﻻ ﻞﻴﺠﺴﺗ ﻲﺟذﻮﻤﻨﻟا
ﺔﻴﺑﺮﻌﻟا-٤٦
ضﺮﻌﻟا ﻞﺒﻗ
ﻂﻘﻓ ﻮﻳﺪﻴﻓ يد ﻲﻓ يد ﺔﻘﻄﻨﳌا ﺰﻣر
ﺎﻬﺿﺮﻋ ﻦﻜﳝ ﻲﺘﻟا صﺮﻘﻟا عاﻮﻧأ
ﺎﻬﺿﺮﻋ ﻦﻜﳝ ﻻ ﻲﺘﻟا صاﺮﻗﻷا
ﺔﻌﻗر ﻪﻴﺟﻮﺘﺑ ﺔﻴﻨﻴﺼﻟا ﻰﻠﻋ ﻒﻄﻠﺑ ﺎﺻﺮﻗ ﻊﺿ ﻰﻠﻋﻷا ﻰﻟا صﺮﻘﻟا
صﺮﻗ ضﺮﻋ
ﻞﻴﻐﺸﺘﻟا فﺎﻘﻳﻹ Stop رز ﻰﻠﻋ ﻂﻐﺿا
ناﻮﻨﻌﻟا ﺔﻤﺋﺎﻗو صﺮﻘﻟا ﺔﻤﺋﺎﻗ ماﺪﺨﺘﺳا
ﺚﺤﺒﻟا ﻒﺋﺎﻇو ماﺪﺨﺘﺳا
رﺎﺴﻣ وأ ﻞﺼﻓ ﻦﻋ ﺚﺤﺒﻟا
ﺔﺌﻴﻄﺒﻟا ﺔﻛﺮﺤﺘﳌا رﻮﺼﻟا ضﺮﻋ
حﺎﺘﻔﻣ يأ لﻮﺣ
ةﻮﻄﺨﻓ ةﻮﻄﺧ تﺎﻛﺮﳊا ضﺮﻋ
ﻚﺗﺪﻫﺎﺸﳌ بوﺮﻏﺮﳌا ﺖﻗﻮﻟا ﻰﻟا لﺎﻘﺘﻧﻻا تدرأ اذإ
ﺪﻬﺸﻣ ﻦﻋ ﺚﺤﺒﻟا ﻲﻓ
ضﺮﻌﻟا ءﺎﻨﺛأ Anykey رز ﻰﻠﻋ ﻂﻐﺿا
ضﺮﻌﻟا ﺮﻳﺮﻜﺗرﺮﻜﺘﳌا ضﺮﻌﻟا
ضﺮﻋ ﺮﻳﺮﻜﺗ اراﺮﻜﺗ ﲔﻌﳌا ءﺰﳉا ضﺮﻋ
ﻂﻐﺿا ﻢﺛ ،Repeat رﺎﻴﺘﺧﻻ يرز ﻰﻠﻋ ﻂﻐﺿا Bرﺎﻴﺘﺧﻻ رز ﻰﻠﻋ
ﺎﻬﻴﻓ ضﺮﻌﻟا ﺮﻳﺮﻜﺗ فﺎﻘﻳإ ﺪﻳﺮﺗ ﻲﺘﻟا ﺔﻄﻘﻨﻟا ﻲﻓ
ضﺮﻌﻟا ءﺎﻨﺛأ Anykey رز ﻰﻠﻋ ﻂﻐﺿا
ﺎﻫﺪﻳﺮﺗ ﻲﺘﻟا ﻮﻳدوﻷا ﺔﻐﻟ رﺎﻴﺘﺧﻻ يرز ﻰﻠﻋ
ﻮﻳدوﻷا ﺔﻐﻟ رﺎﻴﺘﺧا ﺔﻤﺟﺮﺘﻟا رﺎﻴﺘﺧا
ﺎﻫﺪﻳﺮﺗ ﻲﺘﻟا ﺔﻤﺟﺮﺘﻟا ﺔﻐﻟ رﺎﻴﺘﺧﻻ يرز ﻰﻠﻋ
ﺮﻴﺒﻜﺘﻟا
ةﺮﻴﻣﺎﻜﻟا ﺔﻳواز ﺮﻴﻴﻐﺗ
ﺎﻫﺪﻳﺮﺗ
يدﺎﻌﻟا ﻢﺠﺤﻟا ← 2X ← 4X ← 2X ← يدﺎﻌﻟا ﻢﺠﺤﻟا
ﻊﺿﻮﳌا ﺔﻣﻼﻋ ضﺮﻋ
ﻊﺿﻮﳌا تﺎﻣﻼﻋ ماﺪﺨﺘﺳا
ﻊﺿﻮﳌا ﺔﻣﻼﻋ ﻮﺤﻣ
تﺎﻣﻼﻌﻟا ﻊﻧﺎﺻ ماﺪﺨﺘﺳا
ﺔﻣﻼﻋ ﻊﻧﺎﺻ ضﺮﻋ
ﺔﻣﻼﻋ ﻊﻧﺎﺻ ﻮﺤﻣ
ةرﺎﺘﻟﻤﺨا
CD-DA ﻮﻳدوﻷا صﺮﻗ ضﺮﻋ
MP3/CD-DAﻮﻳدوﻷا صﺮﻗ ضﺮﻋ
CD-DAﻮﻳدوﻷا صﺮﻗ ﺔﺷﺎﺷ ﺮﺻﺎﻨﻋ
MP3 ﺔﺷﺎﺷ ﺮﺻﺎﻨﻋ
صﺮﻘﻟا ﺔﻴﻨﻴﺻ ﻲﻓ MP3 صﺮﻗ ﻊﺿ
ﻂﻐﺿا ﻢﺛ ،Music رﺎﻴﺘﺧﻻ يرز ﻰﻠﻋ ﻂﻐﺿا رز وأ OK رز ﻰﻠﻋ
MP3 صﺮﻗ ﻞﻴﻐﺸﺗ
ﺔﻴﻠﻤﻋ ءﺎﻨﺛأ راﺮﻜﺗ REPEATرز ﻰﻠﻋ ﻂﻐﺿا ﻞﻴﻐﺸﺘﻟا
ىﺮﺧأ ةﺮﻣ راﺮﻜﺗ Repeat رز ﻰﻠﻋ ﻂﻐﺿا ةرﺮﻜﺘﻣ ةرﻮﺼﺑ صﺮﻘﻟا ﻞﻴﻐﺸﺘﻟ
صﺮﻘﻟا Disc راﺮﻜﺘﻟا ﻊﺿو ﻰﻟإ ﻊﺿﻮﻟا
ءﺎﻨﻏرﺎﺴﻣ رﺎﻴﺘﺧﻻ مﺪﺨﺘﺴﺗ
ﻞﻴﻐﺸﺘﻟا ﺔﻴﻠﻤﻋ
ﻞﻴﻐﺸﺘﻟا تارﺎﻴﺧ ﻊﺿ
ﻖﻓاﻮﻣ
ةرﻮﺻ صﺮﻗ ضﺮﻋ
صﺮﻘﻟا ﺔﻴﻨﻴﺻ ﻲﻓ Jpeg صﺮﻗ ﻊﺿ
ةرﻮﺼﻟا رﺎﻴﺘﺧﻻ
ﻞﻴﻐﺸﺘﻟا ﺔﺤﺋﻻ ﻞﻴﻐﺸﺘﻟ Play رز ﻰﻠﻋ ﻂﻐﺿا
صﺮﻘﻟا ﺔﻴﻨﻴﺻ ﻲﻓ MPEG4 صﺮﻗ ﻊﺿ
ﻂﻐﺿا ﻢﺛ ،DivX رﺎﻴﺘﺧﻻ يرز ﻰﻠﻋ ﻂﻐﺿا رز وأ OK رز ﻰﻠﻋ
ﺢﺋاﺮﺸﻟا ضﺮﻋ
ﻢﺛ ،ﺢﺋاﺮﺸﻟا ضﺮﻋ ﺔﻋﺮﺳ ﻂﺒﻀﻟ
ناﻮﻨﻌﻟا ﺔﺤﺋﻻ ضﺮﻋ
Stop رز ﻰﻠﻋ ﻂﻐﺿا ،ناﻮﻨﻌﻟا ضﺮﻋ فﺎﻘﻳﻹ
Menu رز ﻰﻠﻋ ﻂﻐﺿا
MPEG4 ﺔﻔﻴﻇو ﻒﺻو
ضﺮﻌﻟا ءﺎﻨﺛأ ناﻮﻨﻌﻟا لﻮﺣ تﺎﻣﻮﻠﻌﳌا
رز ﻰﻠﻋ ﻂﻐﻀﻟﺎﺑ ﻞﺠﺴﻣّ ﺞﻣﺎﻧﺮﺑ ضﺮﻋ ﺎﻀﻳإ ﻚﻨﻜﳝ ضﺮﻌﻟا ءﺎﻨﺛأ Anykey
OK رز ﻰﻠﻋ ﻂﻐﺿا ﻢﺛ
ﲔﻤﻴﻟا ﻲﻓ ﻞﻳﺪﻌﺘﻟا ﺔﻤﺋﺎﻗ ضﺮﻌﺗ ﺎﻫﺪﻨﻋو
ناﻮﻨﻌﻟا ﺔﺤﺋﻻ ﺔﺷﺎﺷ ﺮﺻﺎﻨﻋ
ﺔﻤﺋﺎﻘﻟا
ﻪﻠﻔﻗ ءﺎﻐﻟإ وأ دﺪﺤﻤﻟا رﺰﻟا ضﺮﻋ
ةدوﺪﶈا ﻞﻳﺪﻌﺘﻟا
ﻞﻳﺪﻌﺘﻟا
صﺮﻘﻟا ﻲﻓ ةدﺎﻤﻠﻟ ﻞﻳﺪﻌﺘﻟا
ﻲﺳﺎﺳﻷا ﻞﻳﺪﻌﺘﻟا ناﻮﻨﻌﻟا ﺔﺤﺋﻻ
ناﻮﻨﻋ ﺔﻌﻗﺮﻟا ﻊﺿو ﺔﻴﻤﺴﺗ ةدﺎﻋإ
ﺺﺋﺎﺼﳋا رﺎﻴﺘﺧﻻ رارزأ ﻰﻠﻋ ﻂﻐﺿا OK رز ﻰﻠﻋ ﻂﻐﺿا ﻢﺛ ،ﺔﺑﻮﻏﺮﳌا
ﻢﺛ ،Save رﺎﻴﺘﺧﻻ رارزأ ﻰﻠﻋ ﻂﻐﺿا
ناﻮﻨﻋ ﻮﺤﻣ
ناﻮﻨﻋ ﺔﻳﺎﻤﺣﻞﻔﻗ
ناﻮﻨﻌﻟا ﺔﺤﺋﻻ ﺔﺷﺎﺷ ضﺮﻌﺗ ﺎﻫﺪﻨﻋو
ﻢﺛ ،Protection رﺎﻴﺘﺧﻻ يرز ﻰﻠﻋ ﻂﻐﺿا رز وأ OK رز ﻰﻠﻋ ﻂﻐﺿا
ﻰﻠﻋ ﻂﻐﺿا ﻢﺛ ،Edit رﺎﻴﺘﺧﻻ يرز ﻰﻠﻋ ﻂﻐﺿا رز وأ OK رز
ﻂﻐﺿا ﻢﺛ ،Yes رﺎﻴﺘﺧﻻ يرز ﻰﻠﻋ ﻂﻐﺿا
ﻰﻠﻋ ﻂﻐﺿا ﻢﺛ ،Yes رﺎﻴﺘﺧﻻ يرز ﻰﻠﻋ ﻂﻐﺿا.OK رز
Delete ﺪﻨﻋ OK رﺰﻟا ﻰﻠﻋ ﻂﻐﺿا ﺔﻳاﺪﺒﻟا ﺔﻄﻘﻧ ﻲﻓ OK رز ﻰﻠﻋ ﻂﻐﺿا
ناﻮﻨﻌﻟا ﺔﺤﺋﻻ ﺔﺷﺎﺷ ﺮﺻﺎﻨﻋ ﻞﻳﺪﻌﺗ
ضﺮﻋ ﺔﺤﺋﻻ عاﺪﺑإ
Make رﺎﻴﺘﺧﻻ OK رز ﻰﻠﻋ ﻂﻐﺿا
يرز ﻰﻠﻋ ﻂﻐﺿا
ﺔﻳاﺪﺒﻟا ﺔﻄﻘﻧ ﻲﻓ OK رز ﻰﻠﻋ ﻂﻐﺿا
فﺎﻘﻳﻹا
ﺪﻳﺮﺗ يﺬﻟا ناﻮﻨﻌﻟا رﺎﺘﺧﻻ يرز ﻰﻠﻋ ﻂﻐﺿا
رز وأ
ﺎﻫﺪﻨﻋو .ضﺮﻌﻟا فﺎﻘﻳﻹ Stop رز ﻰﻠﻋ ﻂﻐﺿا
ضﺮﻌﻟا ﺔﺤﺋﻻ ةدﺎﳌ ﺔﻴﻤﺴﺗ ةدﺎﻋإ
رارزأ ماﺪﺨﺘﺳﺎﺑ ﺎﻫﺪﻳﺮﺗ ﻲﺘﻟا ﺺﺋﺎﺼﳋا ﻞﺧدا
ﻢﺛ ،Save رﺎﻴﺘﺧﻻ رارزأ ﻰﻠﻋ ﻂﻐﺿا OK رز ﻰﻠﻋ ﻂﻐﺿا
رز وأ
رﺎﺘﺨﻣ ﺪﻬﺸﻣ ضﺮﻋ
ضﺮﻌﻟا ﺔﺤﺋﻻ ﺪﻬﺸﻣ ﻞﻳﺪﻌﺗ
ﻢﺛ ،Edit Scene رﺎﻴﺘﺧﻻ يرز ﻰﻠﻋ ﻂﻐﺿا OK رز ﻰﻠﻋ ﻂﻐﺿا
ﺪﻬﺸﳌا ﻦﻣ ﺔﻳﺎﻬﻨﻟا ﺔﻄﻘﻧ ﻲﻓ OK رز ﻰﻠﻋ ﻂﻐﺿا
ﺪﻬﺸﻣ لاﺪﺒﺘﺳا ﺪﻬﺸﻣ ﻞﻳﺪﻌﺗ
OK رز ﻰﻠﻋ
ﺪﻬﺸﻤﻠﻟ ﺔﻳاﺪﺒﻟا ﺔﻄﻘﻧ ﻲﻓ OK رز ﻰﻠﻋ ﻂﻐﺿا
ﺪﻬﺸﻣ ﺔﻓﺎﺿإ
ﺪﻬﺸﳌا ﻦﻣ ﺔﻳاﺪﺒﻟا ﺔﻄﻘﻧ ﻲﻓ OK رز ﻰﻠﻋ ﻂﻐﺿا
ﺪﻬﺸﻣ ﻊﺿﻮﻣ ﺮﻴﻴﻐﺗ ﺪﻬﺸﻣ ﻞﻘﻧ
ﻂﻐﺿا ﻢﺛ ،Move رﺎﻴﺘﺧﻻ يرز ﻰﻠﻋ ﻂﻐﺿا OK رز ﻰﻠﻋ
ﻰﻠﻋ ﻂﻐﺿا ﻢﺛ ،Add رﺎﻴﺘﺧﻻ يرز ﻰﻠﻋ ﻂﻐﺿا.OK رز
ﺪﻬﺸﻣ ﻮﺤﻣ
ﻂﻐﺿا ﻢﺛ ،Delete رﺎﻴﺘﺧﻻ يرز ﻰﻠﻋ ﻂﻐﺿا OK رز ﻰﻠﻋ
ةرﺎﺘﻟﻤﺨا ضﺮﻌﻟا ﺔﺤﺋﻻ ﺦﺴﻧ ﻢﺘﻳ ﺎﻫﺪﻨﻋو
ضﺮﻌﻟا ﺔﺤﺋﻻ ﻦﻣ ضﺮﻋ ﺔﺤﺋﻻ ةدﺎﻣ ﻮﺤﻣ
؟ﻮﶈا ﺪﻳﺮﺗ ﻞﻫ ﻮﶈا ﺪﻛﺄﺗ ﻲﺘﻟا ﺔﻟﺎﺳﺮﻟا ﻦﻣ ﺪﻛﺄﺗ
ﺎﻴﺋﺎﻘﻠﺗ ضﺮﻌﻟا ﺔﺤﺋﻻ ﻞﻳﺪﻌﺗ ﺔﺷﺎﺷ ﻰﻟا ﺔﺷﺎﺸﻟا دﻮﻌﺗو
ﻮﶈا ﺔﻴﻠﻤﻋ ءﺎﻬﺘﻧا ﺪﻌﺑ
صﺮﻘﻟا ﺮﻳﺪﻣ
صﺮﻘﻟا ﻢﺳا ﻞﻳﺪﻌﺗ
ﻢﺛ ، Save رﺎﻴﺘﺧﻻ
فﺎﻘﻳﻹا ﻊﺿو ﻲﻓ زﺎﻬﳉا ﻊﻣ Menu رز ﻰﻠﻋ ﻂﻐﺿا
صﺮﻗ ﻢﻴﻤﺼﺗ
صﺮﻘﻟا ﺔﻳﺎﻤﺣ
ﻢﺛ ،Disc Manager رﺎﻴﺘﺧﻻ يرز ﻰﻠﻋ ﻂﻐﺿا رز وأ OK رز ﻰﻠﻋ ﻂﻐﺿا
ﻢﺛ ،Protected رﺎﻴﺘﺧﻻ يرز ﻰﻠﻋ ﻂﻐﺿا OK رز ﻰﻠﻋ ﻂﻐﺿا
ناﻮﻨﻌﻟا تﺎﺤﺋﻻ ﻊﻴﻤﺟ ﻮﺤﻣ
ﻂﻐﺿا ﻢﺛ ،Yes رﺎﻴﺘﺧﻻ يرز ﻰﻠﻋ ﻂﻐﺿا OK رز ﻰﻠﻋ
،بﻮﻠﻄﳌا ﻊﺿﻮﻟا ﺪﻳﺪﺤﺘﻟ ﻦﻳرﺰﻟا ﻰﻠﻋ ﻂﻐﺿا OK رﺰﻟا ﻰﻠﻋ ﻂﻐﺿا ﻢﺛ
رز وأ OK رز ﻰﻠﻋ ﻂﻐﺿا ﻢﺛ ، Lists
ﻰﻠﻋ ﻂﻐﺿا ﻢﺛ ،Yes رﺎﻴﺘﺧﻻ
صﺮﻘﻟا مﺎﲤإ
OK رز
ﻂﻐﺿا ﻢﺛ ، Yes رﺎﻴﺘﺧﻻ
ﻮﻳﺪﻴﻔﻟا فﺎﻘﻳﻹا ﻊﺿو ﻲﻓ زﺎﻬﳉا ﻊﻣ Menu رز ﻰﻠﻋ ﻂﻐﺿا
ﻢﺛ ، Disc Manager رﺎﻴﺘﺧﻻ يرز ﻰﻠﻋ ﻂﻐﺿا
؟صﺮﻘﻟا مﺎﲤإ مﺪﻋ ﺪﻳﺮﺗ ﻞﻫ ﺔﻟﺎﺳﺮﻟا ﻦﻣ ﺪﻛﺄﺗ
ﺔﻗﺎﻄﻟا
ﻞﻴﺠﺴﺘﻟا
ةرﻮﺼﻟا
ضﺮﻌﻟا
تﻮﺼﻟا
ﺖﻗﺆﳌﺎﺑ ﻞﻴﺠﺴﺘﻟا
ﺪﻌﺑ ﻦﻋ ﻢﻜﺤﺘﻟا
ىﺮﺧﻷا
تﺎﻔﺻاﻮﳌا
تﻮﺼﻟا جﺮﺨﻣ
ﻢﻟﺎﻌﻟا لﻮﺣ ﺞﻧﻮﺴﻣﺎﺳ ﺔﻛﺮﺷ عوﺮﻀﺑ لﺎﺼﺗﻻا
AK68-01094L-00