00732C SCL901
ENGLISH |
|
| ESPAÑOL |
Advanced Recording | Filmación avanzada | ||
Setting and Recording the DATE/TIME | Configurar y grabar una FECHA/HORA | ||
✤ Setting and recording the date/time feature works in the | ✤ Configurar y grabar la función de fecha/hora sólo funciona | ||
CAMERA mode only. | en el modo CAMERA. | ||
✤ You can record the date/time on your tapes, so you will know | ✤ Usted puede grabar la fecha/hora en las cintas que realiza, de | ||
when it was made. The date and time are recorded whenever | modo que cuando vea posteriormente la cinta, podrá recordar | ||
they are displayed on the viewfinder or LCD. | el momento en que se hizo. La fecha y la hora se graban siem- | ||
| pre que aparezcan en el visor o en la pantalla LCD. | ||
Setting a DATE/TIME | Configuración de FECHA/HORA | ||
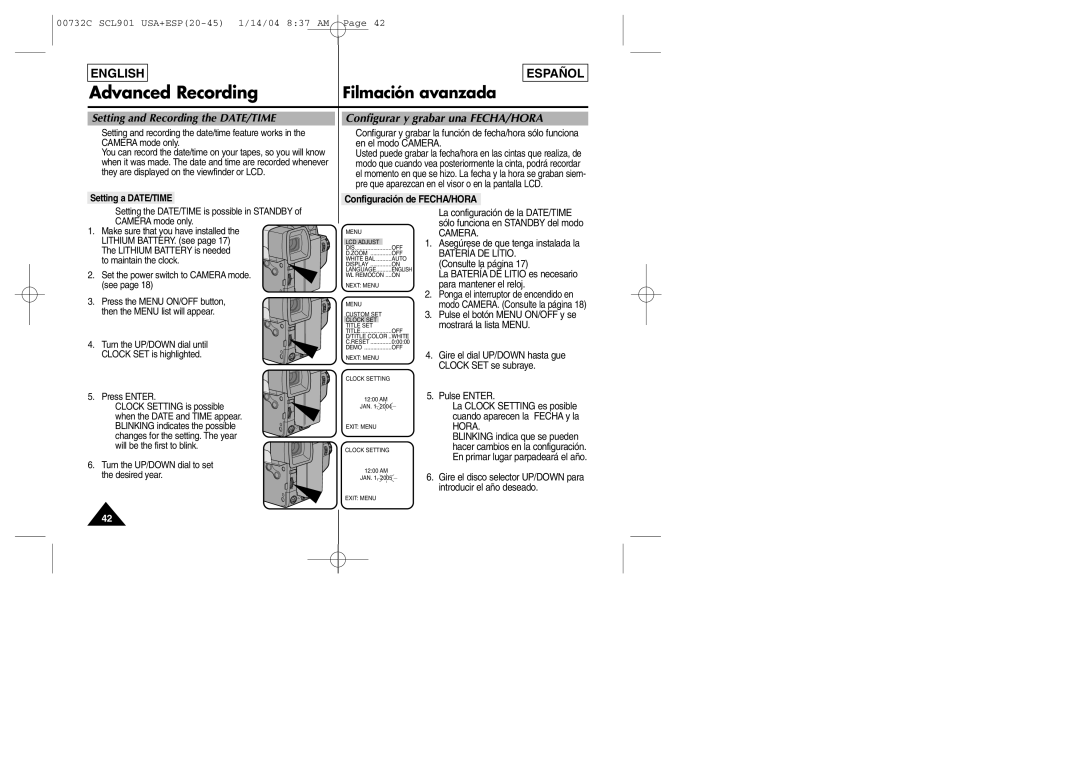
✤ Setting the DATE/TIME is possible in STANDBY of |
| ✤ La configuración de la DATE/TIME | |
CAMERA mode only. |
|
| sólo funciona en STANDBY del modo |
1. Make sure that you have installed the | MENU |
| CAMERA. |
LITHIUM BATTERY. (see page 17) | LCD ADJUST | 1. | Asegúrese de que tenga instalada la |
The LITHIUM BATTERY is needed | DIS........................OFF | ||
D.ZOOM ..............OFF |
| BATERÍA DE LITIO. | |
to maintain the clock. | WHITE BAL ..........AUTO |
| (Consulte la página 17) |
DISPLAY ..............ON |
| ||
2. Set the power switch to CAMERA mode. | LANGUAGE..........ENGLISH |
| La BATERÍA DE LITIO es necesario |
WL REMOCON ....ON |
| ||
(see page 18) | NEXT: MENU | 2. | para mantener el reloj. |
3. Press the MENU ON/OFF button, |
| Ponga el interruptor de encendido en | |
MENU |
| modo CAMERA. (Consulte la página 18) | |
then the MENU list will appear. | CUSTOM SET | 3. | Pulse el botón MENU ON/OFF y se |
| CLOCK SET |
| mostrará la lista MENU. |
| TITLE SET |
| |
| TITLE ....................OFF |
|
|
| D/TITLE COLOR ..WHITE |
|
|
4. Turn the UP/DOWN dial until | C.RESET ..............0:00:00 |
|
|
DEMO ..................OFF |
|
| |
CLOCK SET is highlighted. | NEXT: MENU | 4. | Gire el dial UP/DOWN hasta gue |
|
|
| CLOCK SET se subraye. |
CLOCK SETTING
5. Press ENTER.
■ CLOCK SETTING is possible when the DATE and TIME appear.
■ BLINKING indicates the possible changes for the setting. The year will be the first to blink.
6. Turn the UP/DOWN dial to set the desired year.
12:00 AM
JAN. 1, 2004
EXIT: MENU
CLOCK SETTING
12:00 AM
JAN. 1, 2005
EXIT: MENU
5.Pulse ENTER.
■La CLOCK SETTING es posible cuando aparecen la FECHA y la HORA.
■BLINKING indica que se pueden hacer cambios en la configuración. En primar lugar parpadeará el año.
6.Gire el disco selector UP/DOWN para introducir el año deseado.
42
