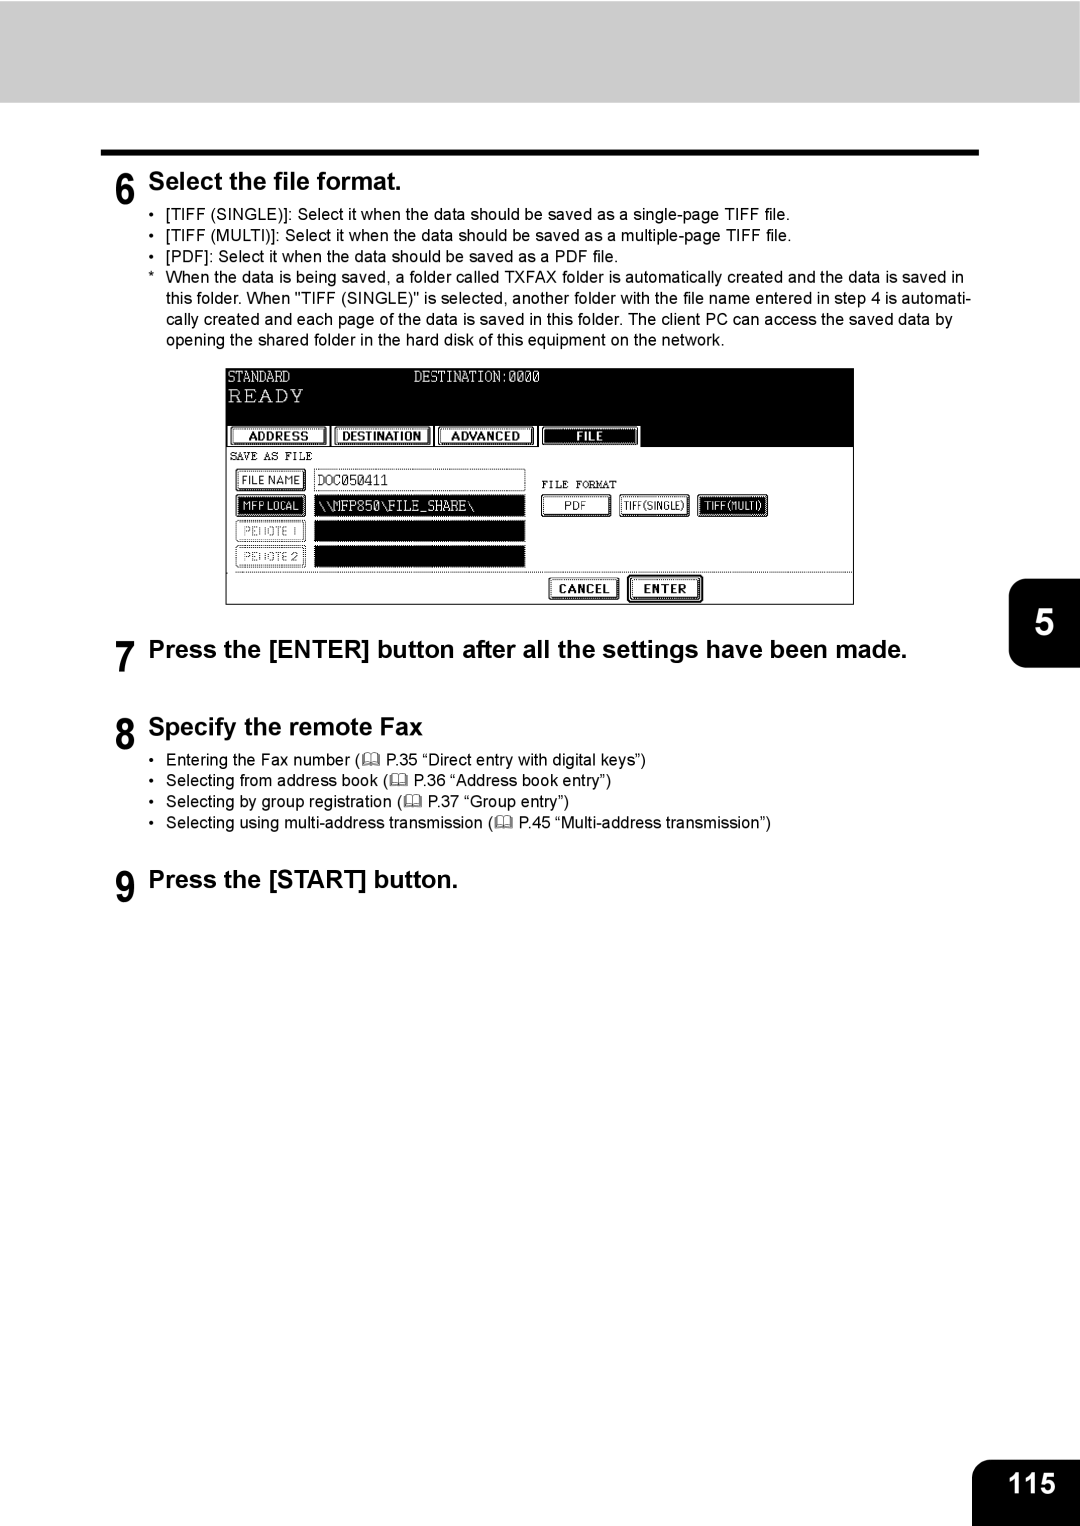
6 Select the file format.
•[TIFF (SINGLE)]: Select it when the data should be saved as a
•[TIFF (MULTI)]: Select it when the data should be saved as a
•[PDF]: Select it when the data should be saved as a PDF file.
*When the data is being saved, a folder called TXFAX folder is automatically created and the data is saved in this folder. When "TIFF (SINGLE)" is selected, another folder with the file name entered in step 4 is automati- cally created and each page of the data is saved in this folder. The client PC can access the saved data by opening the shared folder in the hard disk of this equipment on the network.
7 Press the [ENTER] button after all the settings have been made. 8 Specify the remote Fax
• | Entering the Fax number ( P.35 “Direct entry with digital keys”) | |
• | Selecting from address book ( | P.36 “Address book entry”) |
• | Selecting by group registration ( | P.37 “Group entry”) |
• | Selecting using | |
9 Press the [START] button.
5
