r3 Writing of the setup contents to EEPROM
(The contents of EEPROM installed on the service P.C. board have been set up at shipment from the factory.)
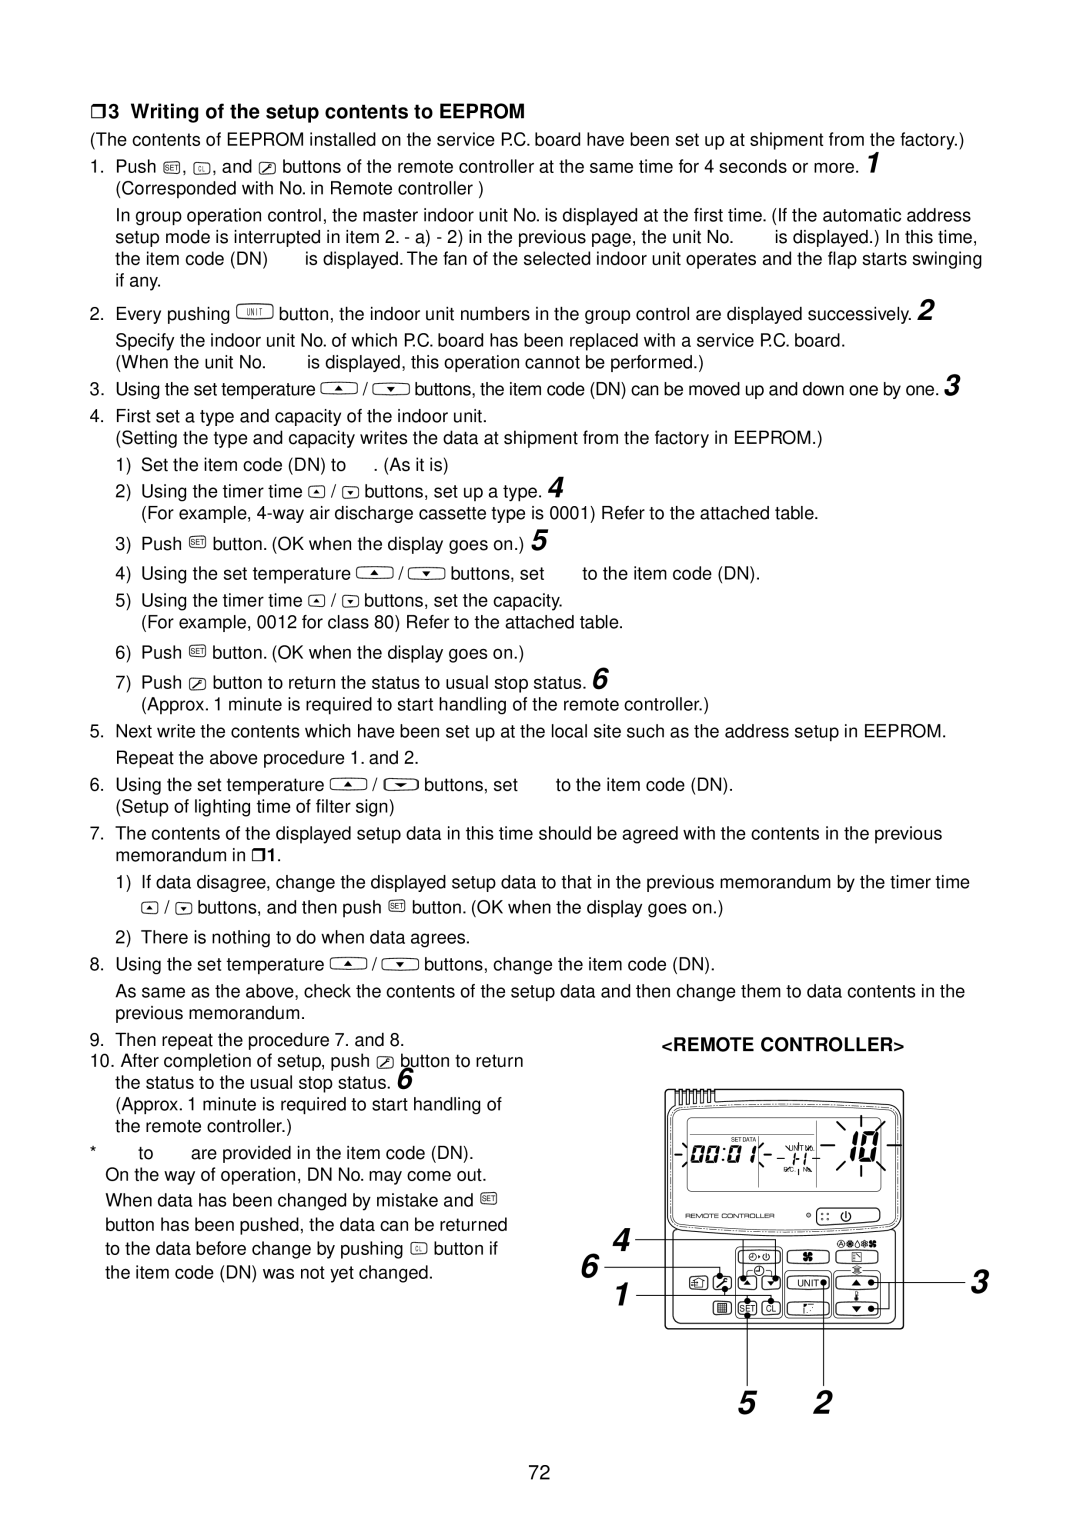
1.Push SET , ![]() , and
, and ![]() buttons of the remote controller at the same time for 4 seconds or more. 1 (Corresponded with No. in Remote controller )
buttons of the remote controller at the same time for 4 seconds or more. 1 (Corresponded with No. in Remote controller )
In group operation control, the master indoor unit No. is displayed at the first time. (If the automatic address setup mode is interrupted in item 2. - a) - 2) in the previous page, the unit No. ALL is displayed.) In this time, the item code (DN) 10 is displayed. The fan of the selected indoor unit operates and the flap starts swinging if any.
2.Every pushing ![]() button, the indoor unit numbers in the group control are displayed successively. 2
button, the indoor unit numbers in the group control are displayed successively. 2
Specify the indoor unit No. of which P.C. board has been replaced with a service P.C. board. (When the unit No. ALL is displayed, this operation cannot be performed.)
3.Using the set temperature ![]() /
/ ![]() buttons, the item code (DN) can be moved up and down one by one. 3
buttons, the item code (DN) can be moved up and down one by one. 3
4.First set a type and capacity of the indoor unit.
(Setting the type and capacity writes the data at shipment from the factory in EEPROM.)
1)Set the item code (DN) to 10. (As it is)
2)Using the timer time ![]() /
/ ![]() buttons, set up a type. 4
buttons, set up a type. 4
(For example,
3)Push SET button. (OK when the display goes on.) 5
4)Using the set temperature ![]() /
/ ![]() buttons, set 11 to the item code (DN).
buttons, set 11 to the item code (DN).
5)Using the timer time ![]() /
/ ![]() buttons, set the capacity.
buttons, set the capacity.
(For example, 0012 for class 80) Refer to the attached table.
6)Push SET button. (OK when the display goes on.)
7)Push ![]() button to return the status to usual stop status. 6
button to return the status to usual stop status. 6
(Approx. 1 minute is required to start handling of the remote controller.)
5.Next write the contents which have been set up at the local site such as the address setup in EEPROM. Repeat the above procedure 1. and 2.
6.Using the set temperature ![]() /
/ ![]() buttons, set 01 to the item code (DN). (Setup of lighting time of filter sign)
buttons, set 01 to the item code (DN). (Setup of lighting time of filter sign)
7.The contents of the displayed setup data in this time should be agreed with the contents in the previous memorandum in r1.
1)If data disagree, change the displayed setup data to that in the previous memorandum by the timer time ![]() /
/ ![]() buttons, and then push SET button. (OK when the display goes on.)
buttons, and then push SET button. (OK when the display goes on.)
2)There is nothing to do when data agrees.
8.Using the set temperature ![]() /
/ ![]() buttons, change the item code (DN).
buttons, change the item code (DN).
As same as the above, check the contents of the setup data and then change them to data contents in the previous memorandum.
9. Then repeat the procedure 7. and 8.
10.After completion of setup, push ![]() button to return the status to the usual stop status. 6
button to return the status to the usual stop status. 6
(Approx. 1 minute is required to start handling of |
|
|
|
the remote controller.) |
| SET DATA |
|
* 01 to 9F are provided in the item code (DN). |
|
| |
| UNIT No. |
| |
|
|
| |
On the way of operation, DN No. may come out. |
| R.C. No. |
|
|
|
| |
When data has been changed by mistake and SET |
|
|
|
button has been pushed, the data can be returned | 4 |
|
|
to the data before change by pushing button if |
|
| |
the item code (DN) was not yet changed. | 6 | UNIT | 3 |
| 1 | ||
|
| ||
| SET CL |
|
2
72