Oki B2500 Series Connect your Wlan adaptor, Configure your network, Setup / Wlan / ASS. Config

Page 39

B2520 / B2540

Connect your WLAN adaptor

Your machine belongs to a new generation of terminals that you can incorporate into a WLAN network using a WLAN USB key.

Your machine’s network radio adaptor transmits data using the radio protocol IEEE 802.11g; it can also be incorporated into an existing IEEE 802.11b network.

When connecting to your machine, only use the approved adaptor. Other transmitting or receiving adaptors may damage your device.

Irrespective of whether you use your machine in an infrastructure or ad-hoc network, you must set up certain network and security parameters (for example, the Service-Set-ID (SSID) and the WEP key). These must match the network’s specifications.

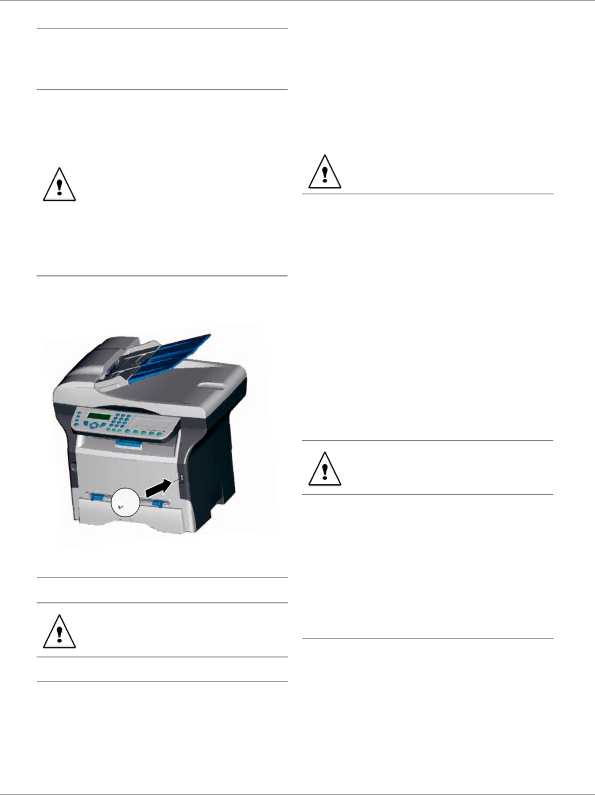
1Plug your WLAN USB key into the USB port of your machine.

Configure your network

We recommend that the settings of your WLAN network should only be changed by a person with a good knowledge of the configuration of your computer.

Creating or rejoining a network

Before attempting to use a WLAN adaptor on your machine, you must enter the parameters that will allow a WLAN network to recognise your machine.

On your machine you will find simple instructions that guide you step by step through the set-up of your network. Just follow them!


281 - SETUP / WLAN / ASS. CONFIG.

network

1

with OK.


Type in

, select the menu SETUP using the keys


or

and confirm with OK.


2

Select WLAN using the keys or

and confirm


3

Select ASS. CONFIG. using the keys

or

and

WLAN-


confirm with OK.


4

Select NEW NETWORK using the keys

or


and confirm with OK.


If you choose and exisiting network, steps 5

8


and 6 ( and possibly 7) are carried out


automatically.

5SSID appears on the screen, enter the name of your network using the numerical keypad, pressing the keys one after the other until you obtain the name you want (32 characters maximum) and confirm with OK.

6AD-HOC MODE or INFRA. MODE appear on the screen. Go back to the beginning of the chapter and make your choice.

Select one of these modes and confirm with OK.

-If you choose AD-HOC mode, the sub-menu CHANNEL appears, enter a figure between 1 and 13 and confirm with OK.

7WITHOUT SECURITY or WITH SECURITY appear on the screen.

Select the option you want and confirm with OK.

-If you choose WITH SECURITY the sub-menu WEP KEY 1 appears, enter the key number (1 to 4 maximum) that you are using on your network.

The WEP key number may be configured in the menu:

29 - SETUP / TECHNICALS / WEP KEYS NBR

8IP CONF.: MANU or IP CONF.: AUTO appear on the screen.

If you choose to set up the system manually, go to the next paragraph and enter the parameters

IP ADDRESS, SUBNET MASK and GATEWAY.

9At the end of this procedure, you return to the main menu of ASS. CONFIG.

10 Exit this menu by pressing the key.

Referring to or changing your network parameters

Each of the parameters of your network may be changed as your network develops.

2822 - SETUP / WLAN / PARAMETERS / IP ADDRESS

1

Type in

, select the menu SETUP using the keys


or

and confirm with OK.

2

Select WLAN using the keys or and confirm


with OK.

- 34 -

Image 39
Contents User’s Guide Consumables Refer to the Maintenance section of this bookletDear customer Dear customerContents Display the consumables status Calibrate your scanner Introduction Configuration requirements InstallationLock the machine Read the countersContents Preface Information Software use licensePreface Environmental Preface Environmental Information Software use license Environmental InformationSoftware use license Registered trademarks Prohibited reproductionsApplicable law Running environment InstallationInstallation Location conditionsEP Cartridge recommendations Paper recommendationsControl panel Terminal descriptionAccessing terminal menus Command panelFeed cassette paper insertion Packaging contentsDevice installation Installing the document feederPush the lower panel down until it clicks Cartridge installationPaper delivery stop Starting your deviceDevice connection Paper insertion in the manual input tray Simple copy ECO mode copyCopy CopySpecial setup for the copying Left and right printing margins setup Paper type setupSheet-feed analysis margins setup Analysis margins setupFax Fax transmissionFax reception Fax answering machine Saving an access codeFax Relay broadcastRerouting fax messages to a USB memory key Fax reroutingCancelling a transmission in progress Transmission waiting queueMailBoxes MBX Fax Deleting a MBX Modifying the features of a MBXPrinting the contents of a MBX Creating an MBXPolling a deposited document Deposit and PollingMBX polling from a remote fax Placing a document in depositPresentation of the sender SMSSMS Parameters Sending an SMSParameters/Setup Parameters SetupEconomy period Local prefixTransmission report Document feed typeNumber of copies Reception ModeReceived faxes reduction mode Reception without paperTechnical Parameters Setup / TechnicalsPrint / Functions List Printing the functions guideLock the machine Print the list of setupsPrinting the logs Font printingRead the counters Display the consumables statusCalibrate your scanner Modifying a record DirectoryCreating subscribers record Creating subscribers listPrinting the directory Directory / CancelDirectory Deleting a record or a listLocal network settings Ethernet network settings Model B2540Selecting the type of your local network Radio networks Wlan Wlan networkType of radio network Radio ad-hoc networkCreating or rejoining a network Configure your networkSetup / Wlan / ASS. Config Connect your Wlan adaptorSetup / Wlan / Parameters / Mode Setup / Wlan / Parameters / Subnet MaskSetup / Wlan / Parameters / Gateway Setup /WLAN / Parameters / SsidSetup / Wlan / Parameters Hostname Setting up a multifunction machineAn example of how an AD-HOC network may be set up Setting up the PCService Message service Model B2540Scan to FTP Message service Model B2540Connection configuration Standard settingsMail sorting Print your documents USB memory keyKey Use of the USB memory keyMedia / Media Analysis Save a document on a USB memory KeyDelete your files located in the key Media / Delete / ManualInstall the software on your PC PC FeaturesConfiguration requirements InstallationB2520 / B2540 Network connection Make sure that your multifunction machine is powered offConnections USB ConnectionPreparation screen appears PC FeaturesUninstall the software from your PC Next screen shows the list of compatibleUtilities and applications activation Multifunction Terminals SupervisionMF Director Graphical presentationDocument analysis MF MonitorCompanion Suite Pro LL functionalities Display the consumable statusPrinting with the multifunction machine PrintingAnalysis from a Twain compatible software Character recognition software OCRAddress book Add a contact to the terminal address bookAdd a group to the terminal address book Import or export a directory Manage the address bookFax communications Presentation of the Fax window Send a faxSend a fax from the hard disk or the terminal Outbox Receive a faxFollow-up of fax communications Send a fax from applicationFax parameters Click on the icon To display the available fields FeaturesCover sheet Creating a cover sheetCreating a cover page template Description of the tab CoverFor the second step Click on NEW then on SMS SMS CommunicationPresentation of the SMS window Send an SMSDescription of the tab Logs and Reports Access to SMS parametersFollow-up of SMS Sent item memory items sentIssues with smart cards MaintenanceService Toner cartridge replacementPrinter issues MaintenanceCleaning Printer cleaningScanner issues Miscellaneous issuesCommunication errors General codes Communication error codesTransmission from the feeder Transmission from memoryEnvironmental specifications SpecificationsPhysical specifications Electrical specificationsReference paper Consumable specificationsIBC PobÔežní 186 00 Praha Czech Republic Tel. +420 224 Oki Systems Iberica, S.A Kat 18 D 35 34394 Levent İstanbul Tel +90 212 279 Oki Europe Limited 07077701 iss.1