Aiwa XR-M88 Stereo System: Essential Safety Instructions and Operating Guidelines

Page 2

WARNING

TO REDUCE THE RISK OF FIRE OR ELECTRIC SHOCK, DO NOT EXPOSE THIS APPLIANCE TO RAIN OR MOISTURE.

Am!!vh

“CAUTION:TO REDUCE THE RISK OF

ELECTRIC SHOCK,

DO NOT REMOVE COVER (OR BACK). NO USER-SERVICEABLE PARTS INSIDE. REFER SERVICING TO QUALIFIED SERVICE PERSONNEL.”

Explanation of Graphical Symbols:

The lightning flash with arrowhead symbol, within an equilateral triangle, is intended to alert the user to the presence of uninsulated “dangerous voltage” within the product’s en-

Aclosure that may be of sufficient magnitude to constitute a risk of electric shock to persons.

The exclamation point within an equilateral triangle is intended to alert the user to the presence of important operating and mainte- nance (servicing) instructions in the literature

A accompanying the appliance.

PRECAUTIONS

Read the Operating Instructions carefully and completely before operating the unit. Be sure to keep the Operating Instructions for future reference. All warnings and cautions in the Operating Instructions and on the unit should be strictly followed, as well as the safety suggestions below.

Installation

1Water and moisture – Do not use this unit near water, such as near a bathtub, washbowl, swimming pool, or the like.

2Heat – Do not use this unit near sources of heat, including heating vents, stoves, or other appliances that generate heat. H also should not be placed in temperatures less than 5°C (41 “F)or greater than 35-C (95”F).

3Mounting surface – Place the unit on a flat, even surface.

4Ventilation – The unit should be situated with adequate space around it so that proper heat ventilation is assured. Allow 10 cm (4 in.) clearance from the rear and the top of the unit, and 5 cm (2 in.) from the each side.

-Do not place the unit on a bed, rug, orsimilarsurface that may block the ventilation openings.

-Do not install the unit in a bookcase, cabinet, or airtight rack where ventilation may be impeded.

5Objects and liquid entry -Take care that objects or liquids do not get inside the unit through the ventilation openings.

6Carts and stands – When placed or mounted on a stand or cart, the unit

should be moved with care.

L

Quick stops, excessive force, and un-

even surfaces may cause the unit or

@!l AA* 3

cart to overturn or fall.

7Condensation – Moisture may form on the CD pickup lens when:

-The unit is moved from a cold spot to a warm spot

-The heating system has just been turned on

-The unit is used in a very humid room

-The unit is cooled by an air conditioner

When this unit has condensation inside, it may not function normally. Should this occur, leave the unit forafew hours, then try to operate again.

8Wall orceilina mountina– The unit should not be mounted on a wall or ceilin~, unless s~ecified in the Operating Instructions.

Electric Power

1 Power sources - Connect this unit only to power sources specified in the Operating Instructions, and as marked on the unit.

2Polarization – As a safety feature, some units are equipped with polarized AC power plugs which can only be inserted one way into a power outlet. If it is difficult or impossible to insert the AC power plug into an outlet, turn the plug over and try again. If it still does not easily insert into the outlet, please call a qualified service technician to service or replace the outlet. To avoid defeating the safety feature of the polarized plug, do not force it into a power outlet.

3AC power cord

-When disconnecting the AC power cord, pull it out by the AC power plug. Do not pull the cord itself.

-Never handle the AC power plug with wet hands, as this could result in fire or shock.

-Power cords should be routed to avoid being severely bent, pinched, or walked upon. Pay particular attention to the cord from the unit to the power socket.

-Avoid overloading AC power plugs and extension cords beyond their capacity, as this could result in fire or shock.

4Extension cord – To help prevent electric shock, do not use a polarized AC power plug with an extension cord, receptacle, or other outlet unless the polarized plug can be completely in- serted to prevent exposure of the blades of the plug.

5When not in use – Urmlua the AC Dower cord from the AC outlet if the unit will not’be”used for &everal months or more. When the cord is plugged in, a small amount of current continues to flow to the unit, even when the power is turned off.

Outdoor Antenna

1Power lines – When connecting an outdoor antenna, make sure it is located away from power lines.

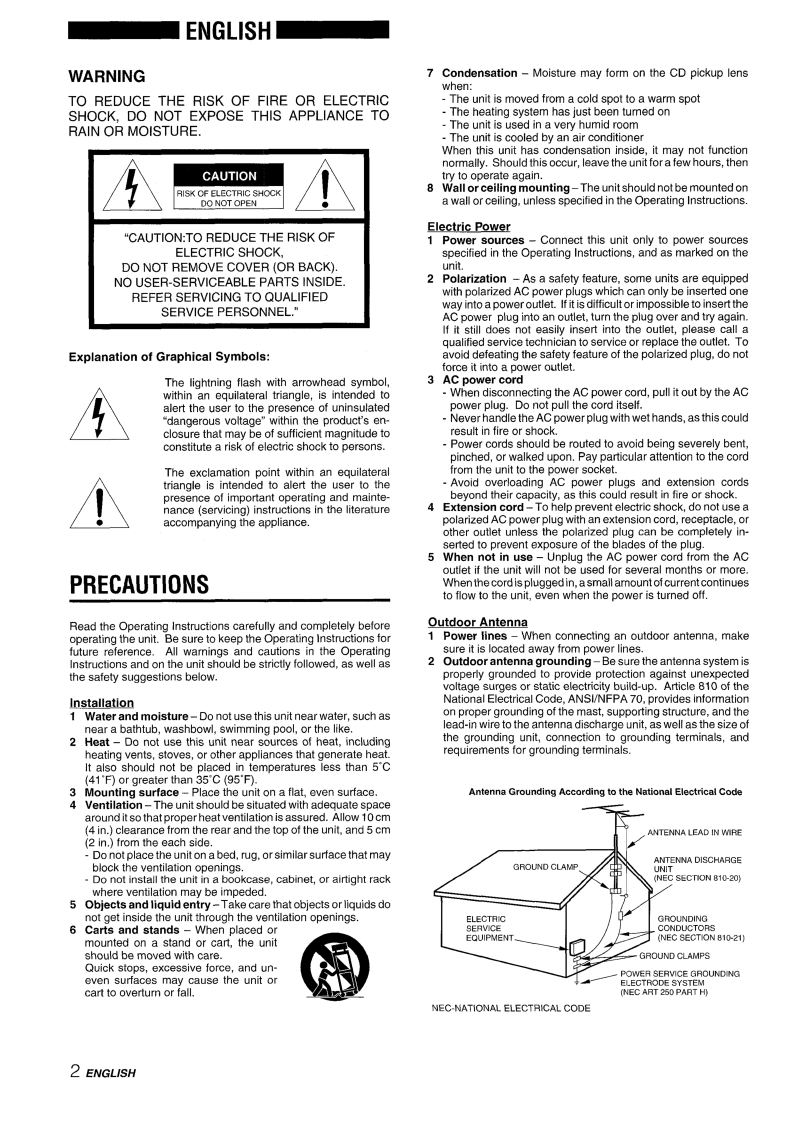
2Outdoor antenna aroundinct – Be sure the antenna system is properly grounded-to provid; protection against une~pected voltage surges or static electricity build-up. Article 810 of the National Electrical Code, ANSVNFPA 70, provides information on proper grounding of the mast, supporting structure, and the lead-in wire to the antenna discharge unit, as well as the size of the grounding unit, connection to grounding terminals, and requirements for grounding terminals.

Antenna Grounding According to the National Electrical Code


~

,ANTENN,4’LEAOINWIRE


ANTENNA DISCHARGE


(NEC SECTION

810-20)

ELECTRIC


GROUNDING


SERVICE


CONDUCTORS


EQUIPMENT

= (NEC SECTION

810-21)


GROUND

CLAMPS


POWER SERVICE GROUNDING


,/

ELEcTRODE

SYSTEM


(NEC ART 250 PART H)


NEC-NATIONAL

ELECTRICAL CODE


2 ENGLISH

Image 2
Contents Clumo ANTENN,4’LEAOINWIRE PrecautionsAC power cord Outdoor AntennaTable of Contents Connect the speaker cords to the speakers Before connecting the AC cordConnections Connect the speaker cords to the tuner/amplifierPlacing the TWO Units Side by Side Connecting AN Outdoor AntennaConcerning the Display WINDOW’S Demo Display To use the Function button on the CD/tape unit Using the Remote ControlBefore Operation Opening and closing the top coverDimming the Display Setting the ClockEconomizing Power Adjusting the Sound ‘@GiiJ’EEiiiiPManual Tuning Press the + or button to select a stationRepeat steps 1 Presetting StationsPreset Number Tuning Playing a Disc OperationLoading a Disc Load a disc with the label side upRepeat Play Programmed PlayRandom Play Loading a Tape To select a reverse modeTo start play when the power is off Direct Play Function Playing Back a TapeAbout cassette tapes Load the tape to be recorded on into the deck Basic RecordingInserting Blank Spaces Press the REC button on the CD/tape unit to start recordingLoad the tape into the cassette deck Al Edit RecordingPress the numbered buttons to designate the tape length To clear the edit programTo change the program of each side Programmed Edit RecordingRepeat for the rest of the tracks for side a To clear the edit programPrepare the source and recording destination Timer Play and Timer RecordingOff timer standby mode Press the II buttonSetting the Sleep Timer Using the system while the timer is setAUX in Jacks Connecting Optional EquipmentMD in Jacks Line OUT JacksCare of CDs Care and MaintenanceListening to External Sources Play the corresponding equipment connectedSpecifications CD Player Section Troubleshooting GuideTuner Section Parts Index NamePage Explication de Ios simbolos graficos PrecaucionesAdvertencia Indice Registro del propietarioImportante ConexionesAntes de conectar el cable electrico de CA Conexion DE UNA Antena Exterior Sobre LA Indication DE Demostracion EN LA PantallaColocacion DE DOS Aparatos Lado a Lado De baterias Antes DE LA OperacionMando Distancia Cuando cambiar Ias bateriasReduccion DEL Brillo DE LA Pantalla Ajuste DEL RelojAhorro DE ENERGiA Pulse el botonAjuste DEL Sonido Sintonizacion Manual Pulse el boton ++ o * para seleccionar una emisoraSintonizacion POR Numero DE Presintona Presintonizacion DE EmisorasIll Repita Ios pasos 1 yReproduction DE UN Disco OperacionCarga DE UN Disco Reproduction Programada Reproduction AleatoriaReproduction Repetida Para volver el contador de cinta al Reproduction DE UNA CintaPara seleccionar el modo de inversion +’ ‘ 1‘ Sobre Ias cintas de caseteCargue la cinta a grabar en la platina Grabacion BasicaColocacion DE Espacios EN Blanco Para parar la grabacion Grabacion CON Edicion DE AlCargue la cinta en la piatina Para borrar el programa de editionCargue la cinta en la platina Grabacion CON Edicion ProgramadaRepita el paso 5 para el resto de Ias pistas del Iado a Pulse Ias teclas numeradas para programar una pistaWER Shift Reproduction CON Temporizador Y GrabacionPrepare la fuente y el destino donde se graba Para verificar la hors y fuente especificadas Para cancelar el temporizador de apagadoAjuste DEL Temporizador DE Apagado Para cambiar el ajuste del temporizadorTomas MD Conexion DE UN Equipo OpcionalTomas Line OUT Tomas AUXReproduzca el correspond iente equipo conectado Escuchandofuentes ExternasCuidado Y Mantenimiento Especificaciones Seccion DEL Sintonizador Solucion a Pequenos ProblemasGeneral Seccion DEL Reproductor DE Discos CompactosNdice DE L05 c0MP0NENTE5 Page ~FRAN~AIS ~ InstallationExplication des symboles graphiques AvertissementDES Matieres Raccordez Ies cordons d’enceinte aux enceintes RaccordementsAvant de raccorder Ie cordon secteur Raccordez Ies cordons d’enceinte au tuner/ amplificateurRaccordement D’UNE Antenne Exterieure Installation DES Deux Appareils Cote a CoteAffichage Demo DE L’AFFICHEUR Raccordez Ies antennes fourniesEmploi DE LA TelecommandeAvant Assombrissement DE ’AFFICHEUR REGLAGEDEL’HORLOGEEconomie D’ENERGIE Ajustement DU SON ‘\.,..,Q,,,/~Accord Manuel Appuyez sur la touche + ou * pour selectionner une stationRepetez Ies etapes 1 et Prereglage DES StationsAccord PAR Numero DE Prereglage Accord avec Ie numero de prereglageLecture D’UN Disque ExploitationChargement D’UN Disque Lecture Programmed Lecture AleatoireLecture Repetee Chargement D’UNE Cassette Function ModeSelection d’un mode d’inversion Pour avancer ou reculer rapidement, appuyez sur la touchePropos des cassettes FRAN~AISInsertion D’ESPACES Vierges Chargez la cassette a enregistrer clans la platineInserez la cassette clans la platine Enregistrement D’EDITION AlPlatine I ‘ ‘%-0 Pour arreter I’enregistrement Enregistrement D’fDITIONProgrammed Pour modifier Ie programme de chaque facePreparez la source et la destination d’enregistrement Lecture TEMPORIStE ETEnregistrement Temporise Pour ecouter un CD, appuyez sur la touche CD sur laPour verifier Ie temps restant avant la mise hors Tension Reglage DE LA Minuterie ’EXTINCTIONUtilisation de la chahe quand la minuterie est reglee Pour annuler la minuterie d’extinction@ljl Raccordement D’UNGOuiPEMENT EN Option Exterieures Entretien ET MaintenanceKcOUTE DE sOuRcEs Lisez sur I’equipement correspondent raccordeSysteme D’ENCEINTES SX-LM200 Recepteur Stereo RX-LM88Platine Cassette /LECTEUR DE Disque Compact Stereo FD-LM88 Droits D’AUTEURGuide DE Depannage Pour reinitialiserNomenclature Page Page Page ~// ~0// fh??l-800-BUY-A/ WA. United States and Puerto Rico