ENGLISH
5 First start-up
| 1 |
|
|
| 2 |
|
|
|
| 6 |
|
| 3 |
|
|
| 4 | 7 |
|
|
|
| |
| 5 |
|
|
|
|
| 8 |
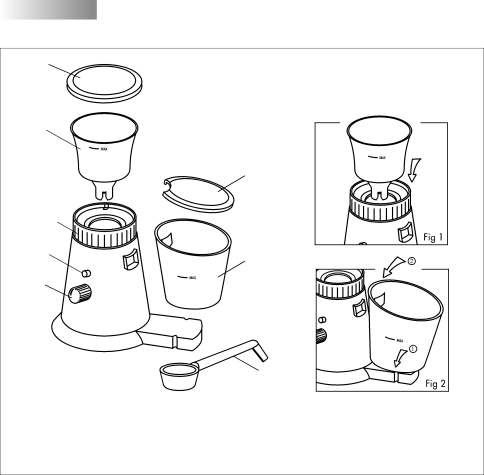
1 | Beaker cover | 5 | Grinding duration adjustment push button |
2 | Coffee bean beaker | 6 | Ground coffee beaker cover |
3 | Grinding level adjustment | 7 | Ground coffee beaker |
4 | On/off switch | 8 | Measure with cleaning device |
•Place the coffee grinder on a flat surface, near a power socket and out of the reach of children.
•Do not put the plug into the socket yet.
•Place the coffee bean beaker on the appliance.
•Thanks to the shape of its base, the coffee bean beaker can be snapped into one of the three positions. Make sure that one of the “MAX” wordings on the container is visible (Fig. 1).
•Approach the ground coffee beaker, fix the base onto the external bottom part of the appliance and press the two parts together (Fig. 2).
•Put the cover cut in the right position and place it onto the ground coffee beaker.
6How to fill the coffee bean beaker
•Make sure the coffee bean beaker is clean.
•Pour the necessary quantity of coffee beans into the beaker. The quantity can vary according to the type of coffee and your own taste. It is advisable to use one measure of coffee beans per cup of coffee. Do not fill the beaker over “MAX”.
•Close the beaker with cover.
• 8 •