iDP3221 User’s Manual
In Figure
It is possible to set as many print areas as desired before executing FF. If print areas overlap each other, the print area setup data are ANDed with the previous data.
If you want to erase a section of mapped data, use the CAN command. The CAN command erases all data in the print area being specified. You can, therefore, use an ESC W to define a print area that encloses the section you want to erase, and then execute the CAN command, so that the section of the data is erased.
It is important to remember that any part of a character that overlaps with the specified print area will be erased. <Example 2>
100 PRINT#1, chr$(&H1b); "L"
110PRINT#1, chr$(&H1b); "W";chr$(0);chr$(0);chr$(0);chr$(0);
120PRINT#1, chr$(200) ;chr$(0);chr$(144);chr$(1);
130PRINT#1, chr$(&H1b); "T";chr$(0);
140PRINT#1, "Page mode lesson 2 CAN command"
150PRINT#1, chr$(&HA);
160PRINT#1, "ABCDEFGHIJKLMNOPQRST1234567890"
170PRINT#1, chr$(&Hc);
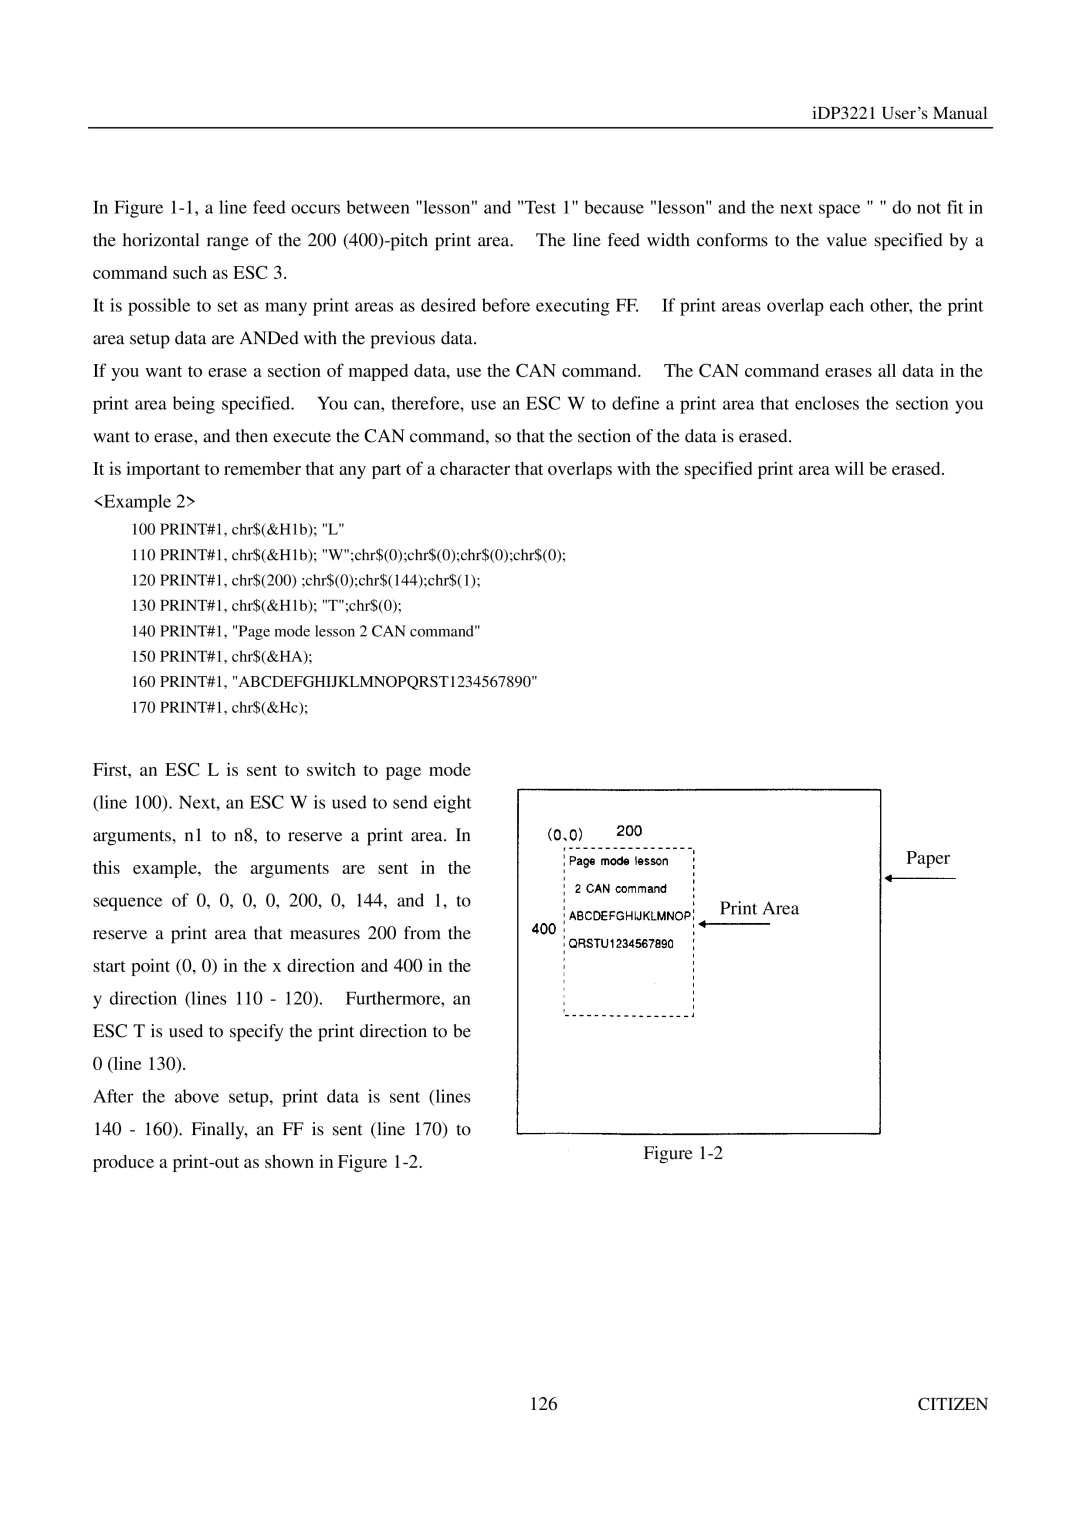
First, an ESC L is sent to switch to page mode (line 100). Next, an ESC W is used to send eight arguments, n1 to n8, to reserve a print area. In this example, the arguments are sent in the sequence of 0, 0, 0, 0, 200, 0, 144, and 1, to reserve a print area that measures 200 from the start point (0, 0) in the x direction and 400 in the y direction (lines 110 - 120). Furthermore, an ESC T is used to specify the print direction to be 0 (line 130).
After the above setup, print data is sent (lines 140 - 160). Finally, an FF is sent (line 170) to produce a
Paper
Print Area
Figure
126 | CITIZEN |