Laminator error recovery
Patch position
The position of the patch on the card can very slightly with a different lot of laminator supply material. You can change the
Change the left-to-right position
Use the laminator LCD panel to change the
See “Using the Laminator LCD panel” on page 42 to use the Film Position setting.
Change the Top-to-Bottom Position
Move the
1Power off the laminator and allow it to cool.
2Open the laminator door and remove the
laminator cartridge.
3Use the sprocket on the supply side of the
cartridge opening to change patch position.
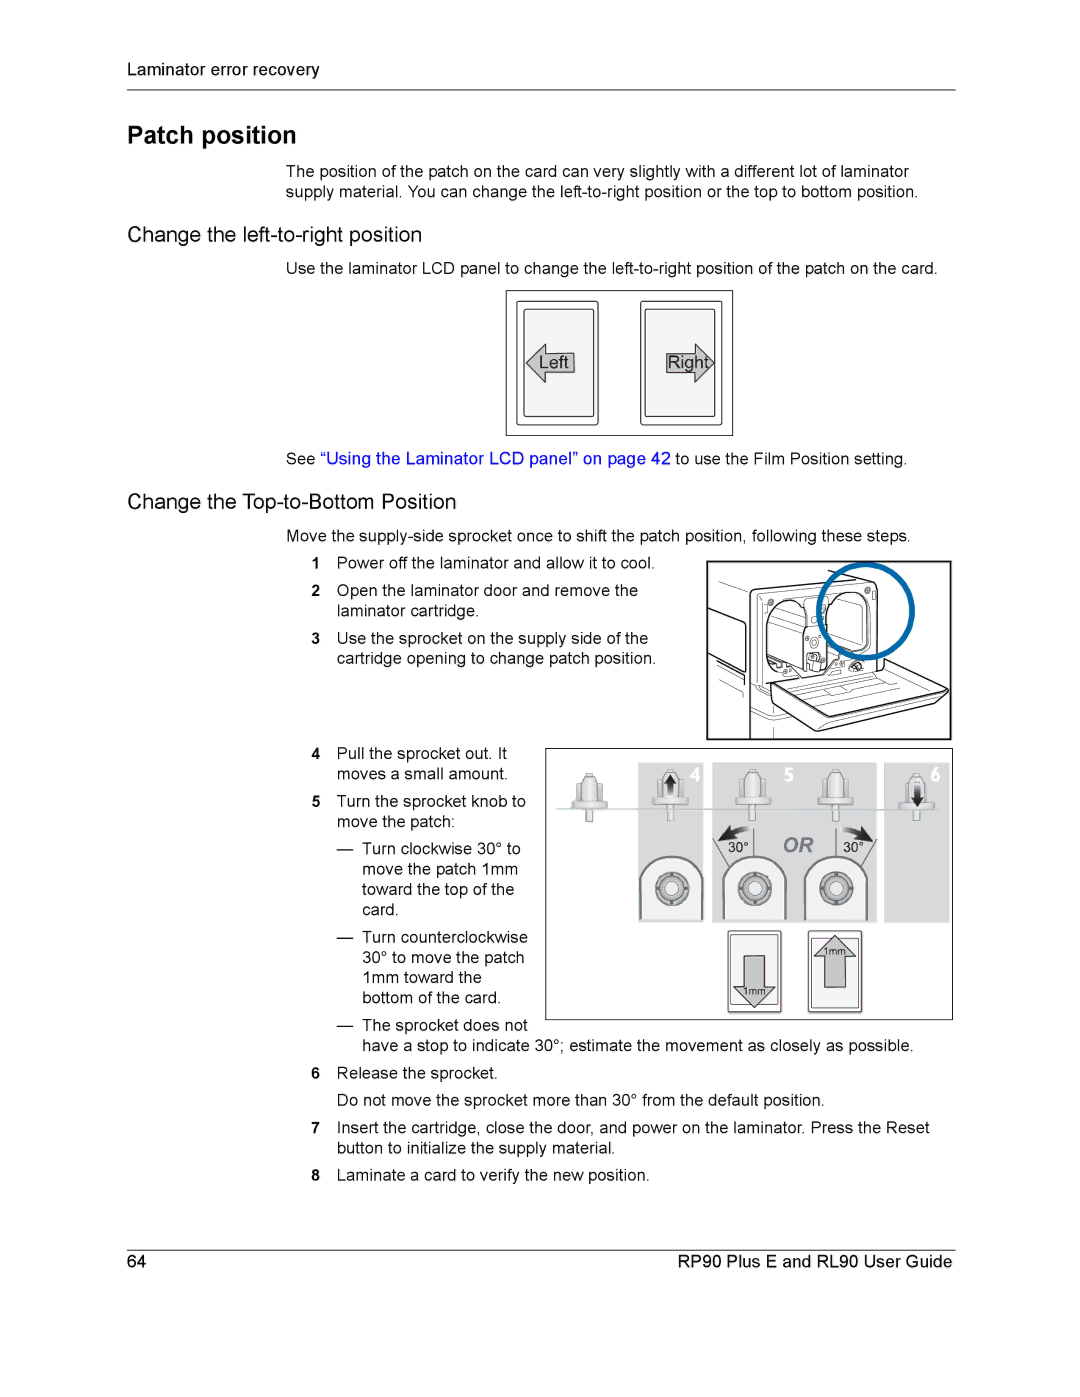
4Pull the sprocket out. It
moves a small amount.
5 Turn the sprocket knob to move the patch:
— Turn clockwise 30° to move the patch 1mm toward the top of the card.
— Turn counterclockwise 30° to move the patch 1mm toward the bottom of the card.
—The sprocket does not
have a stop to indicate 30°; estimate the movement as closely as possible.
6Release the sprocket.
Do not move the sprocket more than 30° from the default position.
7Insert the cartridge, close the door, and power on the laminator. Press the Reset button to initialize the supply material.
8Laminate a card to verify the new position.
64 | RP90 Plus E and RL90 User Guide |
