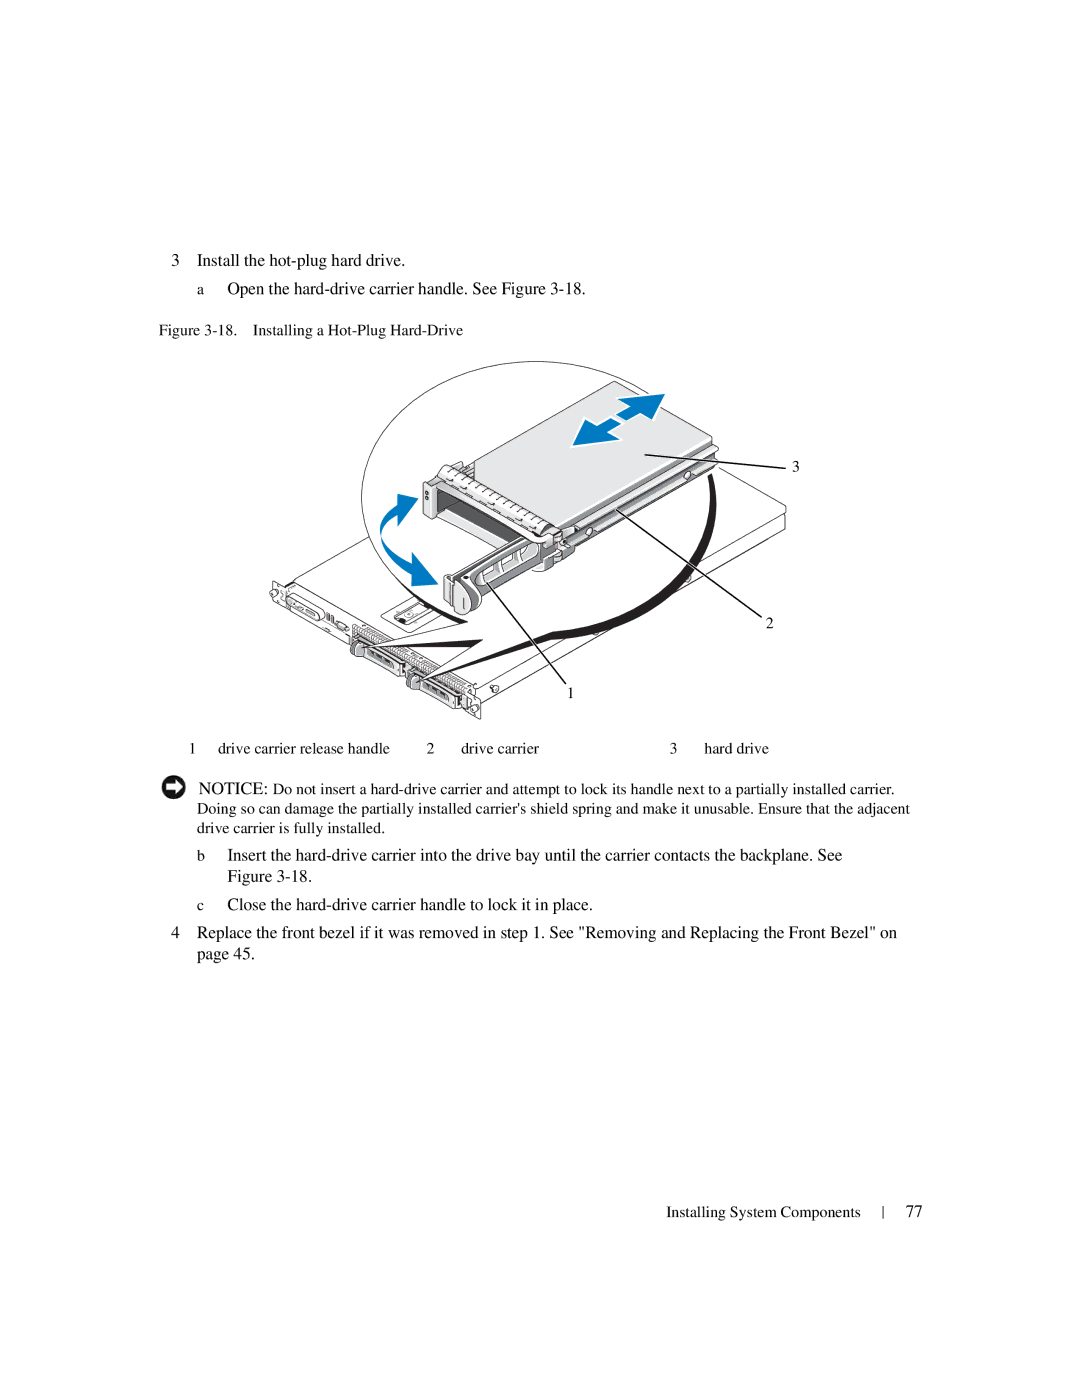
3Install the hot-plug hard drive.

a Open the hard-drive carrier handle. See Figure 3-18.

Figure 3-18. Installing a Hot-Plug Hard-Drive

3

2

1

1

drive carrier release handle

2

drive carrier

3

hard drive

NOTICE: Do not insert a hard-drive carrier and attempt to lock its handle next to a partially installed carrier. Doing so can damage the partially installed carrier's shield spring and make it unusable. Ensure that the adjacent drive carrier is fully installed.

bInsert the hard-drive carrier into the drive bay until the carrier contacts the backplane. See Figure 3-18.

cClose the hard-drive carrier handle to lock it in place.

4Replace the front bezel if it was removed in step 1. See "Removing and Replacing the Front Bezel" on page 45.

Installing System Components

77
Page 77
Image 77
Dell 1950 owner manual Installing System Components