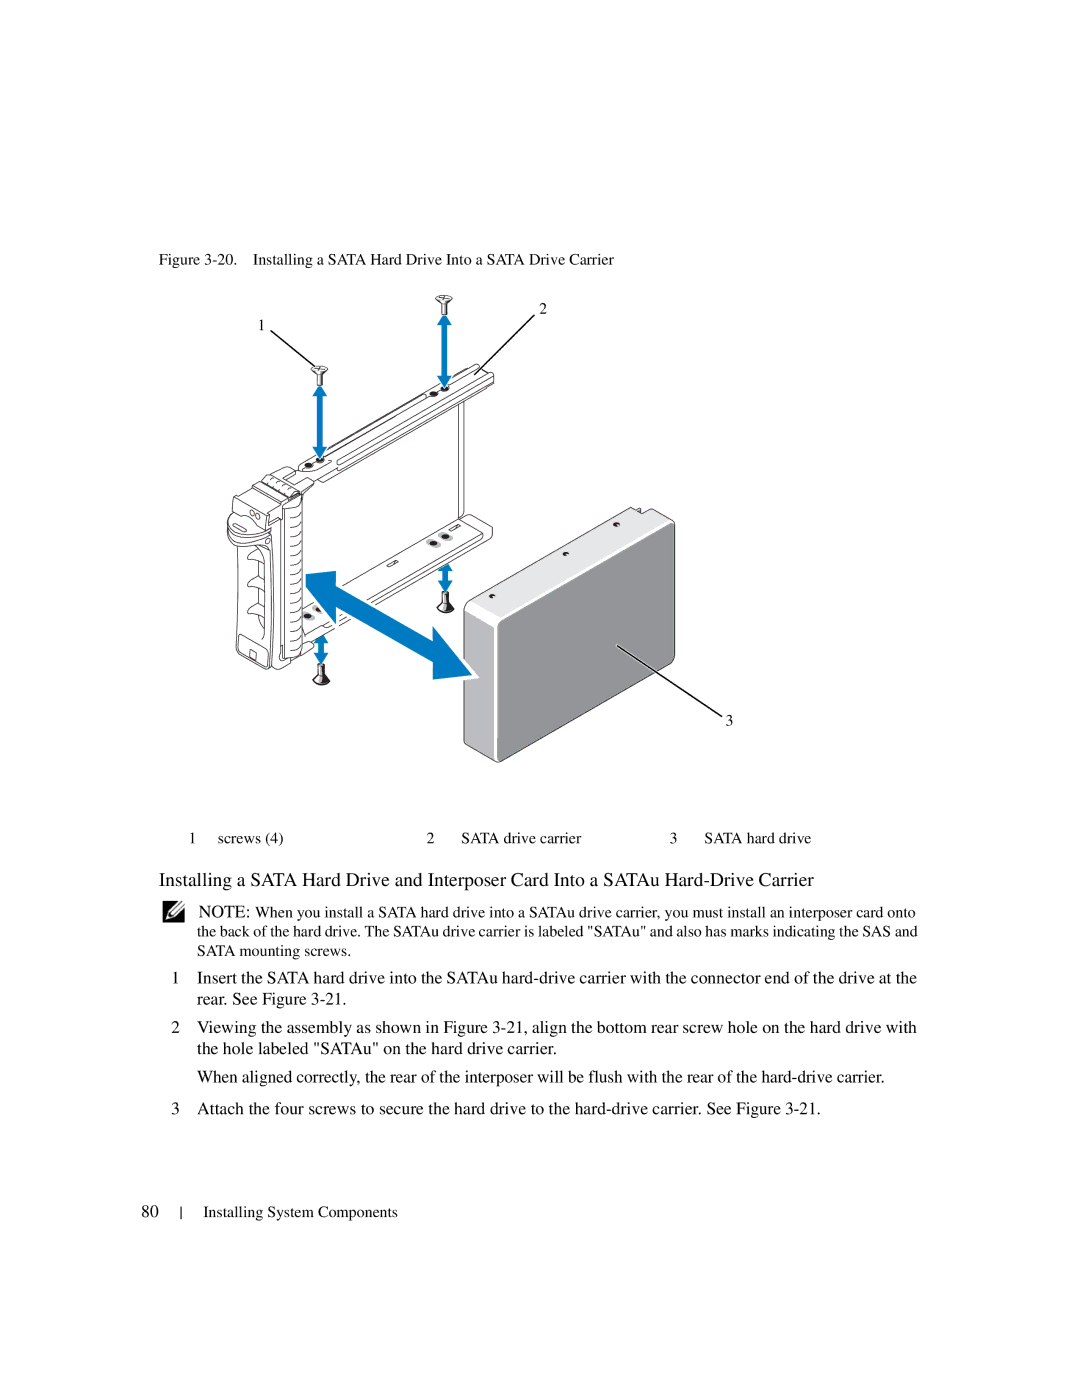
Figure 3-20. Installing a SATA Hard Drive Into a SATA Drive Carrier
2
1
3
1 screws (4) | 2 SATA drive carrier | 3 SATA hard drive |
Installing a SATA Hard Drive and Interposer Card Into a SATAu
NOTE: When you install a SATA hard drive into a SATAu drive carrier, you must install an interposer card onto the back of the hard drive. The SATAu drive carrier is labeled "SATAu" and also has marks indicating the SAS and SATA mounting screws.
1Insert the SATA hard drive into the SATAu
2Viewing the assembly as shown in Figure
When aligned correctly, the rear of the interposer will be flush with the rear of the
3Attach the four screws to secure the hard drive to the
80
