OCX 8800
Instruction Manual
OCX with
Integral Electronics
Remove OCX 8800
1.Turn off power to the system.
2.Shut off the test gases at the cylinders and shut off the instrument air.
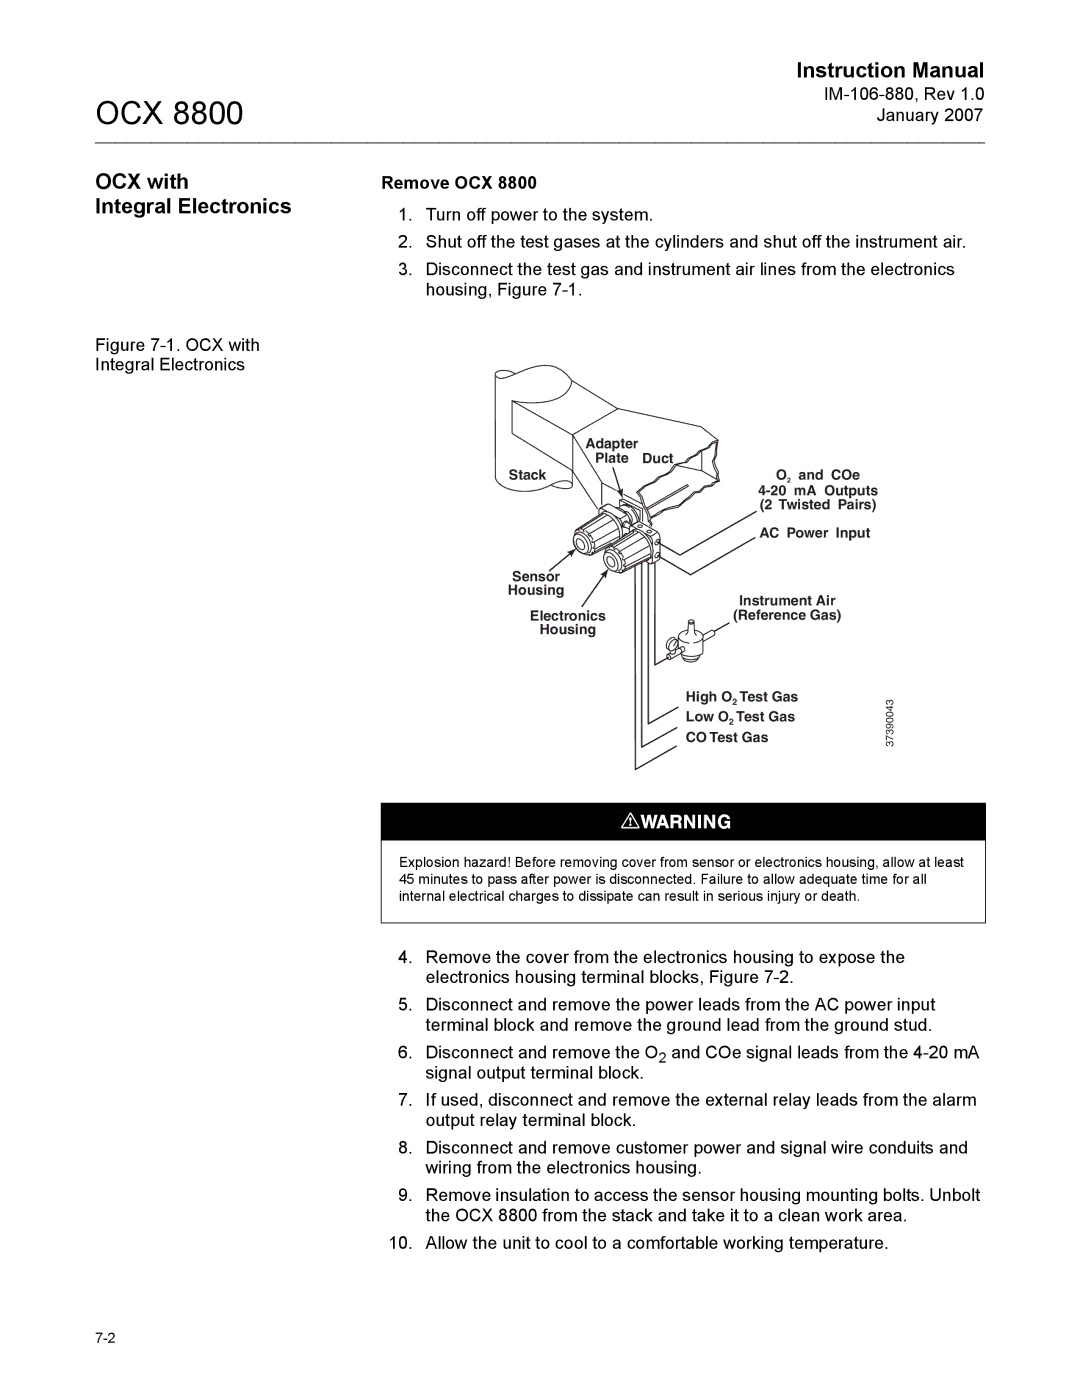
3.Disconnect the test gas and instrument air lines from the electronics housing, Figure
Figure 7-1. OCX with Integral Electronics
Adapter |
|
Plate | Duct |
Stack | O2 and COe |
| |
| (2 Twisted Pairs) |
| AC Power Input |
Sensor |
|
Housing | Instrument Air |
| |
Electronics | (Reference Gas) |
Housing |
|
| High O2 Test Gas |
| Low O2 Test Gas |
| CO Test Gas |
37390043
Explosion hazard! Before removing cover from sensor or electronics housing, allow at least 45 minutes to pass after power is disconnected. Failure to allow adequate time for all internal electrical charges to dissipate can result in serious injury or death.
4.Remove the cover from the electronics housing to expose the electronics housing terminal blocks, Figure
5.Disconnect and remove the power leads from the AC power input terminal block and remove the ground lead from the ground stud.
6.Disconnect and remove the O2 and COe signal leads from the
7.If used, disconnect and remove the external relay leads from the alarm output relay terminal block.
8.Disconnect and remove customer power and signal wire conduits and wiring from the electronics housing.
9.Remove insulation to access the sensor housing mounting bolts. Unbolt the OCX 8800 from the stack and take it to a clean work area.
10.Allow the unit to cool to a comfortable working temperature.
