MODEL 54eA
4.00pH
Pt. 1 : 4.00pH 25.0°C
Exit | Pt 2 | Edit |
10.01pH
Calibrate point 2
Abort Cont
SECTION 13.0
CALIBRATION - pH
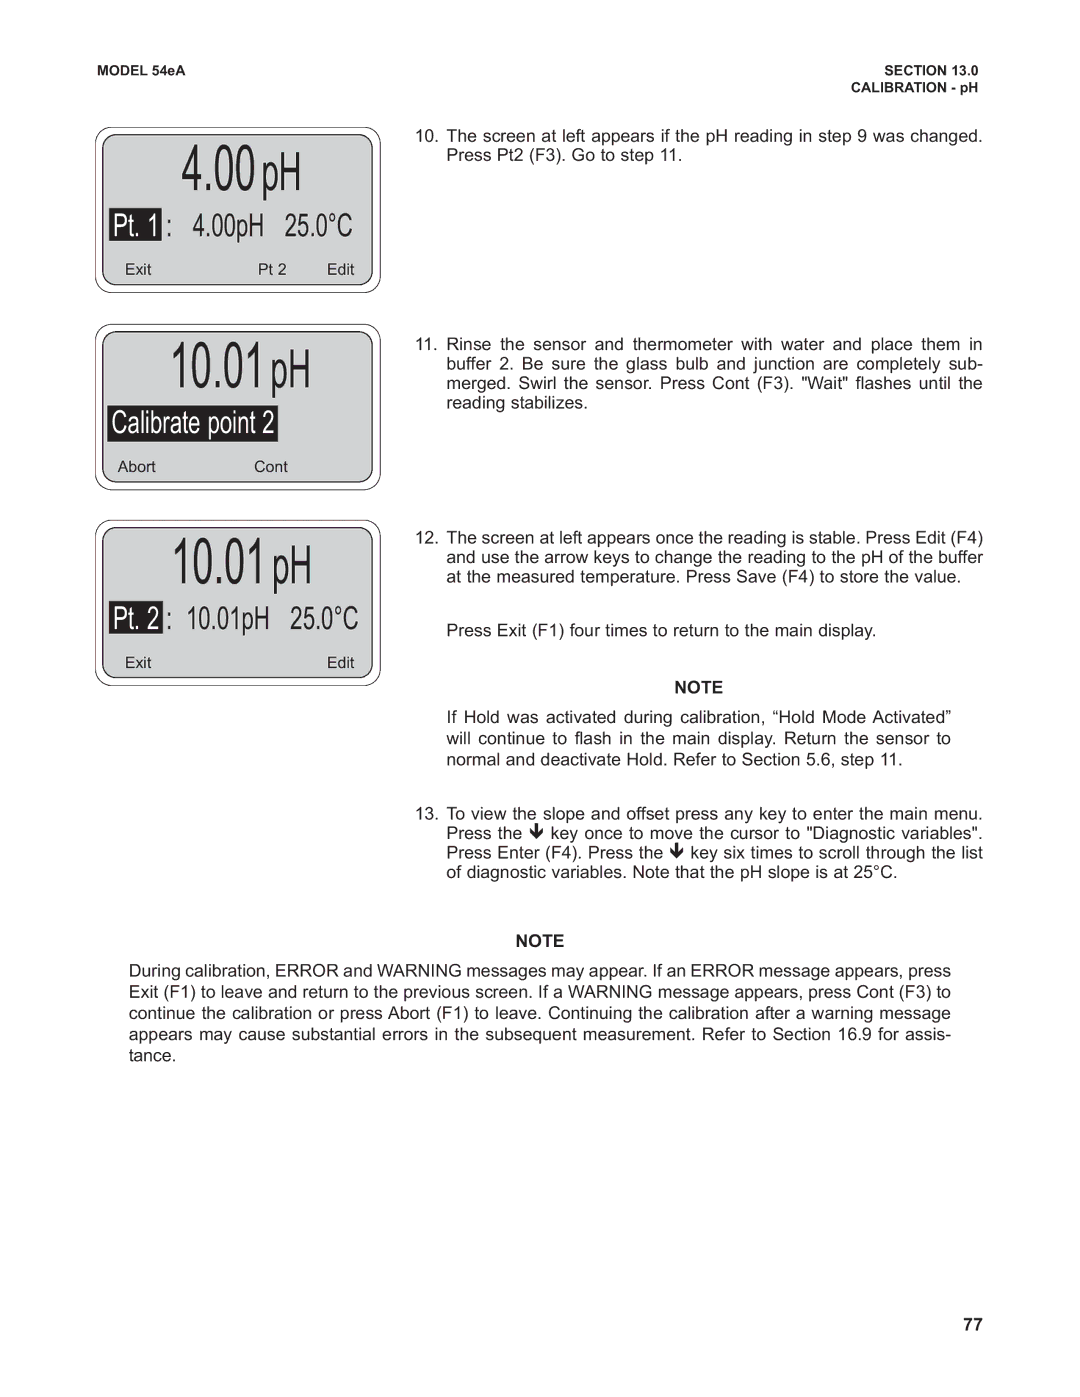
10.The screen at left appears if the pH reading in step 9 was changed. Press Pt2 (F3). Go to step 11.
11.Rinse the sensor and thermometer with water and place them in buffer 2. Be sure the glass bulb and junction are completely sub- merged. Swirl the sensor. Press Cont (F3). "Wait" flashes until the reading stabilizes.
10.01pH
Pt. 2 : 10.01pH 25.0°C
ExitEdit
12.The screen at left appears once the reading is stable. Press Edit (F4) and use the arrow keys to change the reading to the pH of the buffer at the measured temperature. Press Save (F4) to store the value.
Press Exit (F1) four times to return to the main display.
NOTE
If Hold was activated during calibration, “Hold Mode Activated” will continue to flash in the main display. Return the sensor to normal and deactivate Hold. Refer to Section 5.6, step 11.
13.To view the slope and offset press any key to enter the main menu. Press the ê key once to move the cursor to "Diagnostic variables". Press Enter (F4). Press the ê key six times to scroll through the list of diagnostic variables. Note that the pH slope is at 25°C.
NOTE
During calibration, ERROR and WARNING messages may appear. If an ERROR message appears, press Exit (F1) to leave and return to the previous screen. If a WARNING message appears, press Cont (F3) to continue the calibration or press Abort (F1) to leave. Continuing the calibration after a warning message appears may cause substantial errors in the subsequent measurement. Refer to Section 16.9 for assis- tance.
77
