Installing HyperFabric
Installing HyperFabric Switches
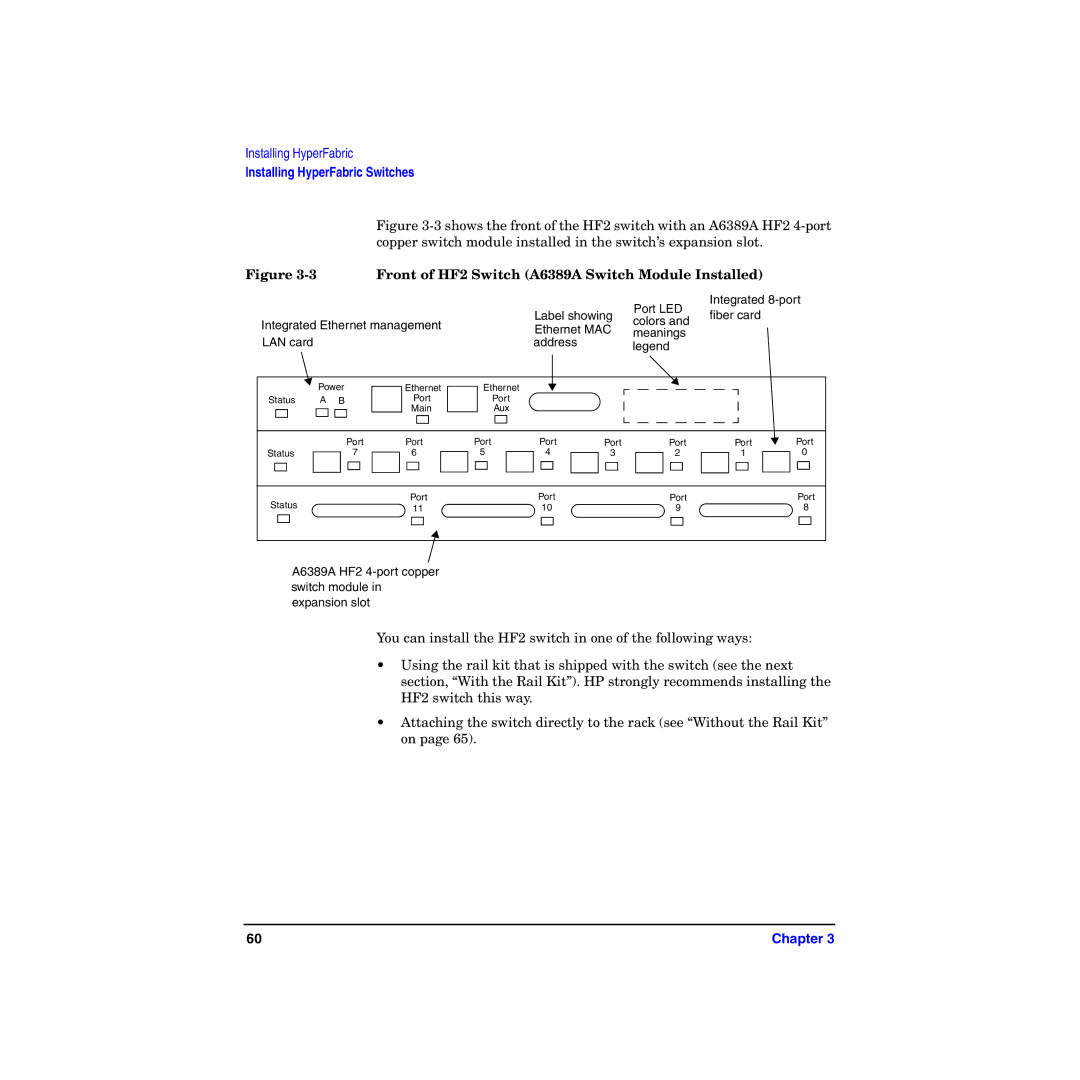
Figure 3-3 shows the front of the HF2 switch with an A6389A HF2 4-port copper switch module installed in the switch’s expansion slot.
Figure | Front of HF2 Switch (A6389A Switch Module Installed) |
Integrated
|
|
|
|
| Label showing | Port LED | fiber card |
| |
Integrated Ethernet management |
| colors and |
| ||||||
| Ethernet MAC |
|
| ||||||
| meanings |
|
| ||||||
LAN card |
|
|
|
|
|
| |||
|
|
|
| address |
| legend |
|
| |
|
|
|
|
|
|
|
|
| |
| Power | Ethernet | Ethernet |
|
|
|
|
| |
Status | A | B | Port | Port |
|
|
|
|
|
|
|
| Main | Aux |
|
|
|
|
|
|
| Port | Port | Port | Port | Port | Port | Port | Port |
Status |
| 7 | 6 | 5 | 4 | 3 | 2 | 1 | 0 |
Status |
|
| Port |
| Port |
| Port |
| Port |
|
| 11 |
| 10 |
| 9 |
| 8 | |
A6389A HF2
You can install the HF2 switch in one of the following ways:
•Using the rail kit that is shipped with the switch (see the next section, “With the Rail Kit”). HP strongly recommends installing the HF2 switch this way.
•Attaching the switch directly to the rack (see “Without the Rail Kit” on page 65).
60 | Chapter 3 |
