Installing HyperFabric
Installing HyperFabric Switches
sliding the switch. If so, try lifting the switch over the rail screws. If you cannot do this, remove the rail screws, slide the switch into position, and put the rail screws back in.
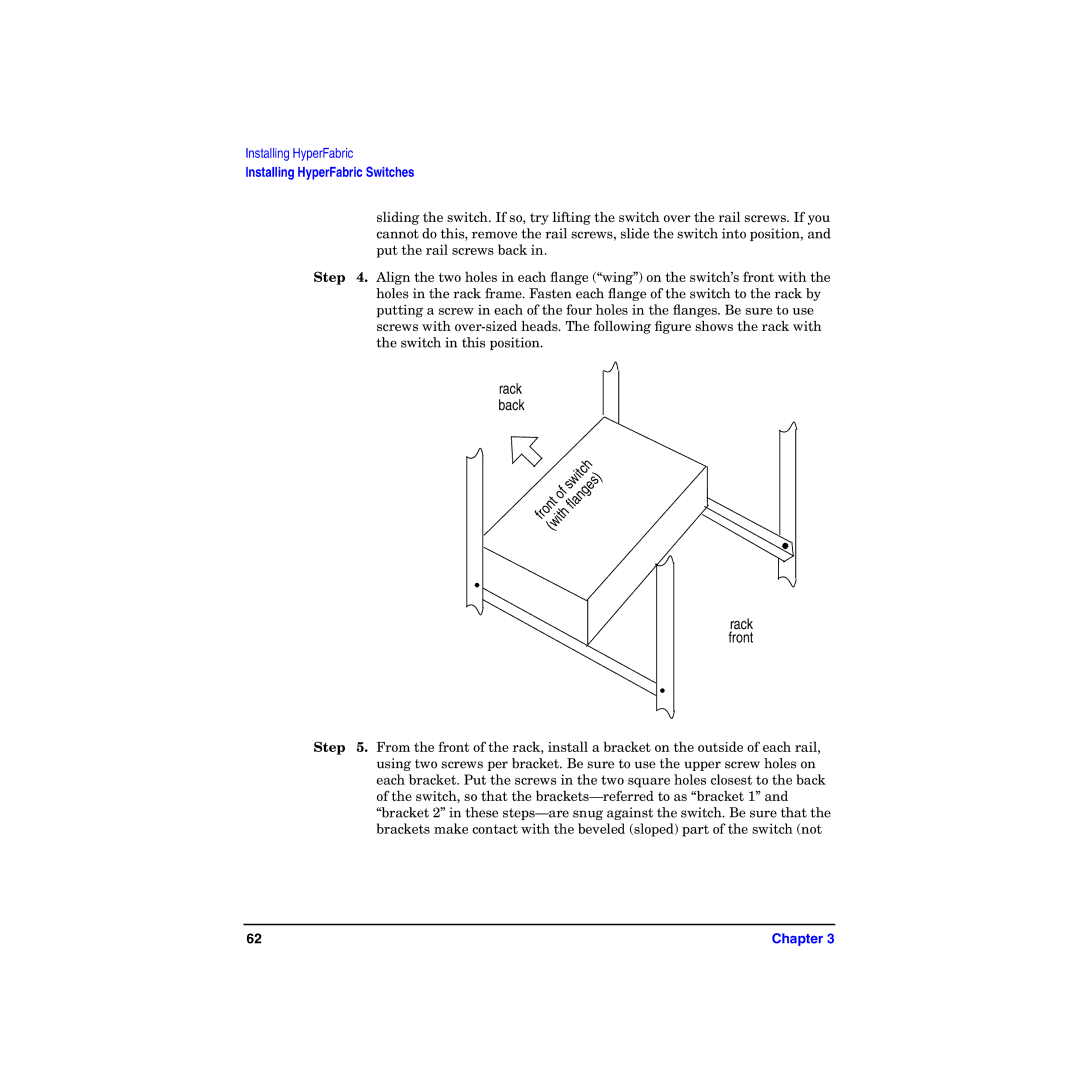
Step 4. Align the two holes in each flange (“wing”) on the switch’s front with the holes in the rack frame. Fasten each flange of the switch to the rack by putting a screw in each of the four holes in the flanges. Be sure to use screws with
rack back
front |
| switch |
of | flanges) | |
(with |
| |
rack front
Step 5. From the front of the rack, install a bracket on the outside of each rail, using two screws per bracket. Be sure to use the upper screw holes on each bracket. Put the screws in the two square holes closest to the back of the switch, so that the
62 | Chapter 3 |
