Chapter 3: NetCommand® Setup and Editing
Figure 6. Finish screen
It is still necessary to memorize the available channels for
Edit NetCommand®: Add an A/V Receiver
A/V Receiver Screen
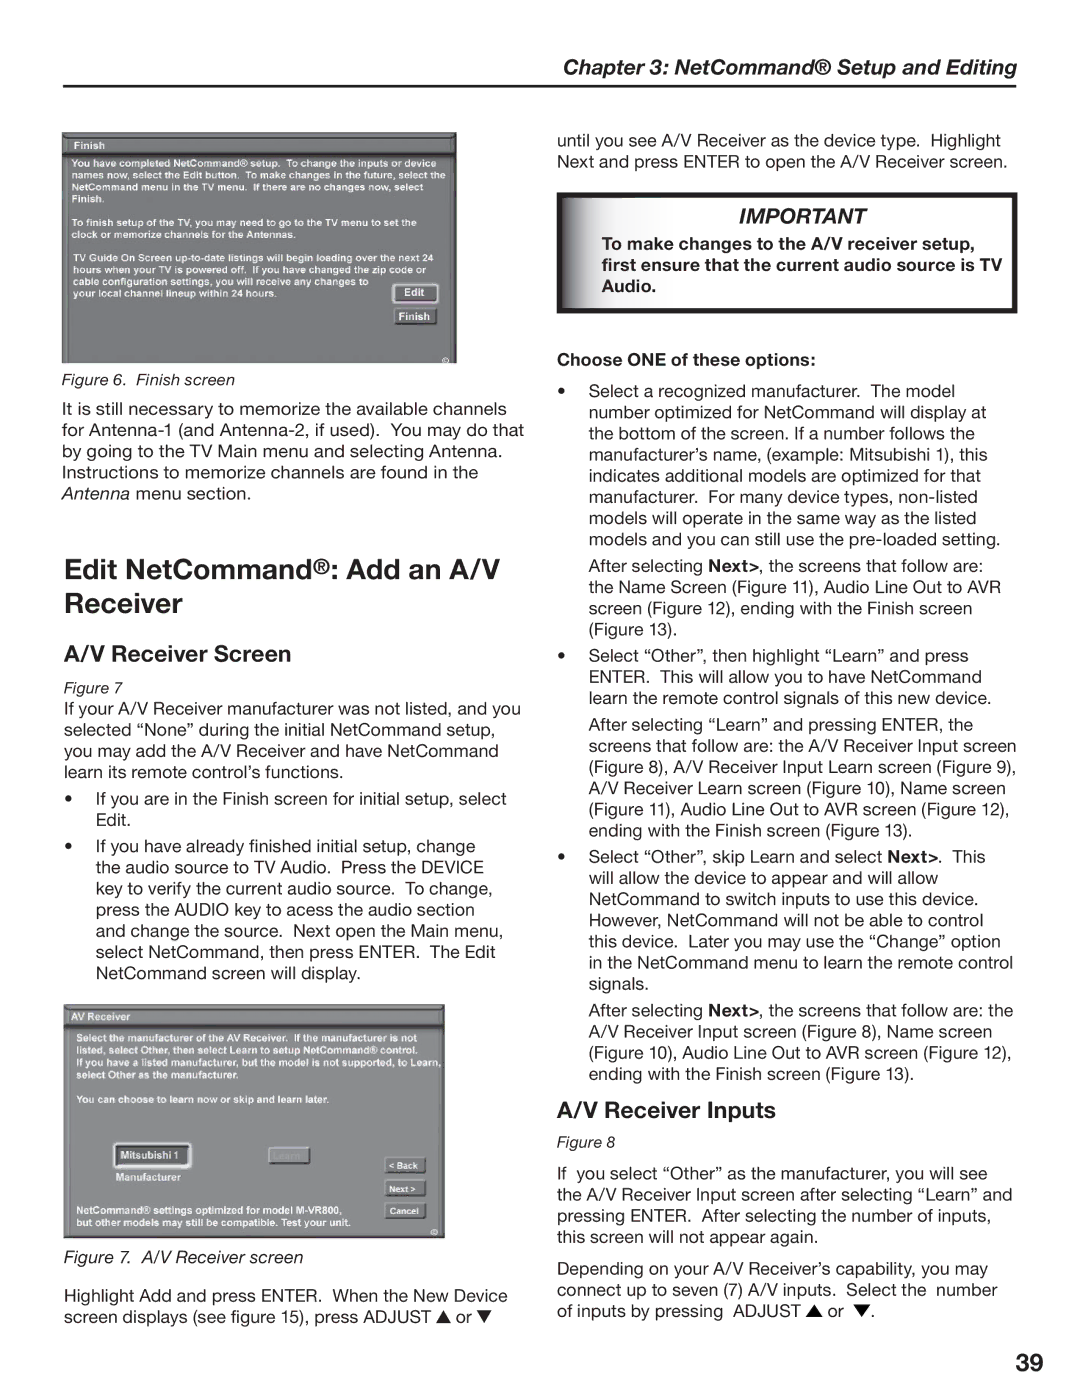
Figure 7
If your A/V Receiver manufacturer was not listed, and you selected “None” during the initial NetCommand setup, you may add the A/V Receiver and have NetCommand learn its remote control’s functions.
•If you are in the Finish screen for initial setup, select Edit.
•If you have already finished initial setup, change the audio source to TV Audio. Press the DEVICE key to verify the current audio source. To change, press the AUDIO key to acess the audio section and change the source. Next open the Main menu, select NetCommand, then press ENTER. The Edit NetCommand screen will display.
Figure 7. A/V Receiver screen
Highlight Add and press ENTER. When the New Device screen displays (see figure 15), press ADJUST![]() or
or![]()
until you see A/V Receiver as the device type. Highlight Next and press ENTER to open the A/V Receiver screen.
IMPORTANT
To make changes to the A/V receiver setup, first ensure that the current audio source is TV Audio.
Choose ONE of these options:
•Select a recognized manufacturer. The model number optimized for NetCommand will display at the bottom of the screen. If a number follows the manufacturer’s name, (example: Mitsubishi 1), this indicates additional models are optimized for that manufacturer. For many device types,
After selecting Next>, the screens that follow are: the Name Screen (Figure 11), Audio Line Out to AVR screen (Figure 12), ending with the Finish screen (Figure 13).
•Select “Other”, then highlight “Learn” and press ENTER. This will allow you to have NetCommand learn the remote control signals of this new device.
After selecting “Learn” and pressing ENTER, the screens that follow are: the A/V Receiver Input screen (Figure 8), A/V Receiver Input Learn screen (Figure 9), A/V Receiver Learn screen (Figure 10), Name screen (Figure 11), Audio Line Out to AVR screen (Figure 12), ending with the Finish screen (Figure 13).
•Select “Other”, skip Learn and select Next>. This will allow the device to appear and will allow NetCommand to switch inputs to use this device. However, NetCommand will not be able to control this device. Later you may use the “Change” option in the NetCommand menu to learn the remote control signals.
After selecting Next>, the screens that follow are: the A/V Receiver Input screen (Figure 8), Name screen (Figure 10), Audio Line Out to AVR screen (Figure 12), ending with the Finish screen (Figure 13).
A/V Receiver Inputs
Figure 8
If you select “Other” as the manufacturer, you will see the A/V Receiver Input screen after selecting “Learn” and pressing ENTER. After selecting the number of inputs, this screen will not appear again.
Depending on your A/V Receiver’s capability, you may connect up to seven (7) A/V inputs. Select the number of inputs by pressing ADJUST![]() or .
or .
39