Chapter 3: NetCommand® Setup and Editing
Edit NetCommand® : Add Devices
Note: Mitsubishi’s NetCommand allows you to edit your home theater configuration. You can add new devices, change device settings and connections, delete devices and learn remote control IR signals not already in NetCommand memory.
Edit NetCommand Screen
Figure 14
If you selected Edit when you were at the Finish screen, the Edit NetCommand screen displays. The choices are:
Figure 14. NetCommand Menu, Edit NetCommand Option
Add
Add a new device to the NetCommand setup. See Figure 15 and “New Device Screen” for more information.
Change
Change the brand/model or input connections of a device already listed in the configuration. Learn the remote control signals of devices listed as “Other” brands. See Figure 24 for more information.
Guide
Edit TV Guide On Screen® zip code and input selections. See the separate TV Guide On Screen Interactive Program Guide System manual for more information about customizing the Guide.
Review
View a list of all devices and input connections in the NetCommand home theater configuration. This is also where you can turn On or Off unused media center inputs or devices. See Figure 5 for more information.
Delete
Remove a device or erase the complete NetCommand home theater configuration. The learned remote control signals are erased when the associated device is deleted. See Figure 25 for more information.
Initial
Start the setup at the beginning. This button only becomes available after deleting the entire configuration, or if NetCommand was not set up when the media center was first powered On. If you select Initial, the first screen
that will display is the Device Setup Screen. See Figure 3 for more information.
Note: If you have completed the NetCommand setup, you can access the Edit menu at any time by pressing TV MENU, then selecting NetCommand. See page 66 for details.
Use these settings to change the NetCommand setup to reflect a change in your home theater system. To learn the remote control IR signals of a device that is not already in the NetCommand memory, add this device as manufacturer of “Other.” The learning screens will then automatically be included in the series of screens used for adding the device.
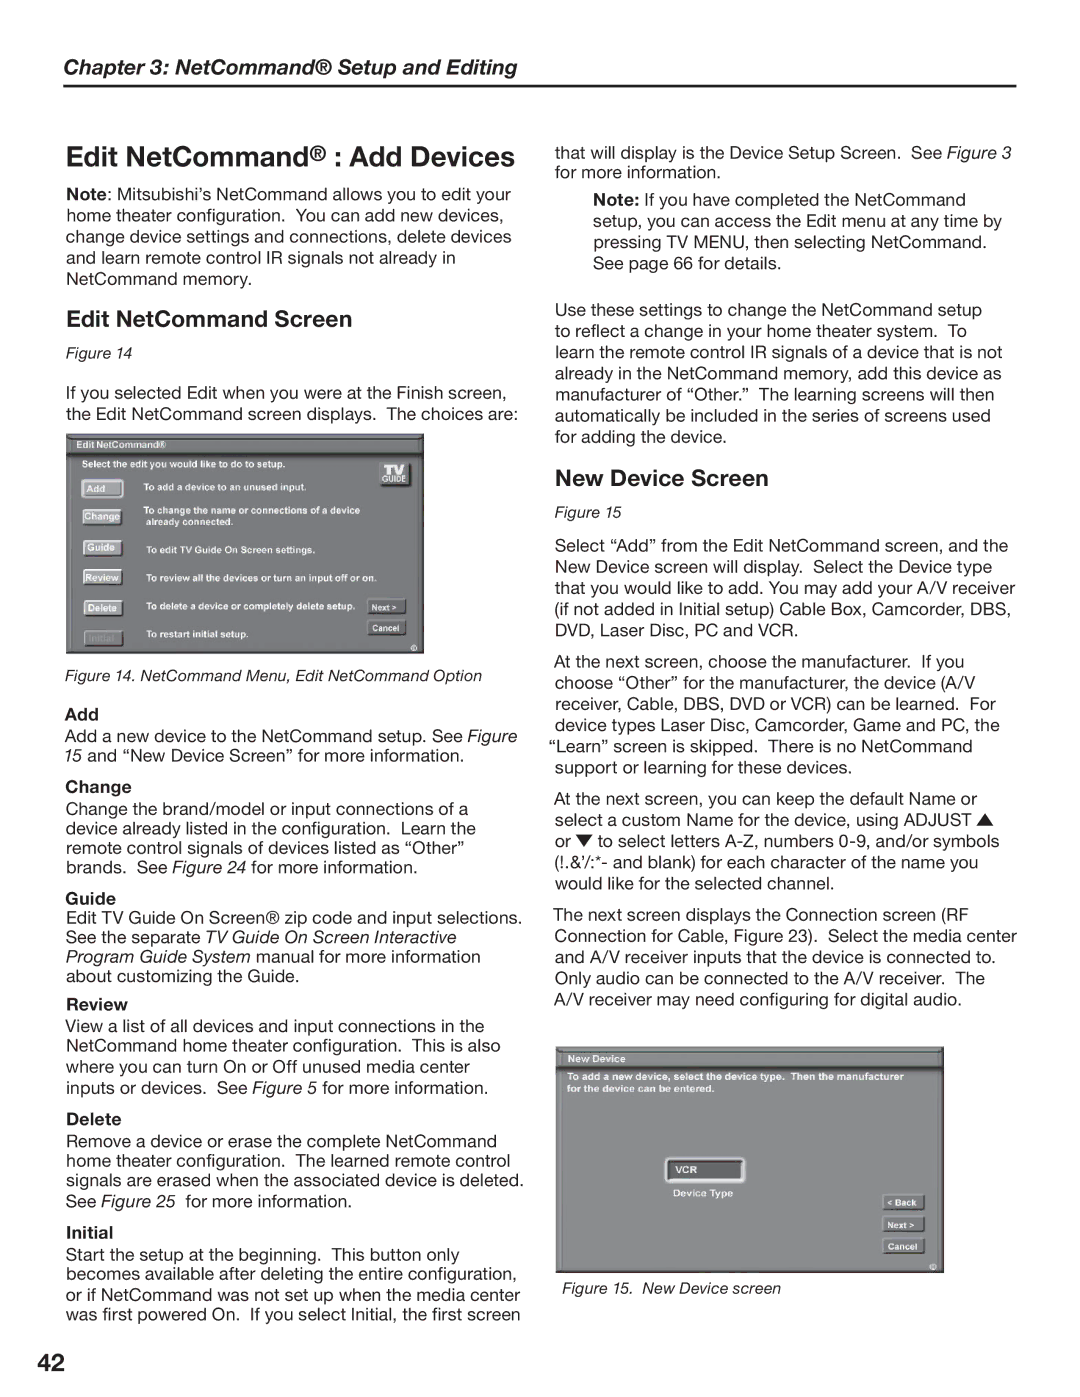
New Device Screen
Figure 15
Select “Add” from the Edit NetCommand screen, and the New Device screen will display. Select the Device type that you would like to add. You may add your A/V receiver (if not added in Initial setup) Cable Box, Camcorder, DBS, DVD, Laser Disc, PC and VCR.
At the next screen, choose the manufacturer. If you choose “Other” for the manufacturer, the device (A/V receiver, Cable, DBS, DVD or VCR) can be learned. For device types Laser Disc, Camcorder, Game and PC, the “Learn” screen is skipped. There is no NetCommand support or learning for these devices.
At the next screen, you can keep the default Name or select a custom Name for the device, using ADJUST ![]() or
or ![]() to select letters
to select letters
The next screen displays the Connection screen (RF Connection for Cable, Figure 23). Select the media center and A/V receiver inputs that the device is connected to. Only audio can be connected to the A/V receiver. The A/V receiver may need configuring for digital audio.
Figure 15. New Device screen
42