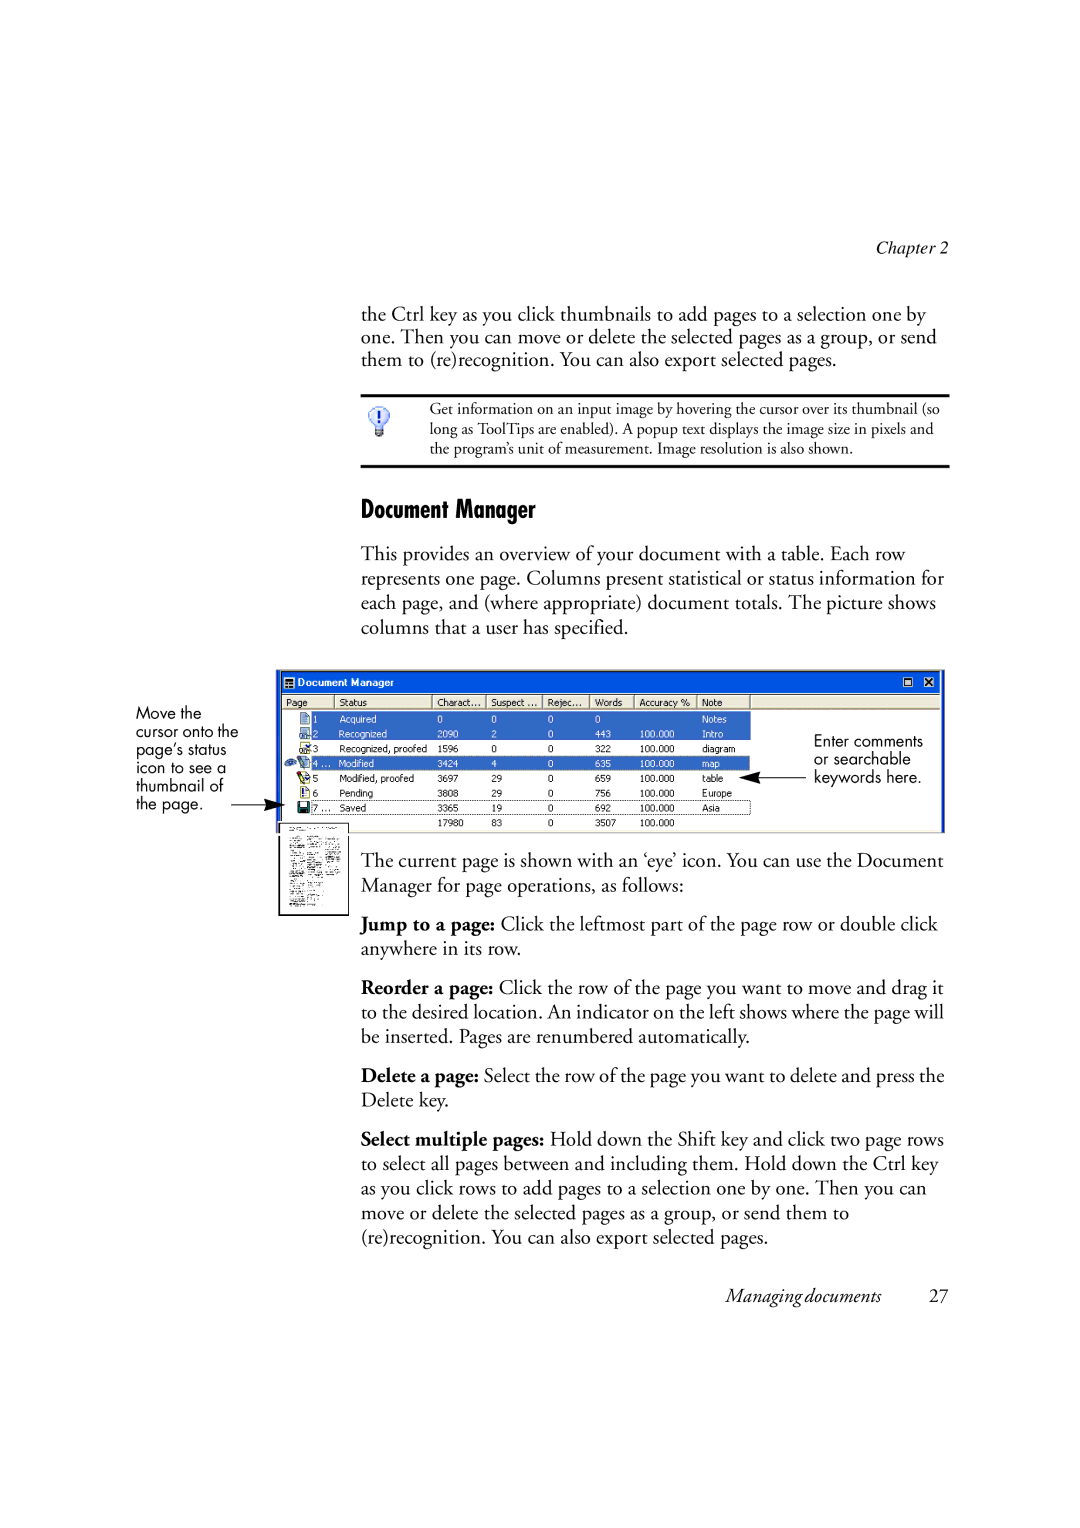
Move the cursor onto the page’s status icon to see a thumbnail of the page.
Chapter 2
the Ctrl key as you click thumbnails to add pages to a selection one by one. Then you can move or delete the selected pages as a group, or send them to (re)recognition. You can also export selected pages.
Get information on an input image by hovering the cursor over its thumbnail (so long as ToolTips are enabled). A popup text displays the image size in pixels and the program’s unit of measurement. Image resolution is also shown.
Document Manager
This provides an overview of your document with a table. Each row represents one page. Columns present statistical or status information for each page, and (where appropriate) document totals. The picture shows columns that a user has specified.
Enter comments or searchable ![]() keywords here.
keywords here.
The current page is shown with an ‘eye’ icon. You can use the Document Manager for page operations, as follows:
Jump to a page: Click the leftmost part of the page row or double click anywhere in its row.
Reorder a page: Click the row of the page you want to move and drag it to the desired location. An indicator on the left shows where the page will be inserted. Pages are renumbered automatically.
Delete a page: Select the row of the page you want to delete and press the Delete key.
Select multiple pages: Hold down the Shift key and click two page rows to select all pages between and including them. Hold down the Ctrl key as you click rows to add pages to a selection one by one. Then you can move or delete the selected pages as a group, or send them to (re)recognition. You can also export selected pages.
Managing documents | 27 |