Checking replaceable’s lifespan
If you experience frequent paper jams or printing problems, check the number of pages the machine has printed. Replace the corresponding parts, if necessary.
1.Press Menu on the control panel.
2.Press the left/right arrow until System Setup appears and press OK.
3.Press the left/right arrow until Maintenance appears and press OK.
4.Press the left/right arrow until Supplies Life appears and press OK.
5.Press the left/right arrow until the item you want appears and press OK.
•Supplies Info: Prints the supply information page.
•Total: Displays the total number of pages printed in color mode or black and white mode.
•ADF Scan: Displays the number of pages scanned using the ADF.
•Platen Scan: Displays the number of pages scanned using the scanner glass.
•Imaging Unit: Displays the number of pages scanned and printed.
•Transfer Belt: Displays the number of pages scanned and printed.
•Fuser: Displays the number of pages scanned and printed.
•TransferRoller: Displays the number of pages scanned and printed.
•Tray 1 Roller: Displays the number of pages scanned and printed.
6.Press Stop/Clear to return to ready mode.
Replacing the toner cartridge
The machine uses four colors and has a different toner cartridge for each one: yellow (Y), magenta (M), cyan (C) and black (K).
The status LED and the
At this stage, the indicated toner cartridge needs to be replaced. Before replacing the toner cartridge, check the model number for the toner cartridge used in your machine.
Click this link to open an animation about replacing the toner cartridge.
1.Turn the machine off, then wait a few minutes for the machine to cool.
2.Using the handle, completely open the front door.
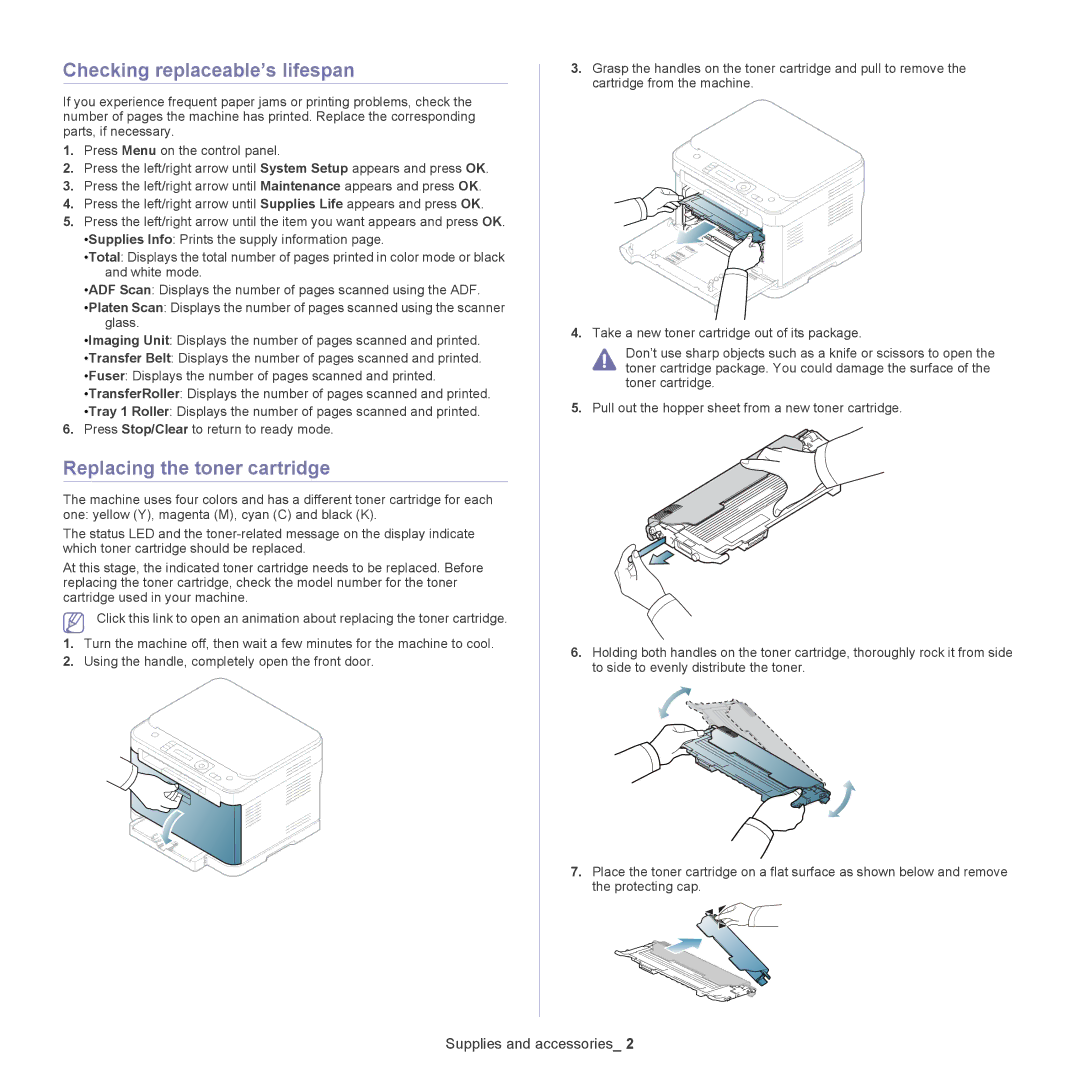
3.Grasp the handles on the toner cartridge and pull to remove the cartridge from the machine.
4.Take a new toner cartridge out of its package.
Don’t use sharp objects such as a knife or scissors to open the toner cartridge package. You could damage the surface of the toner cartridge.
5.Pull out the hopper sheet from a new toner cartridge.
6.Holding both handles on the toner cartridge, thoroughly rock it from side to side to evenly distribute the toner.
7.Place the toner cartridge on a flat surface as shown below and remove the protecting cap.