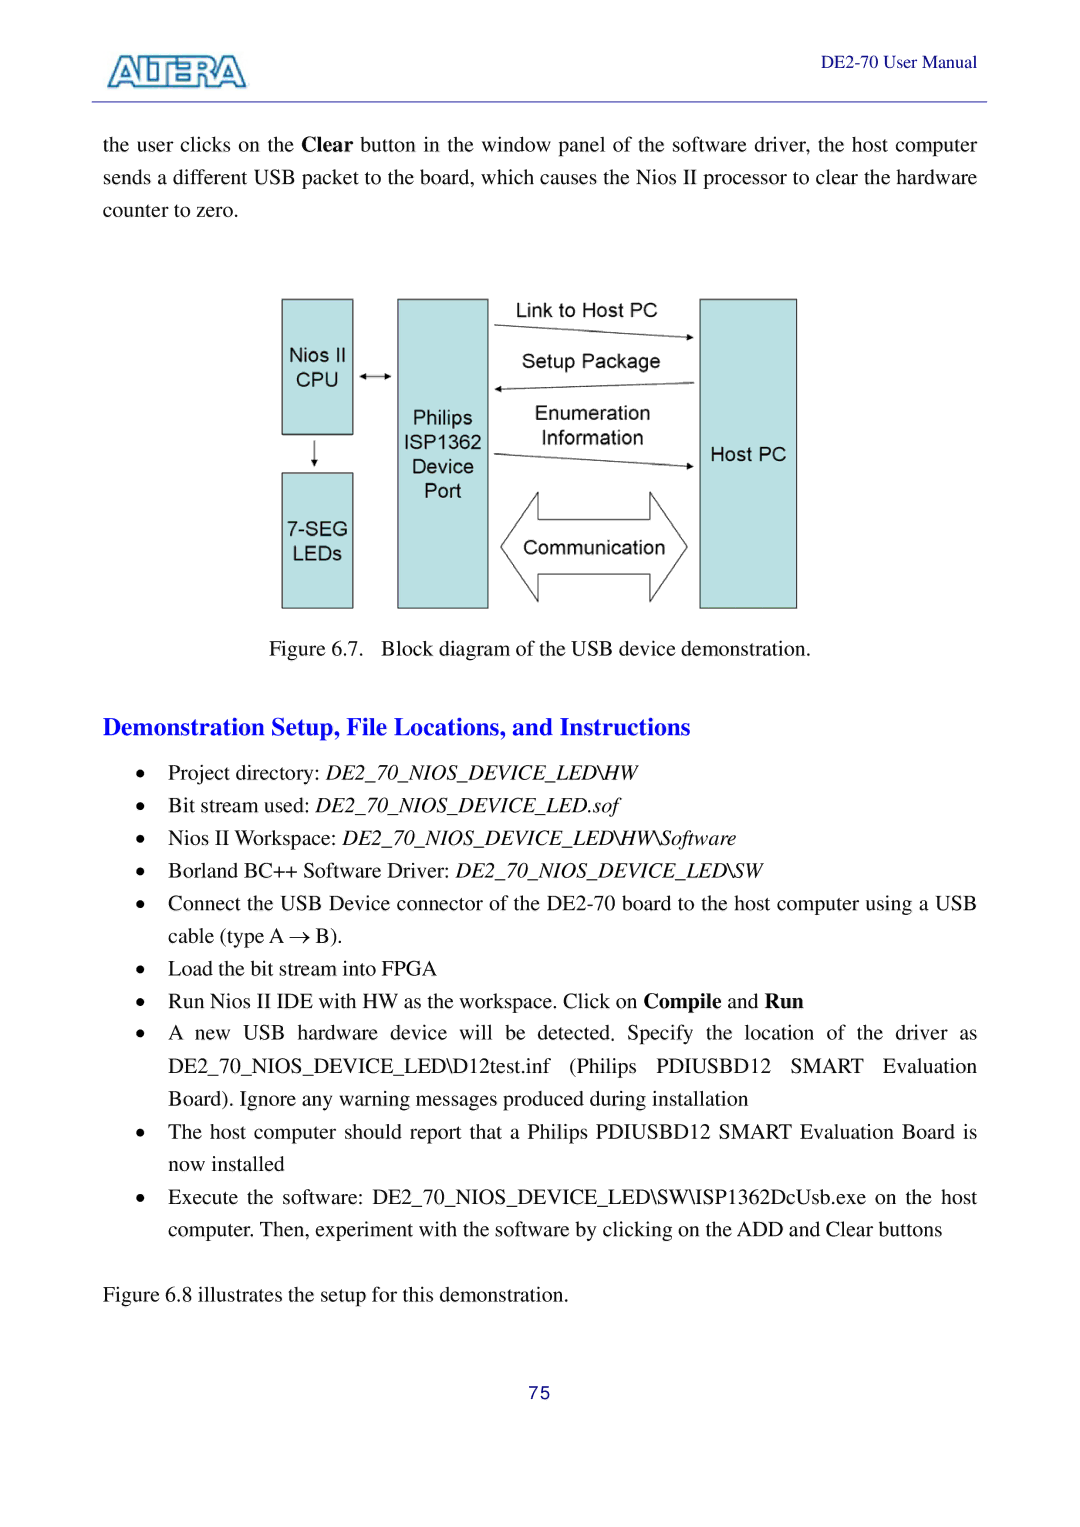
the user clicks on the Clear button in the window panel of the software driver, the host computer sends a different USB packet to the board, which causes the Nios II processor to clear the hardware counter to zero.
Figure 6.7. Block diagram of the USB device demonstration.
Demonstration Setup, File Locations, and Instructions
•Project directory: DE2_70_NIOS_DEVICE_LED\HW
•Bit stream used: DE2_70_NIOS_DEVICE_LED.sof
•Nios II Workspace: DE2_70_NIOS_DEVICE_LED\HW\Software
•Borland BC++ Software Driver: DE2_70_NIOS_DEVICE_LED\SW
•Connect the USB Device connector of the
•Load the bit stream into FPGA
•Run Nios II IDE with HW as the workspace. Click on Compile and Run
•A new USB hardware device will be detected. Specify the location of the driver as DE2_70_NIOS_DEVICE_LED\D12test.inf (Philips PDIUSBD12 SMART Evaluation Board). Ignore any warning messages produced during installation
•The host computer should report that a Philips PDIUSBD12 SMART Evaluation Board is now installed
•Execute the software: DE2_70_NIOS_DEVICE_LED\SW\ISP1362DcUsb.exe on the host computer. Then, experiment with the software by clicking on the ADD and Clear buttons
Figure 6.8 illustrates the setup for this demonstration.
75
