71
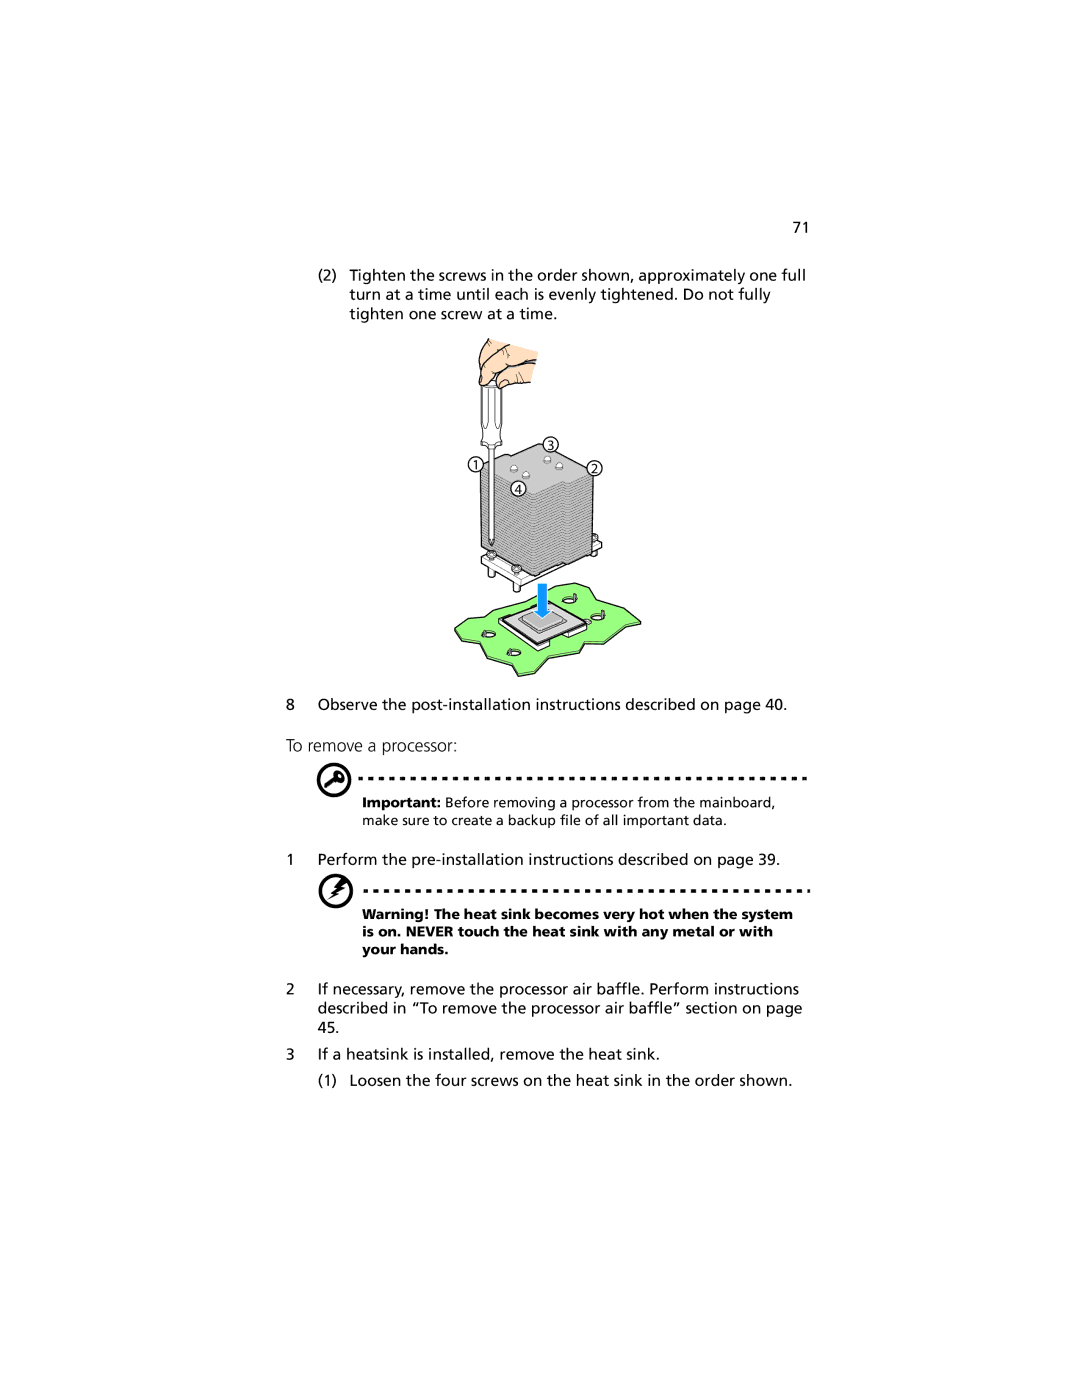
(2)Tighten the screws in the order shown, approximately one full turn at a time until each is evenly tightened. Do not fully tighten one screw at a time.
3
1 ![]()
![]()
![]() 2
2
4
8 Observe the
To remove a processor:
Important: Before removing a processor from the mainboard, make sure to create a backup file of all important data.
1 Perform the
Warning! The heat sink becomes very hot when the system is on. NEVER touch the heat sink with any metal or with your hands.
2If necessary, remove the processor air baffle. Perform instructions described in “To remove the processor air baffle” section on page 45.
3If a heatsink is installed, remove the heat sink.
(1)Loosen the four screws on the heat sink in the order shown.