51
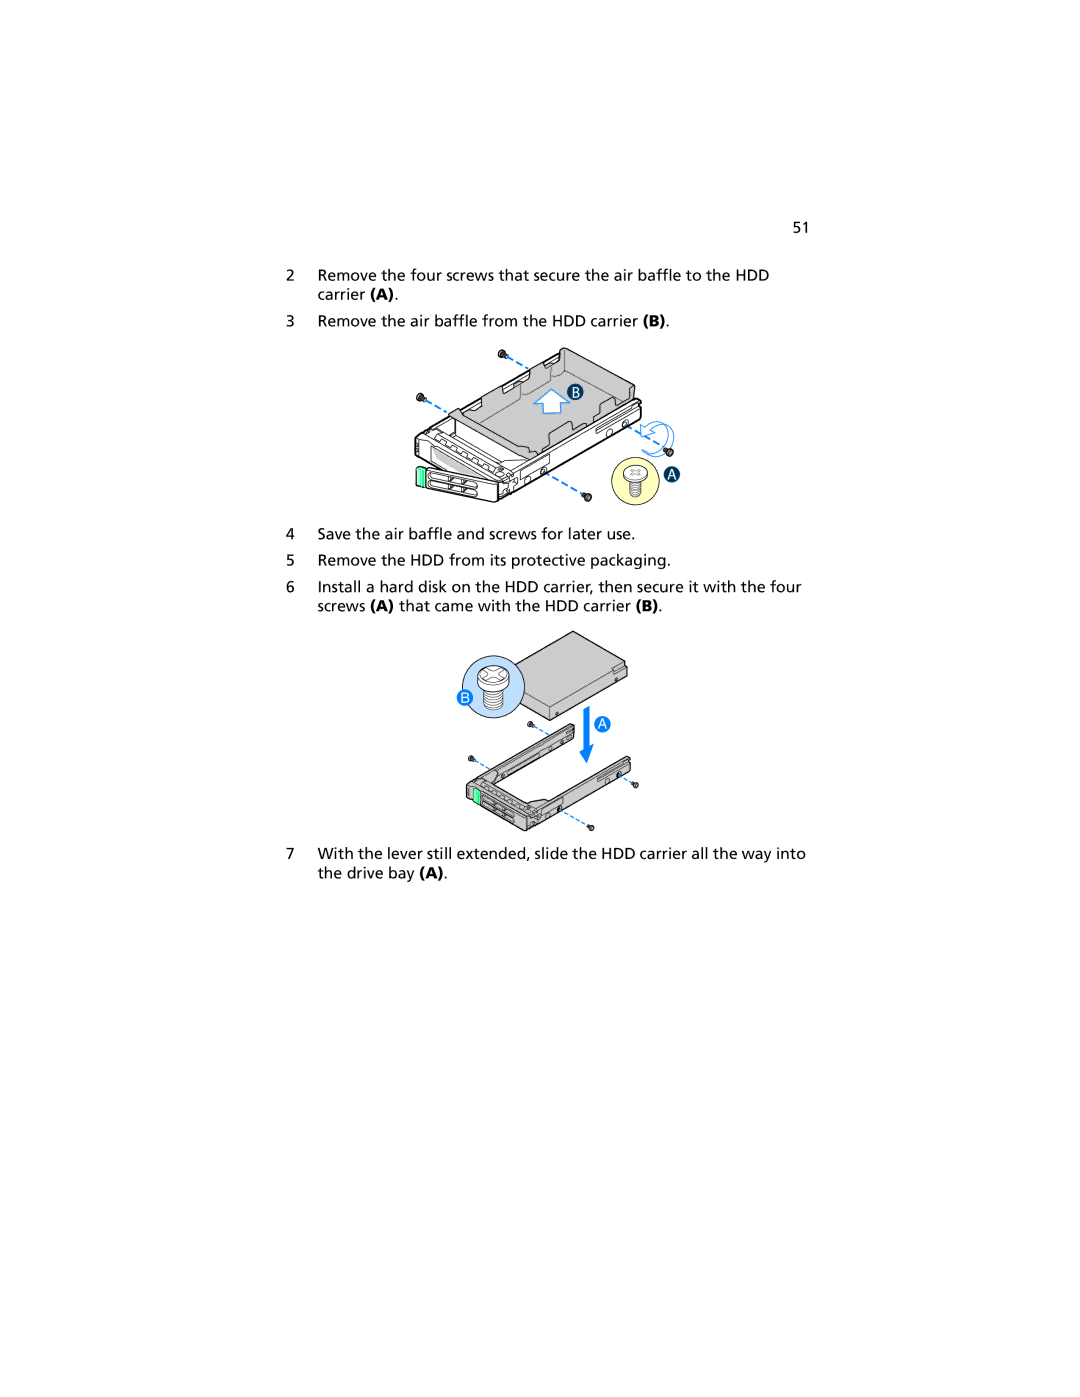
2Remove the four screws that secure the air baffle to the HDD carrier (A).
3Remove the air baffle from the HDD carrier (B).
4Save the air baffle and screws for later use.
5Remove the HDD from its protective packaging.
6Install a hard disk on the HDD carrier, then secure it with the four screws (A) that came with the HDD carrier (B).
B
A
7With the lever still extended, slide the HDD carrier all the way into the drive bay (A).