Copying and activating the customer’s administration and options
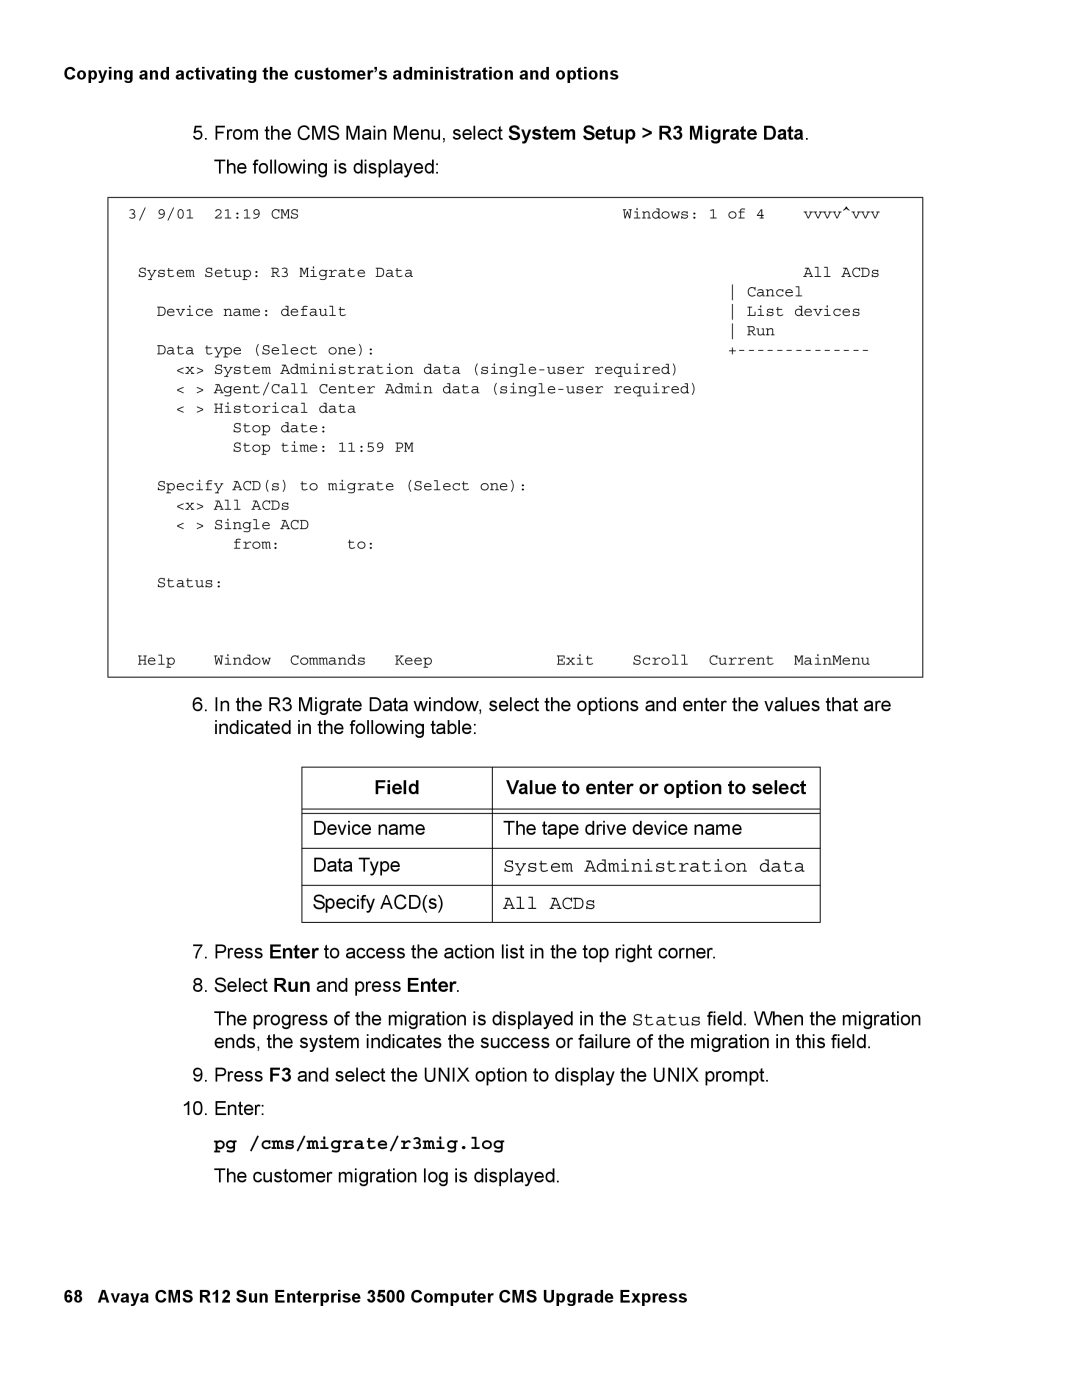
5.From the CMS Main Menu, select System Setup > R3 Migrate Data. The following is displayed:
3/ 9/01 | 21:19 CMS | Windows: 1 of 4 | vvvv^vvv |
System | Setup: R3 Migrate Data |
| All ACDs |
|
| Cancel |
|
Device name: default | List devices | ||
|
| Run |
|
Data | type (Select one): | ||
<x> System Administration data
<> Agent/Call Center Admin data
<> Historical data
| Stop | date: |
|
|
| Stop | time: 11:59 PM |
|
|
Specify ACD(s) to migrate (Select one): |
|
| ||
<x> | All ACDs |
|
| |
< > | Single | ACD |
|
|
| from: | to: |
|
|
Status: |
|
|
| |
Help | Window | Commands Keep | Exit | Scroll Current MainMenu |
6.In the R3 Migrate Data window, select the options and enter the values that are indicated in the following table:
Field | Value to enter or option to select |
|
|
|
|
Device name | The tape drive device name |
|
|
Data Type | System Administration data |
|
|
Specify ACD(s) | All ACDs |
|
|
7.Press Enter to access the action list in the top right corner.
8.Select Run and press Enter.
The progress of the migration is displayed in the Status field. When the migration ends, the system indicates the success or failure of the migration in this field.
9.Press F3 and select the UNIX option to display the UNIX prompt.
10.Enter:
pg /cms/migrate/r3mig.log
The customer migration log is displayed.
68 Avaya CMS R12 Sun Enterprise 3500 Computer CMS Upgrade Express
