Removing and Installing a PRP
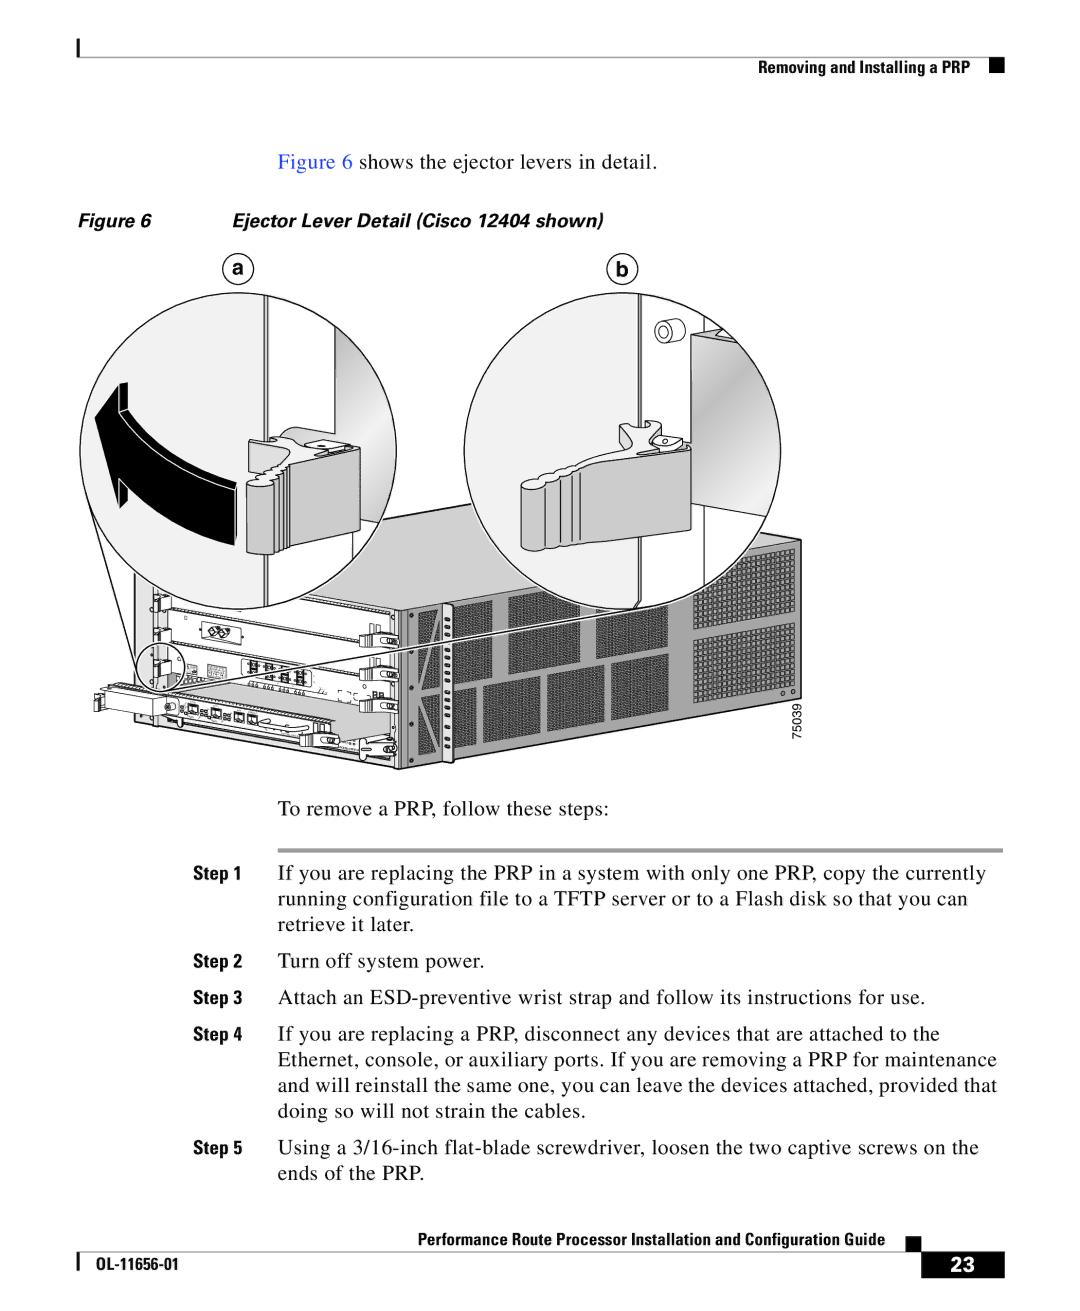
Figure 6 shows the ejector levers in detail.
Figure 6 | Ejector Lever Detail (Cisco 12404 shown) |
|
| a | b |
 CLEAN
CLEAN
ETH 0
PRIMARY
CLASS 1 LASER PRODUCT |
|
LASERPRODUKT DER KLASSE |
|
PRODUIT LASER DE CLASSE 11 |
|
PRODUCTO LASER DE CLASSE 1 | 0 |
1 2 3
ETH 1 | AUX | |
|
| CONSOLE |
PRIMARY
|
| CR |
|
|
| ITICMAJ M |
|
RESET | PERFORMANCE ROUTE | AL ORINOR |
|
|
| MBUS | |
|
| PROCESSOR 1 | FAIL |
|
|
| ENABLE |
|
|
| CONSOLIDATED |
|
|
| SWITCH FABRIC |
75039
To remove a PRP, follow these steps:
Step 1 If you are replacing the PRP in a system with only one PRP, copy the currently running configuration file to a TFTP server or to a Flash disk so that you can retrieve it later.
Step 2 Turn off system power.
Step 3 Attach an
Step 4 If you are replacing a PRP, disconnect any devices that are attached to the Ethernet, console, or auxiliary ports. If you are removing a PRP for maintenance and will reinstall the same one, you can leave the devices attached, provided that doing so will not strain the cables.
Step 5 Using a
|
| Performance Route Processor Installation and Configuration Guide |
|
|
|
|
| ||
|
|
| 23 | |
|
|
|