Additional Configuration and Maintenance Tasks
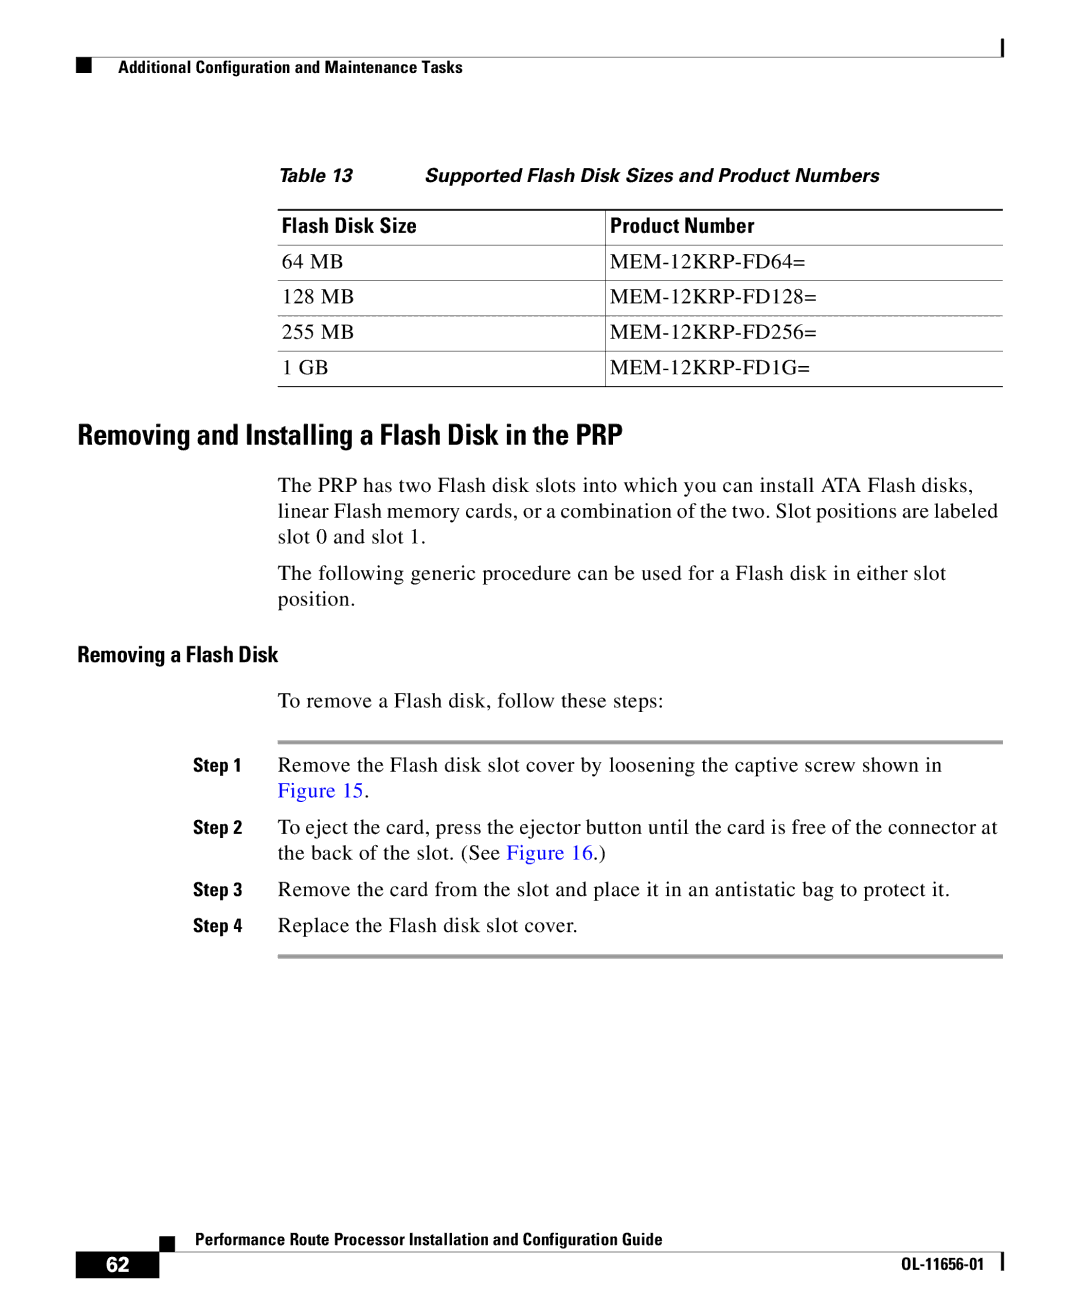
Table 13 | Supported Flash Disk Sizes and Product Numbers | |
|
|
|
Flash Disk Size |
| Product Number |
|
|
|
64 MB |
| |
|
|
|
128 MB |
| |
|
|
|
255 MB |
| |
|
|
|
1 GB |
| |
|
|
|
Removing and Installing a Flash Disk in the PRP
The PRP has two Flash disk slots into which you can install ATA Flash disks, linear Flash memory cards, or a combination of the two. Slot positions are labeled slot 0 and slot 1.
The following generic procedure can be used for a Flash disk in either slot position.
Removing a Flash Disk
To remove a Flash disk, follow these steps:
Step 1 Remove the Flash disk slot cover by loosening the captive screw shown in Figure 15.
Step 2 To eject the card, press the ejector button until the card is free of the connector at the back of the slot. (See Figure 16.)
Step 3 Remove the card from the slot and place it in an antistatic bag to protect it. Step 4 Replace the Flash disk slot cover.
| Performance Route Processor Installation and Configuration Guide |
62 |