Appendix B | Virtual Passage SSL VPN Client |
3. On the Security Warning screen, click Yes.
Click Yes to Install
4.A second Security Warning screen asks you if you want to install XTunnel, the Virtual Passage application.
Click Install.
Click Install
5.The Hardware Installation screen asks you if you want to continue with the installation.
Click Continue Anyway.
Click Continue Anyway
The Web Cache Cleaner and XTunnel are installed in C:\\WINDOWS\Downloaded Program Files.
Installation Complete
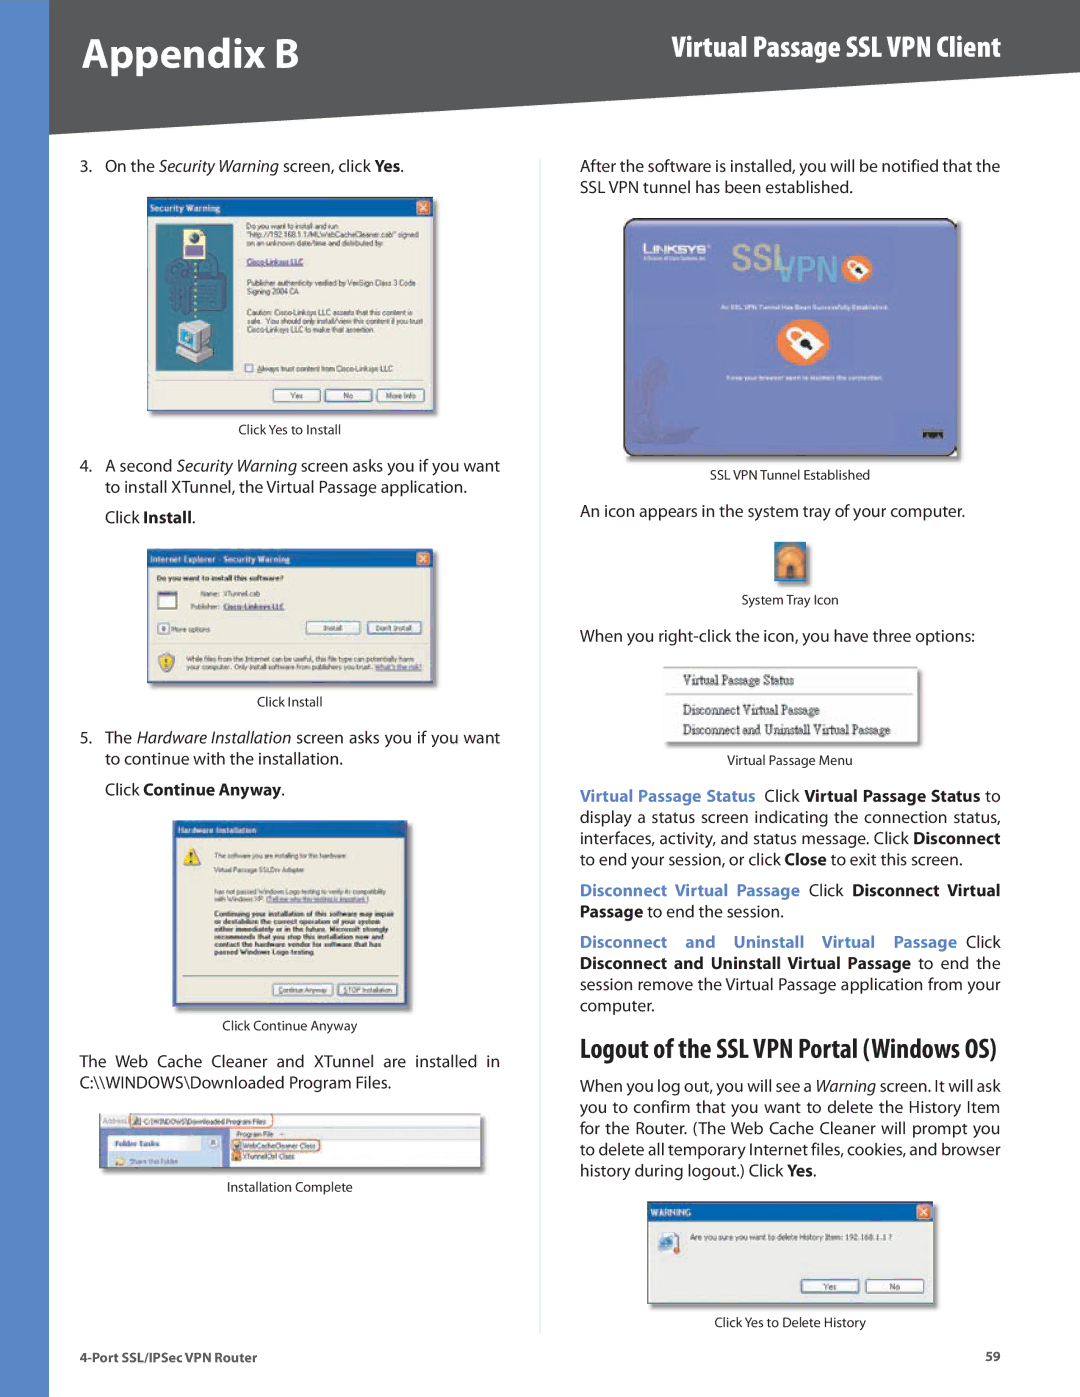
After the software is installed, you will be notified that the SSL VPN tunnel has been established.
SSL VPN Tunnel Established
An icon appears in the system tray of your computer.
System Tray Icon
When you right-click the icon, you have three options:
Virtual Passage Menu
Virtual Passage Status Click Virtual Passage Status to display a status screen indicating the connection status, interfaces, activity, and status message. Click Disconnect to end your session, or click Close to exit this screen.
Disconnect Virtual Passage Click Disconnect Virtual Passage to end the session.
Disconnect and Uninstall Virtual Passage Click Disconnect and Uninstall Virtual Passage to end the session remove the Virtual Passage application from your computer.
Logout of the SSL VPN Portal (Windows OS)
When you log out, you will see a Warning screen. It will ask you to confirm that you want to delete the History Item for the Router. (The Web Cache Cleaner will prompt you to delete all temporary Internet files, cookies, and browser history during logout.) Click Yes.
Click Yes to Delete History
59