Appendix C | Bandwidth Management |
Creation of New Bandwidth Management Rules
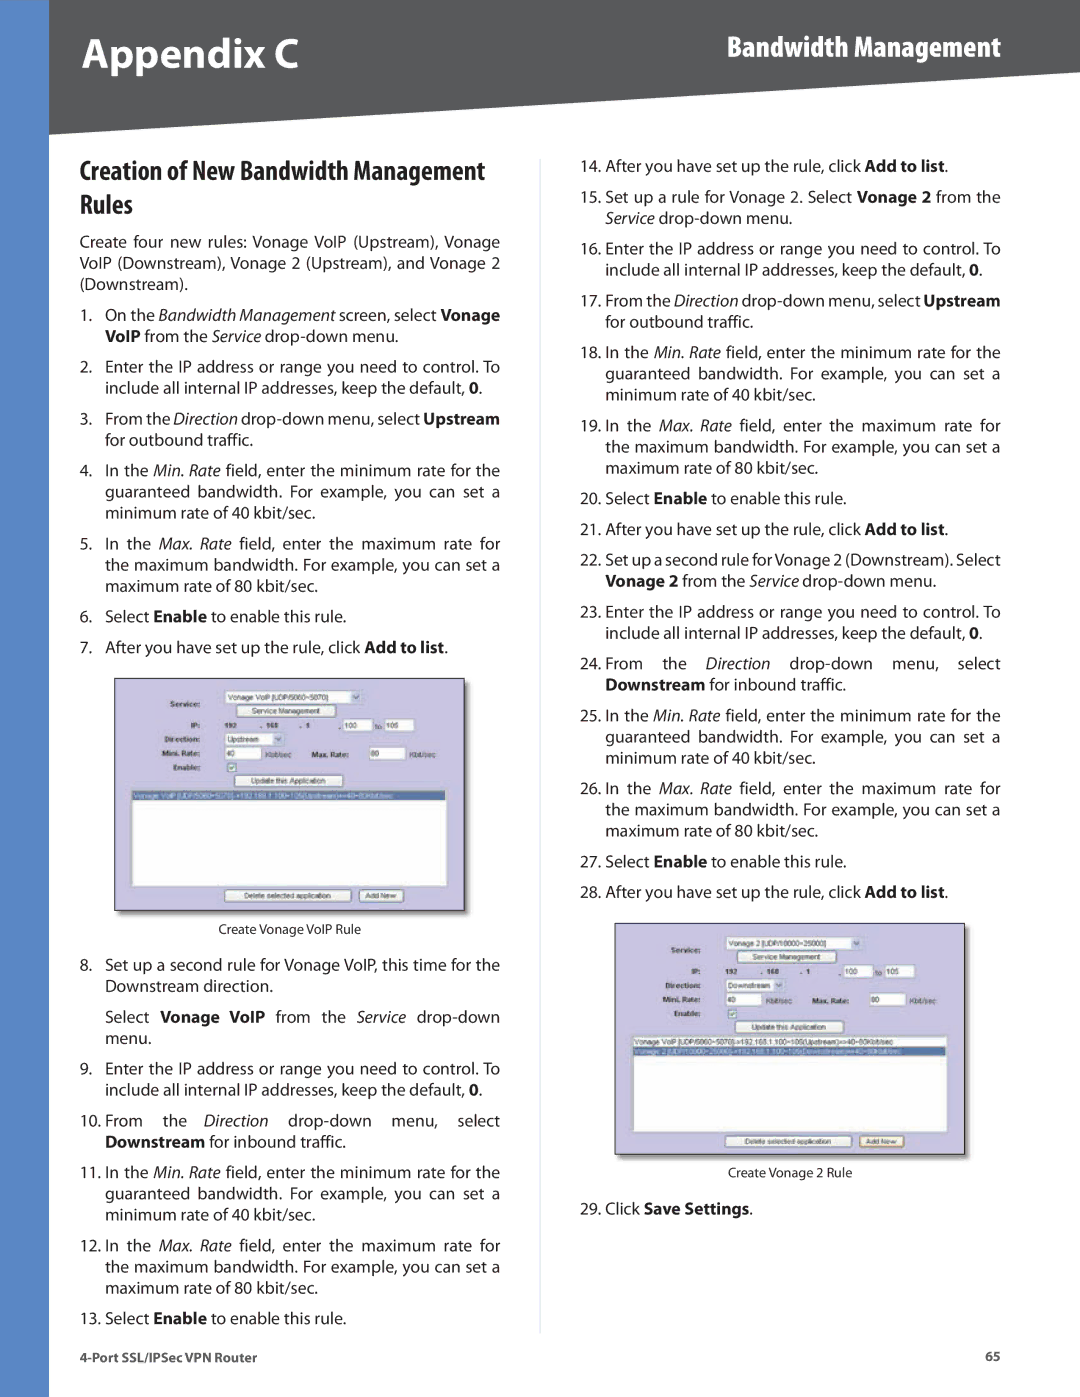
Create four new rules: Vonage VoIP (Upstream), Vonage VoIP (Downstream), Vonage 2 (Upstream), and Vonage 2 (Downstream).
1.On the Bandwidth Management screen, select Vonage VoIP from the Service
2.Enter the IP address or range you need to control. To include all internal IP addresses, keep the default, 0.
3.From the Direction
4.In the Min. Rate field, enter the minimum rate for the guaranteed bandwidth. For example, you can set a minimum rate of 40 kbit/sec.
5.In the Max. Rate field, enter the maximum rate for the maximum bandwidth. For example, you can set a maximum rate of 80 kbit/sec.
6.Select Enable to enable this rule.
7.After you have set up the rule, click Add to list.
Create Vonage VoIP Rule
8.Set up a second rule for Vonage VoIP, this time for the Downstream direction.
Select Vonage VoIP from the Service
9.Enter the IP address or range you need to control. To include all internal IP addresses, keep the default, 0.
10.From the Direction
11.In the Min. Rate field, enter the minimum rate for the guaranteed bandwidth. For example, you can set a minimum rate of 40 kbit/sec.
12.In the Max. Rate field, enter the maximum rate for the maximum bandwidth. For example, you can set a maximum rate of 80 kbit/sec.
13.Select Enable to enable this rule.
14.After you have set up the rule, click Add to list.
15.Set up a rule for Vonage 2. Select Vonage 2 from the Service
16.Enter the IP address or range you need to control. To include all internal IP addresses, keep the default, 0.
17.From the Direction
18.In the Min. Rate field, enter the minimum rate for the guaranteed bandwidth. For example, you can set a minimum rate of 40 kbit/sec.
19.In the Max. Rate field, enter the maximum rate for the maximum bandwidth. For example, you can set a maximum rate of 80 kbit/sec.
20.Select Enable to enable this rule.
21.After you have set up the rule, click Add to list.
22.Set up a second rule for Vonage 2 (Downstream). Select Vonage 2 from the Service
23.Enter the IP address or range you need to control. To include all internal IP addresses, keep the default, 0.
24.From the Direction
25.In the Min. Rate field, enter the minimum rate for the guaranteed bandwidth. For example, you can set a minimum rate of 40 kbit/sec.
26.In the Max. Rate field, enter the maximum rate for the maximum bandwidth. For example, you can set a maximum rate of 80 kbit/sec.
27.Select Enable to enable this rule.
28.After you have set up the rule, click Add to list.
Create Vonage 2 Rule
29.Click Save Settings.
65 |