NOTE: Your computer is designed for peak performance with specific DIMMs that are validated through rigorous testing. The system may not recognize other synchronous dynamic
Installing a DIMM
1.Remove the computer cover according to the instructions in “Removing and Replacing the Computer Cover” found earlier in this chapter.
2.Remove the
3.Remove the expansion cards according to the instructions in “Removing Expan- sion Cards” found earlier in this chapter.
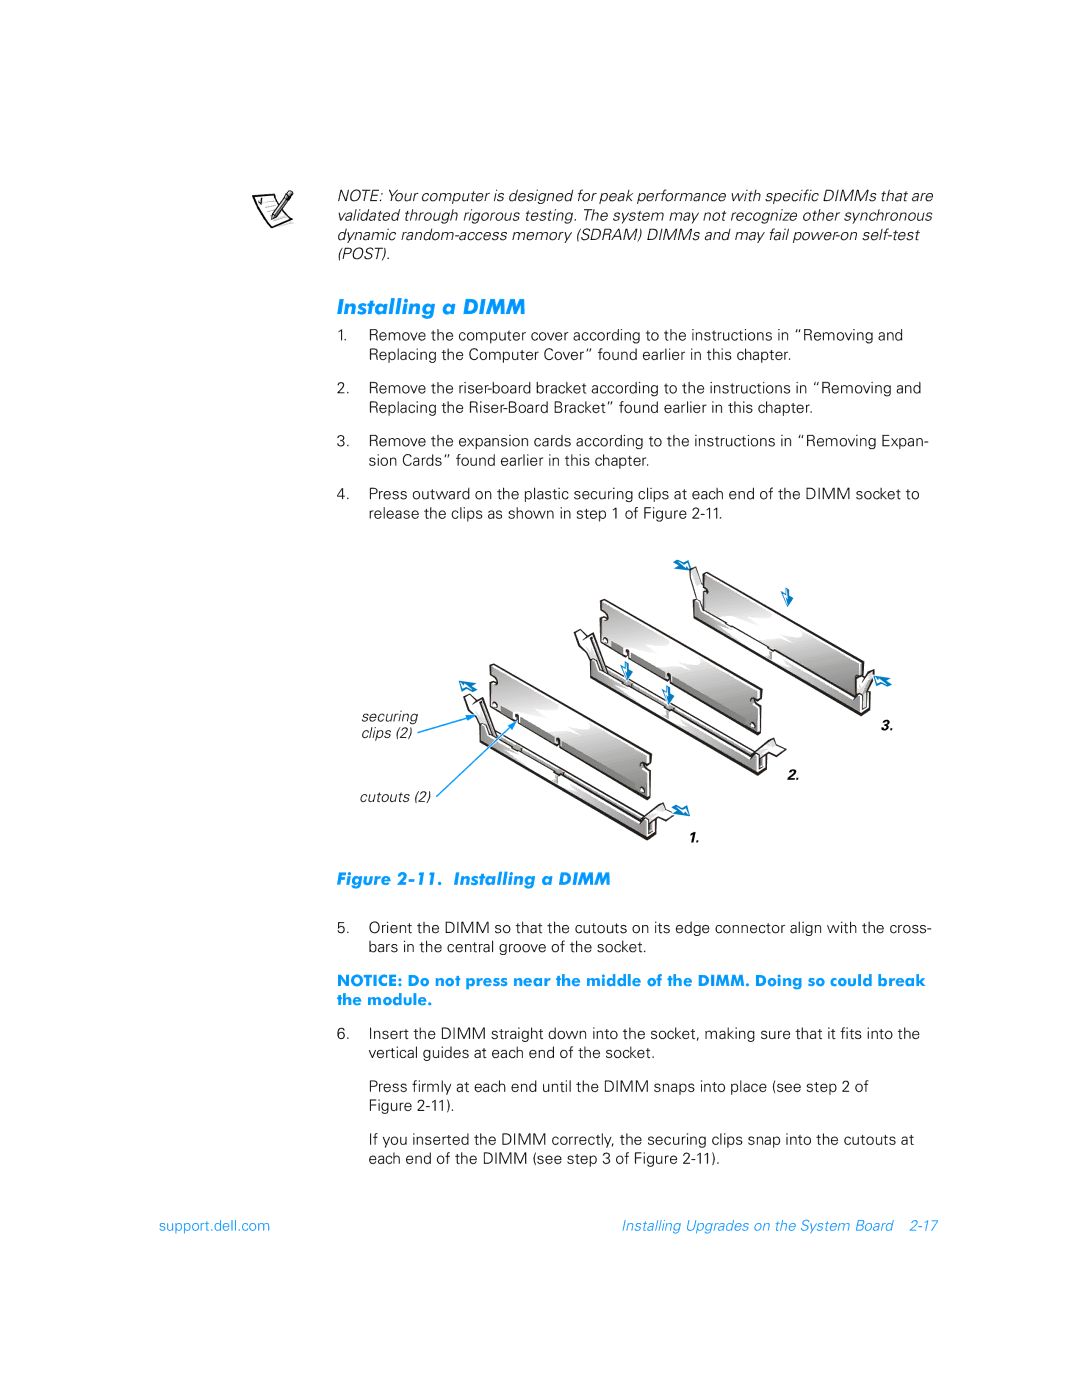
4.Press outward on the plastic securing clips at each end of the DIMM socket to release the clips as shown in step 1 of Figure
securing | 3. | |
clips (2) | ||
| ||
| 2. | |
cutouts (2) |
|
1.
Figure 2-11. Installing a DIMM
5.Orient the DIMM so that the cutouts on its edge connector align with the cross- bars in the central groove of the socket.
NOTICE: Do not press near the middle of the DIMM. Doing so could break the module.
6.Insert the DIMM straight down into the socket, making sure that it fits into the vertical guides at each end of the socket.
Press firmly at each end until the DIMM snaps into place (see step 2 of Figure
If you inserted the DIMM correctly, the securing clips snap into the cutouts at each end of the DIMM (see step 3 of Figure
support.dell.com | Installing Upgrades on the System Board |