NOTICE: Use one hand to support the riser board while installing an expansion card into an expansion-card connector. Otherwise, damage to the riser-board connector or system board may occur.
7.Insert the expansion card firmly into the expansion-card connector.
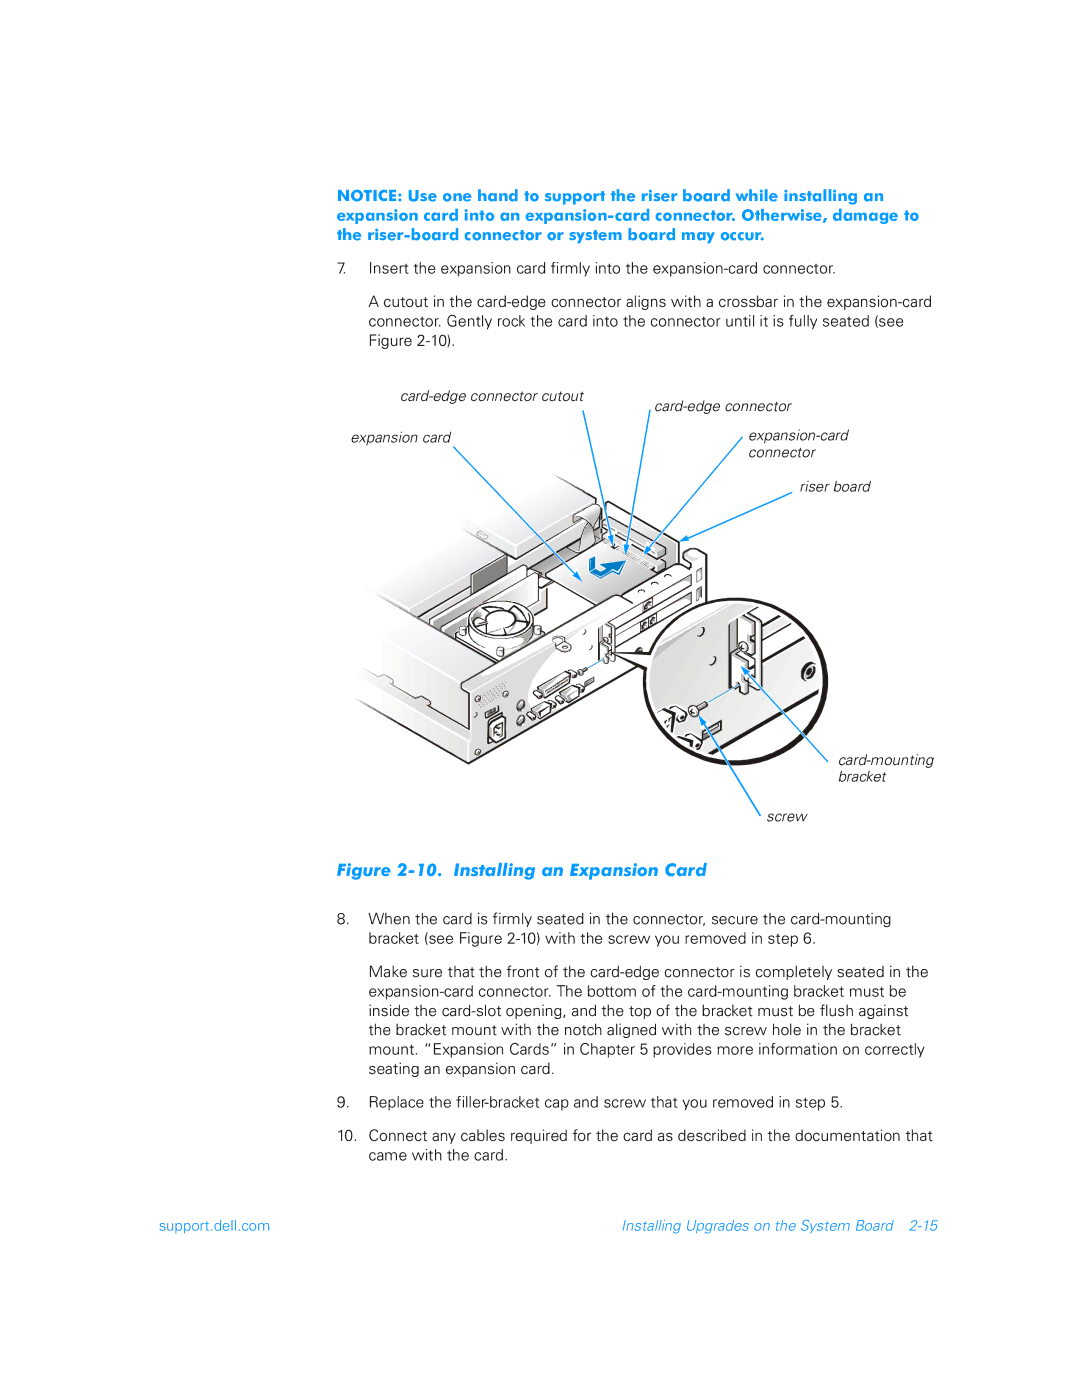
A cutout in the card-edge connector aligns with a crossbar in the expansion-card connector. Gently rock the card into the connector until it is fully seated (see Figure 2-10).
card-edge connector cutout | card-edge connector |
|
expansion card | expansion-card |
| connector |
| riser board |
card-mounting bracket
screw
Figure 2-10. Installing an Expansion Card
8.When the card is firmly seated in the connector, secure the card-mounting bracket (see Figure 2-10) with the screw you removed in step 6.
Make sure that the front of the card-edge connector is completely seated in the expansion-card connector. The bottom of the card-mounting bracket must be inside the card-slot opening, and the top of the bracket must be flush against the bracket mount with the notch aligned with the screw hole in the bracket mount. “Expansion Cards” in Chapter 5 provides more information on correctly seating an expansion card.
9.Replace the filler-bracket cap and screw that you removed in step 5.
10.Connect any cables required for the card as described in the documentation that came with the card.
support.dell.com | Installing Upgrades on the System Board 2-15 |