6Remove the screws that secure the hard-drive cage to the chassis. See Figure 3-31.

7Remove the screws that secure the front-panel assemblies to the chassis. See Figure 3-32.

8Remove the hard-drive cage from the chassis. See Figure 3-32.

9Remove the screws that secure the front-panel assembly to the hard-drive cage. See Figure 3-34.

10Remove the front-panel assembly from the hard-drive cage. See Figure 3-34.

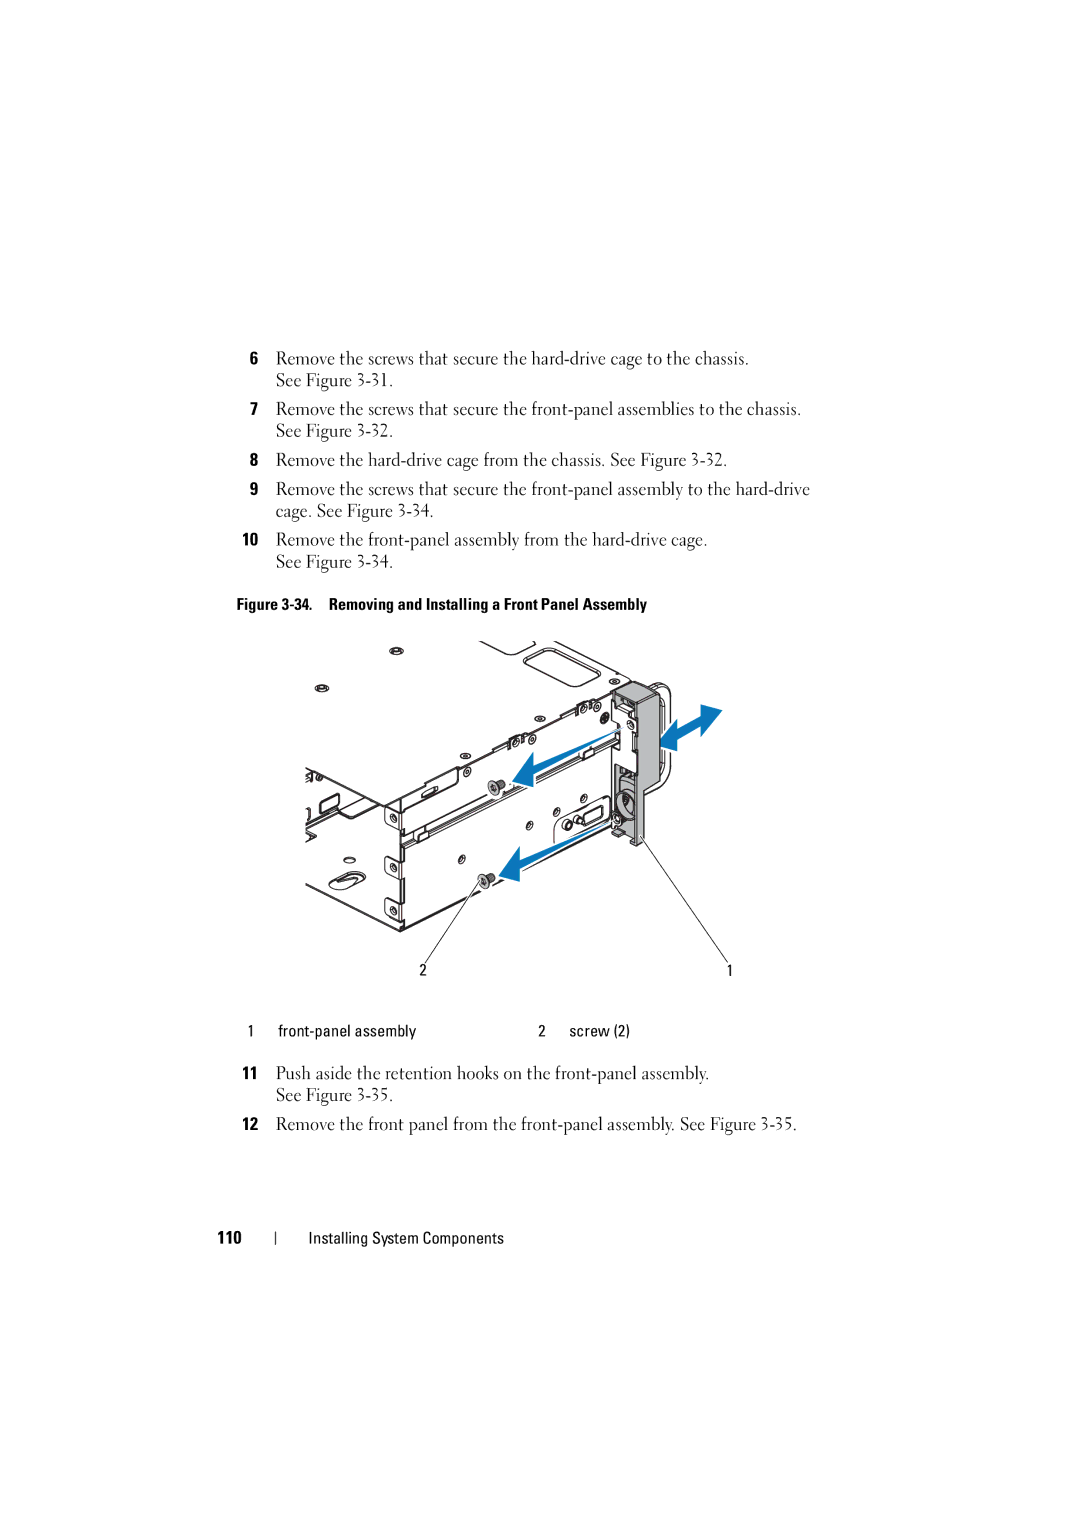
Figure 3-34. Removing and Installing a Front Panel Assembly

2

1

1 front-panel assembly

2 screw (2)

11Push aside the retention hooks on the front-panel assembly. See Figure 3-35.

12Remove the front panel from the front-panel assembly. See Figure 3-35.

110

Installing System Components

Page 110
Image 110
Dell C6100 owner manual Removing and Installing a Front Panel Assembly