4Disconnect all the cables from the first power distribution board. See Figure
Note the routing of the cable underneath the tabs on the chassis as you remove them from the system. You must route these cables properly when you replace them to prevent the cables from being pinched or crimped.
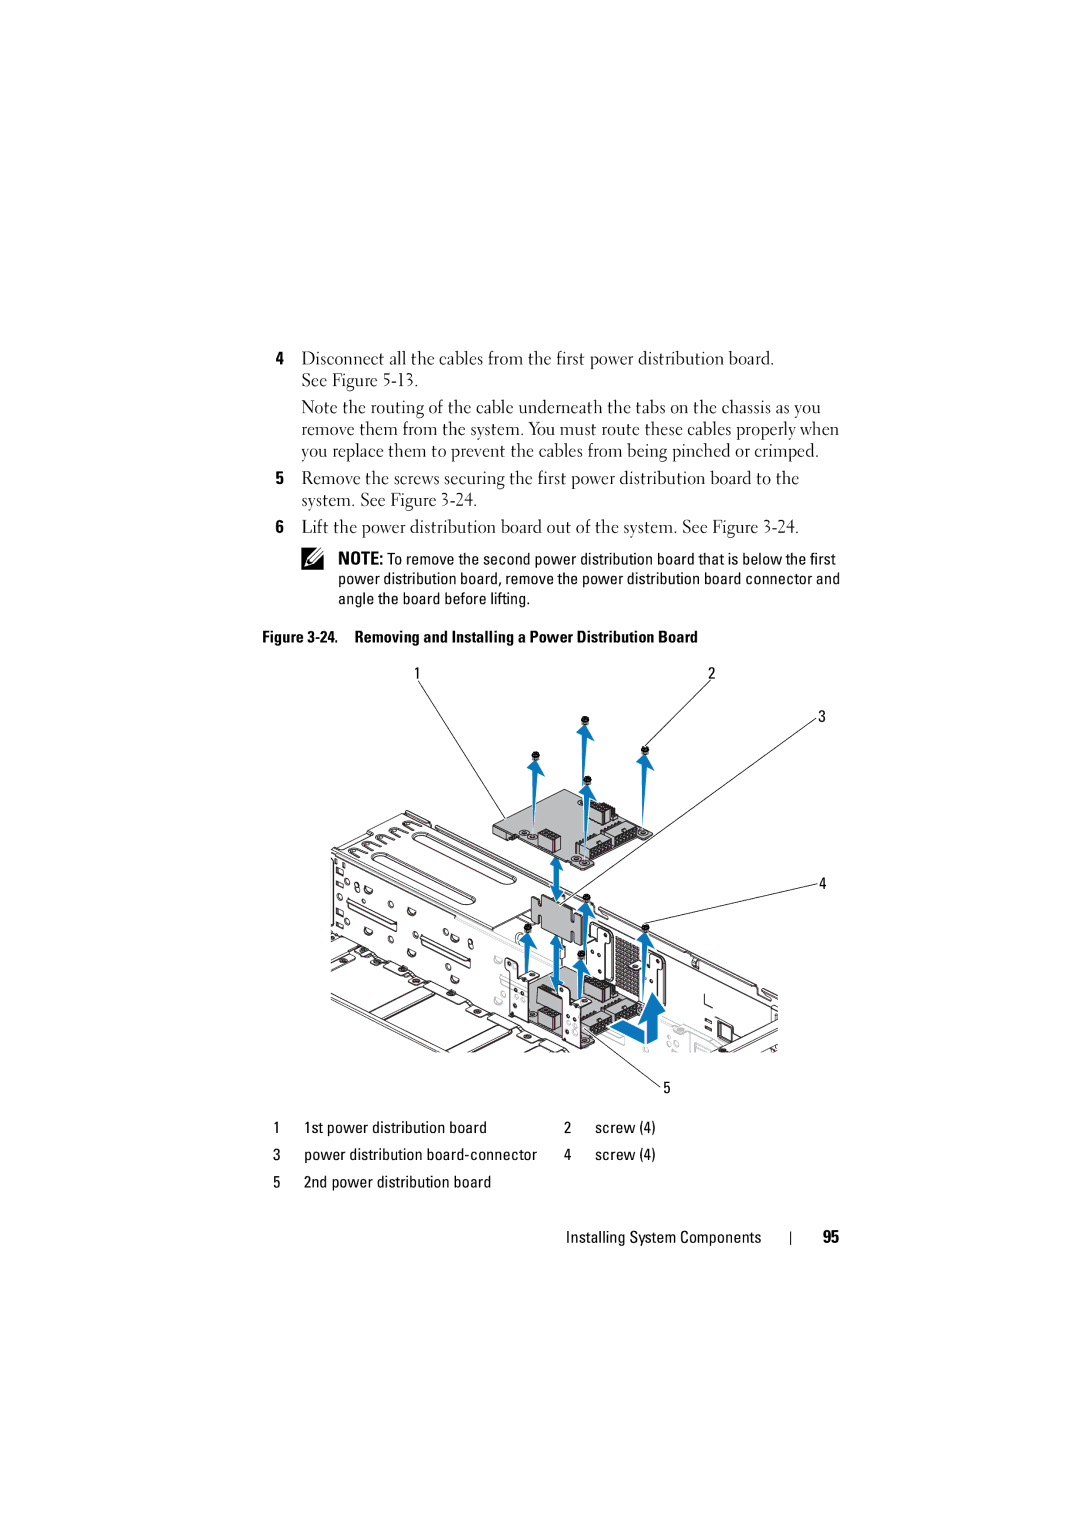
5Remove the screws securing the first power distribution board to the system. See Figure
6Lift the power distribution board out of the system. See Figure
NOTE: To remove the second power distribution board that is below the first power distribution board, remove the power distribution board connector and angle the board before lifting.
Figure 3-24. Removing and Installing a Power Distribution Board
1 | 2 |
3
4
5
1 | 1st power distribution board | 2 | screw (4) |
3 | power distribution | 4 | screw (4) |
5 | 2nd power distribution board |
|
|
Installing System Components
95
