Part Names and Functions |
| 10 |
|
|
|
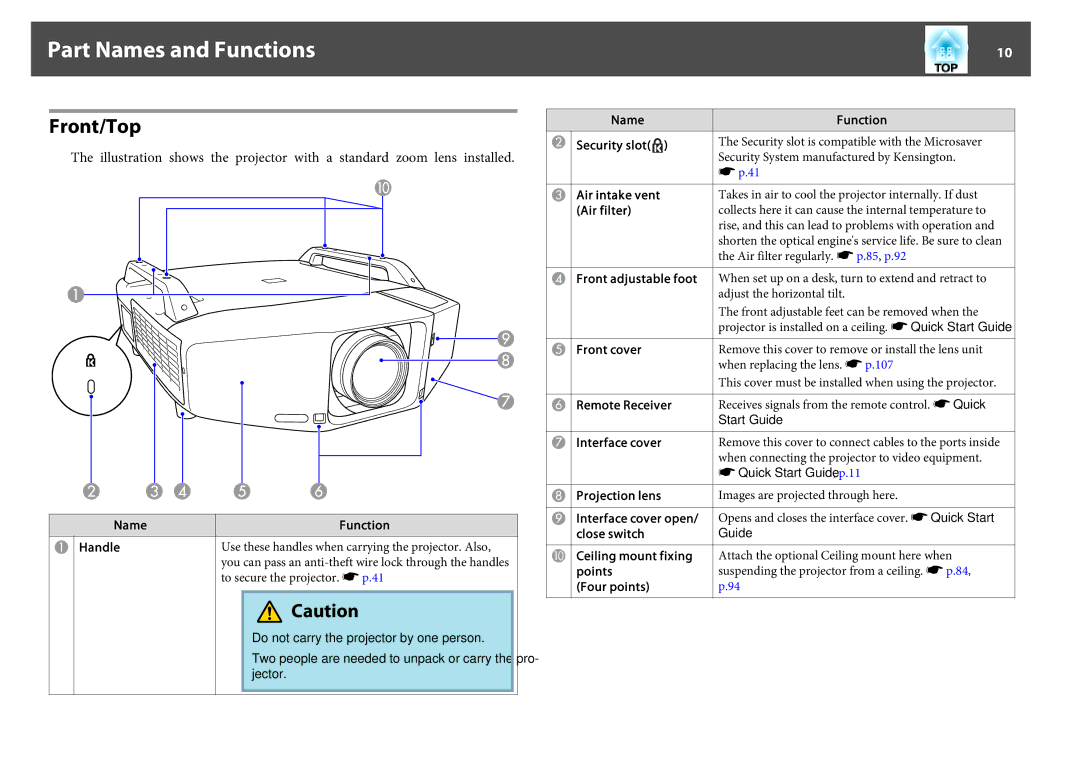
Front/Top
The illustration shows the projector with a standard zoom lens installed.
Name | Function | |
A Handle | Use these handles when carrying the projector. Also, |
|
| you can pass an | |
| to secure the projector. s p.41 | |
![]() Caution
Caution
Do not carry the projector by one person.
Two people are needed to unpack or carry the pro- jector.
Name | Function | |
B Security slot( ) | The Security slot is compatible with the Microsaver |
|
| Security System manufactured by Kensington. | |
sp.41
C Air intake vent | Takes in air to cool the projector internally. If dust |
(Air filter) | collects here it can cause the internal temperature to |
| rise, and this can lead to problems with operation and |
| shorten the optical engine's service life. Be sure to clean |
| the Air filter regularly. s p.85, p.92 |
DFront adjustable foot When set up on a desk, turn to extend and retract to
adjust the horizontal tilt.
|
|
|
|
| The front adjustable feet can be removed when the |
|
|
|
|
| projector is installed on a ceiling. s Quick Start Guide |
|
|
|
|
|
|
E Front cover |
| Remove this cover to remove or install the lens unit | |||
|
|
|
|
| when replacing the lens. s p.107 |
|
|
|
|
| This cover must be installed when using the projector. |
|
|
|
|
|
|
F Remote Receiver |
| Receives signals from the remote control. s Quick | |||
|
|
|
|
| Start Guide |
|
|
|
|
|
|
G Interface cover |
| Remove this cover to connect cables to the ports inside | |||
|
|
|
|
| when connecting the projector to video equipment. |
|
|
|
|
| s Quick Start Guide , p.11 |
|
|
|
|
|
|
H Projection lens |
| Images are projected through here. | |||
IInterface cover open/ Opens and closes the interface cover. s Quick Start
close switch | Guide |
JCeiling mount fixing Attach the optional Ceiling mount here when
points | suspending the projector from a ceiling. s p.84, |
(Four points) | p.94 |