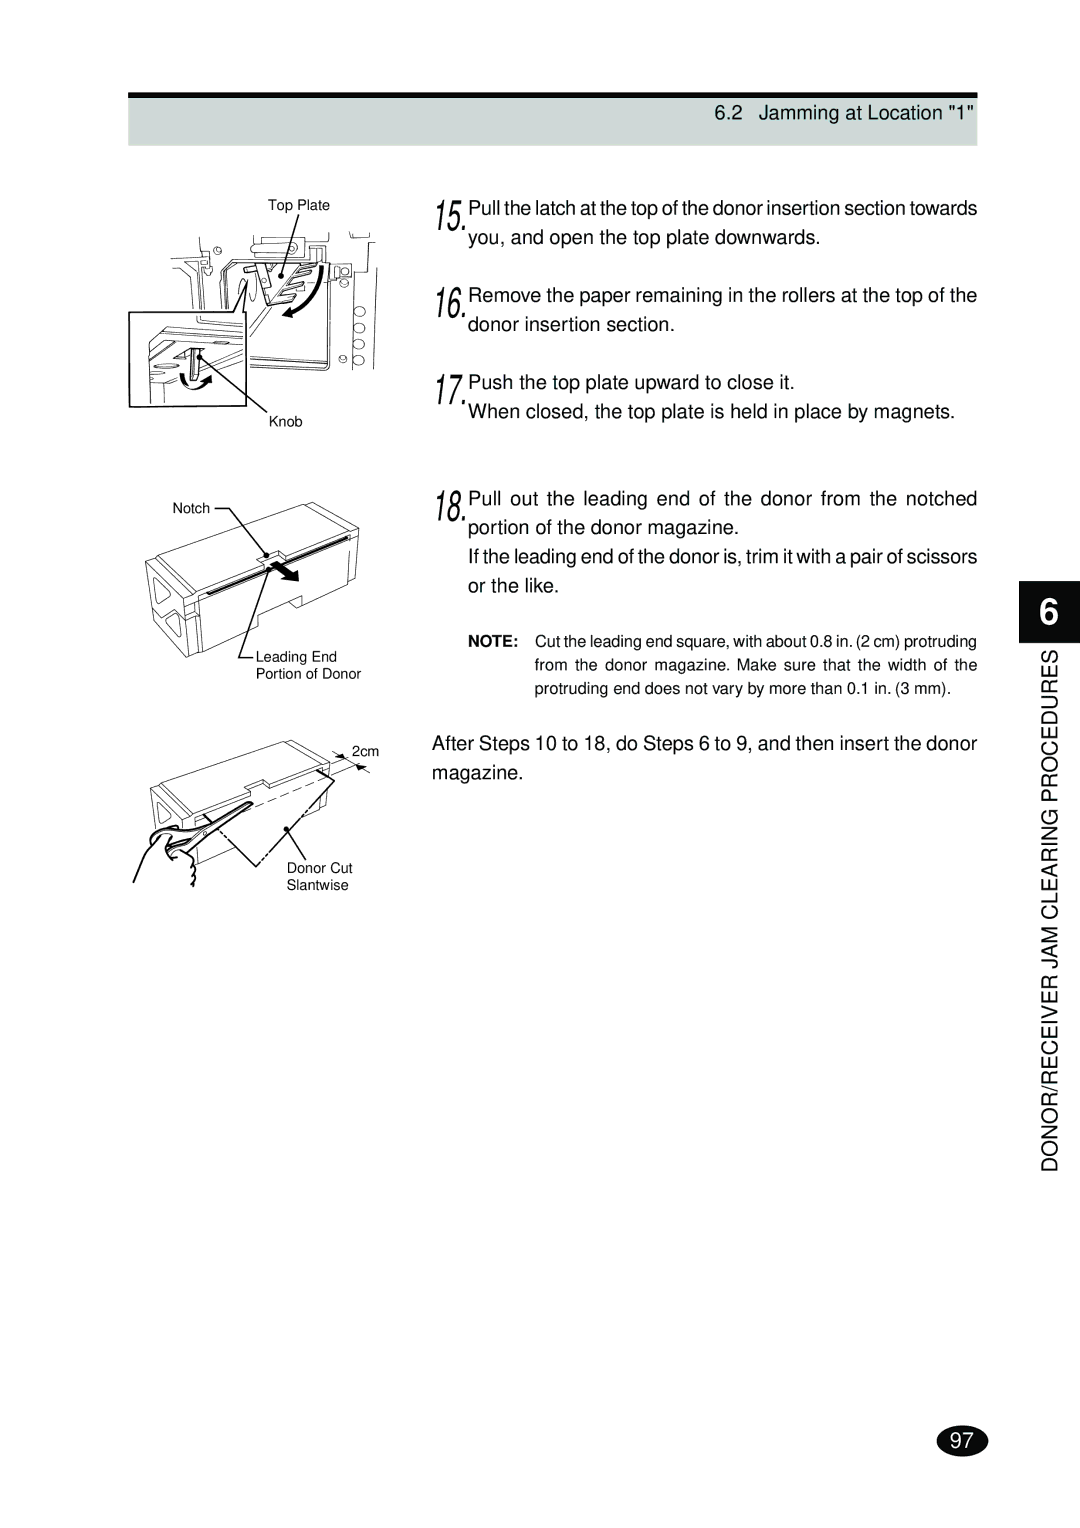
Top Plate
Knob
Notch
Leading End
Portion of Donor
2cm
Donor Cut
Slantwise
6.2 Jamming at Location "1"
15.Pull the latch at the top of the donor insertion section towards you, and open the top plate downwards.
16.Remove the paper remaining in the rollers at the top of the donor insertion section.
17.Push the top plate upward to close it.
When closed, the top plate is held in place by magnets.
18.Pull out the leading end of the donor from the notched portion of the donor magazine.
If the leading end of the donor is, trim it with a pair of scissors or the like.
NOTE: Cut the leading end square, with about 0.8 in. (2 cm) protruding from the donor magazine. Make sure that the width of the protruding end does not vary by more than 0.1 in. (3 mm).
After Steps 10 to 18, do Steps 6 to 9, and then insert the donor
magazine.
6
DONOR/RECEIVER JAM CLEARING PROCEDURES
97
