Installing a 3.5-inch device
1.Prepare the computer for disassembly (Preparation for disassembly on page 85).
2.Remove the access panel (Access panel on page 86).
3.Remove the front bezel (Front bezel on page 87). If you are installing a drive in a bay covered by a bezel blank, remove the bezel blank. See Bezel blanks on page 90 for more information.
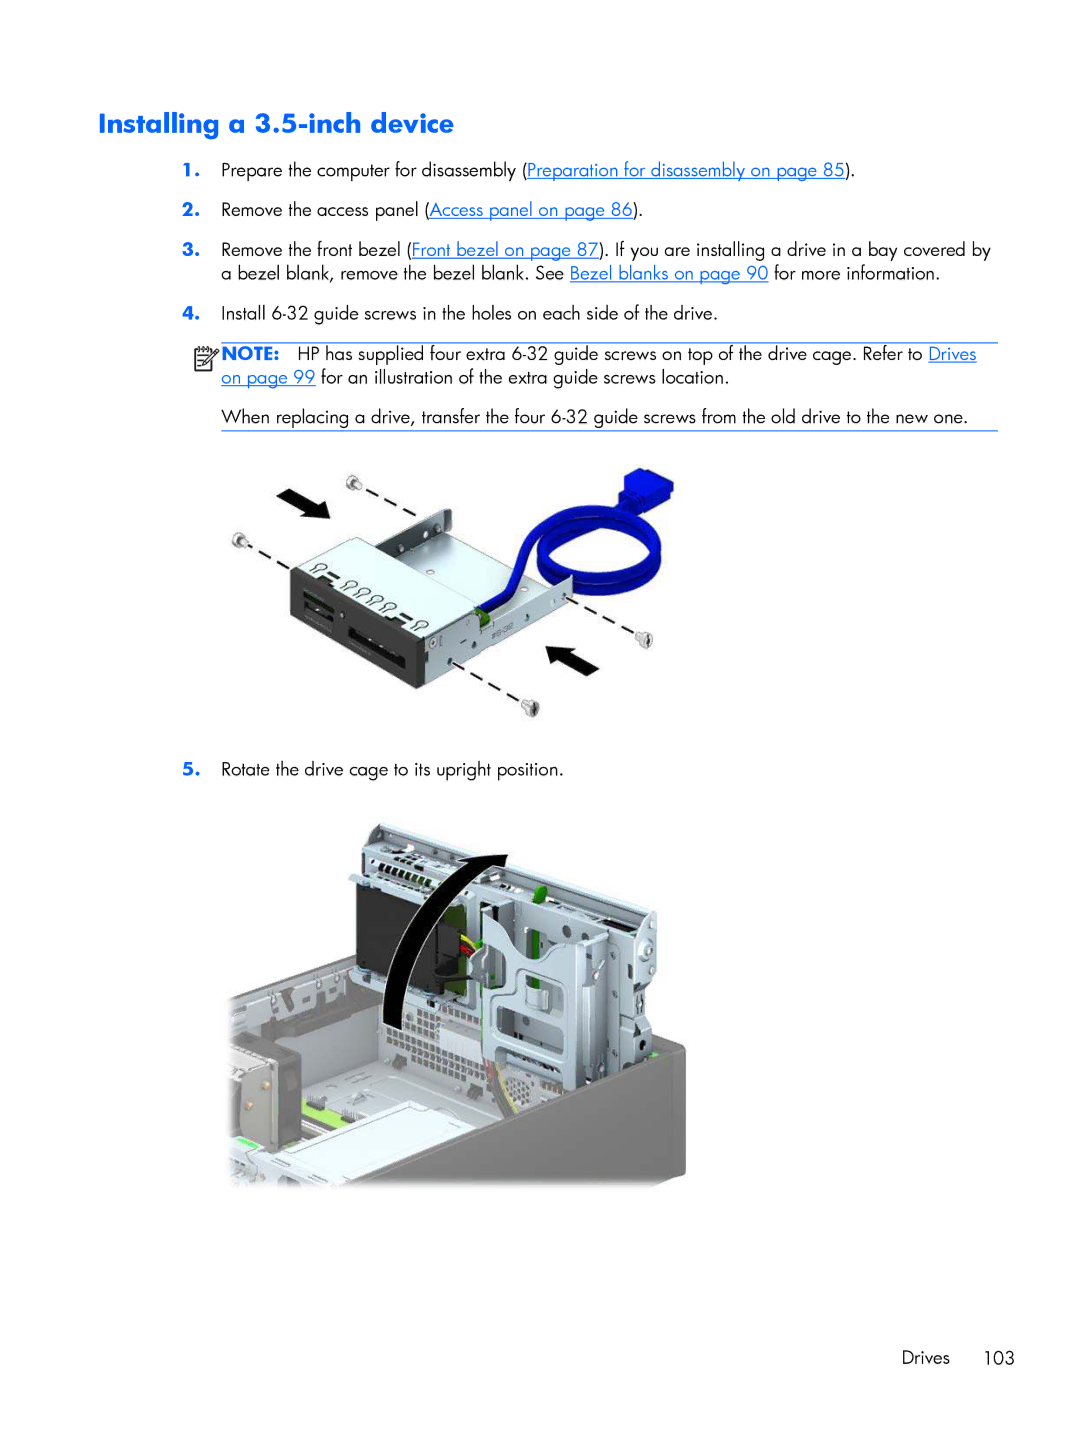
4.Install
![]()
![]()
![]()
![]() NOTE: HP has supplied four extra
NOTE: HP has supplied four extra
When replacing a drive, transfer the four
5.Rotate the drive cage to its upright position.
Drives 103