Speaker
Description | Spare part number |
|
|
Speaker |
|
|
|
1.Prepare the computer for disassembly (Preparation for Disassembly on page 56).
2.Remove the access panel (Computer Access Panel on page 57).
3.Remove the front fan assembly (Front Fan Assembly on page 82).
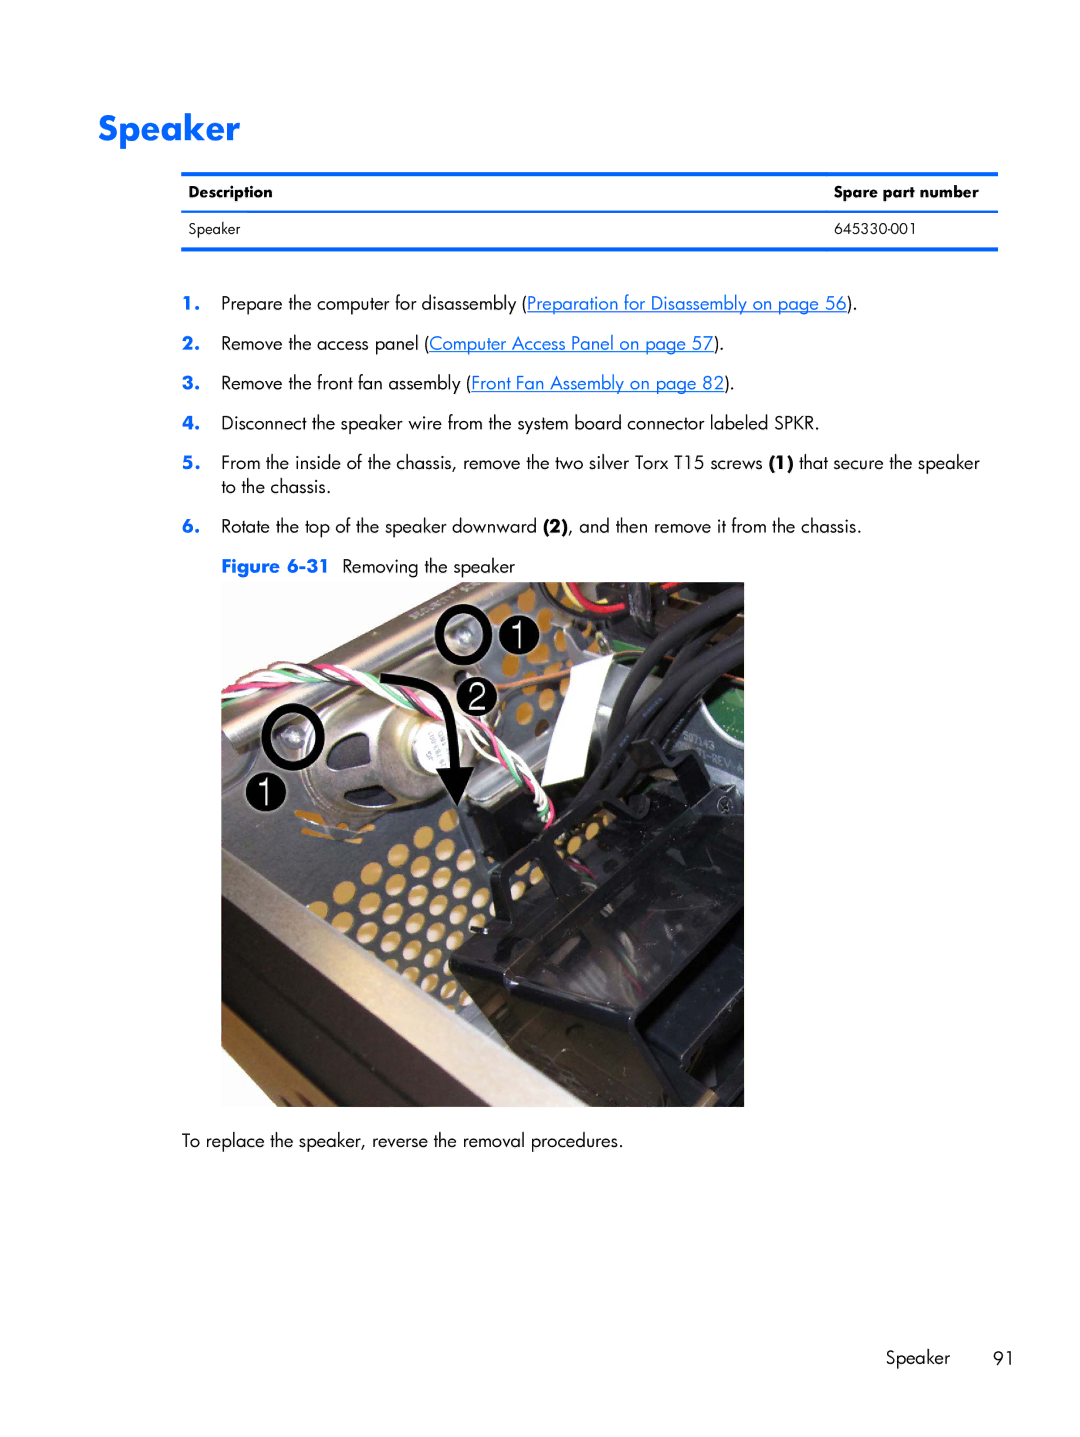
4.Disconnect the speaker wire from the system board connector labeled SPKR.
5.From the inside of the chassis, remove the two silver Torx T15 screws (1) that secure the speaker to the chassis.
6.Rotate the top of the speaker downward (2), and then remove it from the chassis. Figure
To replace the speaker, reverse the removal procedures.
Speaker 91