10.On the left side of the power supply, press the orange release tab to the right just enough to release the handle; then, rotate the handle downward.
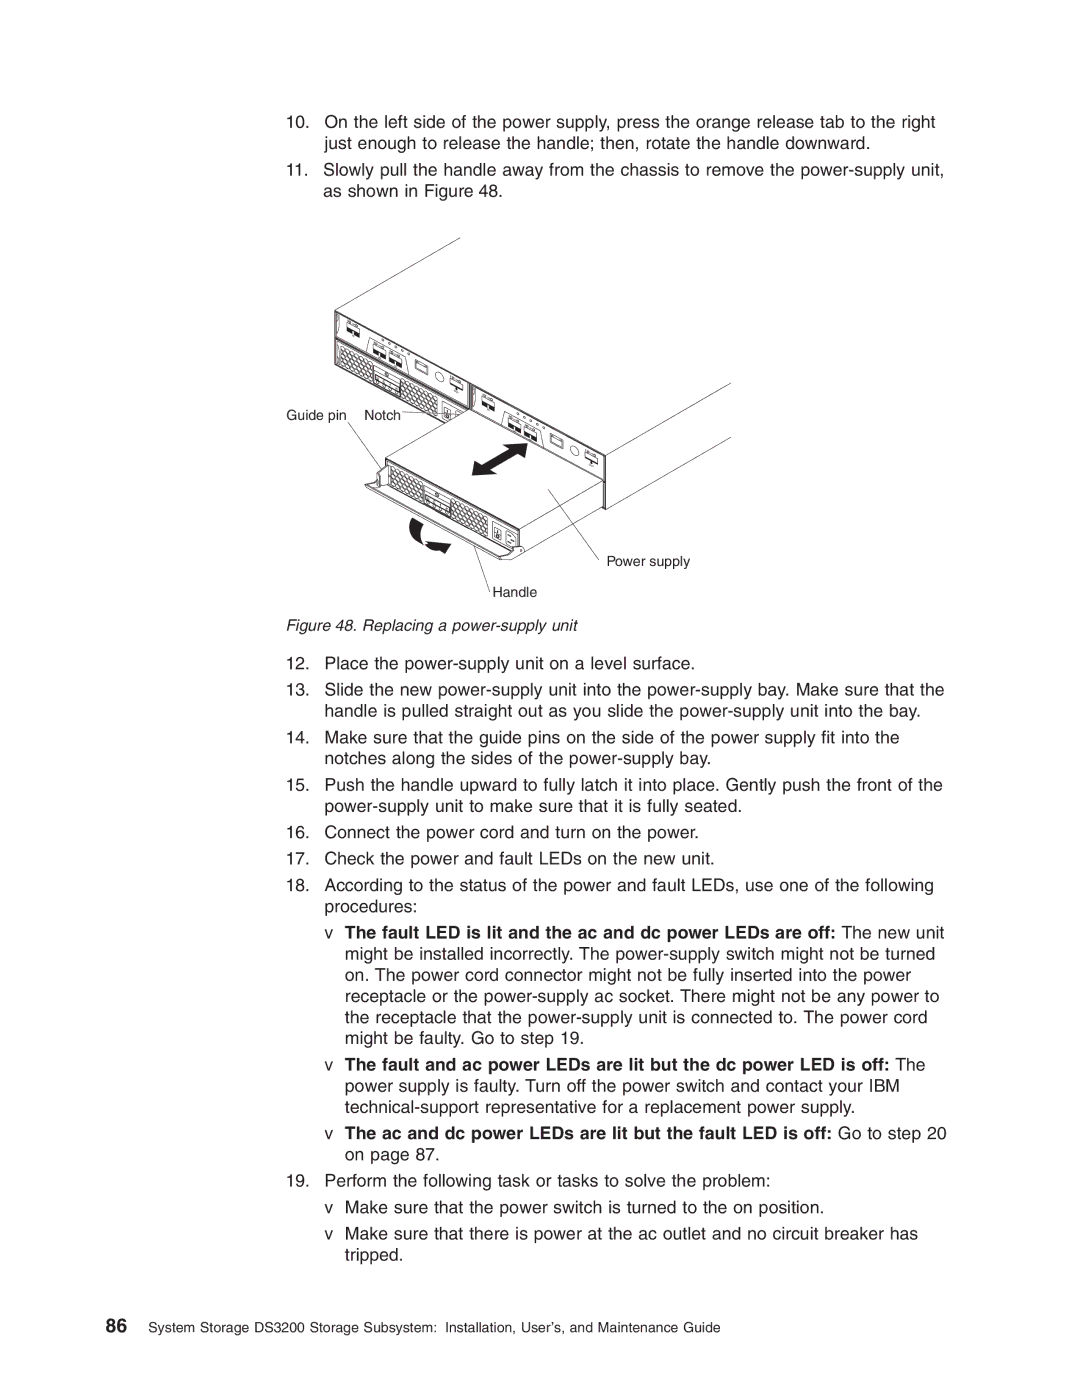
11.Slowly pull the handle away from the chassis to remove the
Guide pin Notch![]()
Power supply
Handle
Figure 48. Replacing a power-supply unit
12.Place the
13.Slide the new
14.Make sure that the guide pins on the side of the power supply fit into the notches along the sides of the
15.Push the handle upward to fully latch it into place. Gently push the front of the
16.Connect the power cord and turn on the power.
17.Check the power and fault LEDs on the new unit.
18.According to the status of the power and fault LEDs, use one of the following procedures:
vThe fault LED is lit and the ac and dc power LEDs are off: The new unit might be installed incorrectly. The
vThe fault and ac power LEDs are lit but the dc power LED is off: The power supply is faulty. Turn off the power switch and contact your IBM
vThe ac and dc power LEDs are lit but the fault LED is off: Go to step 20 on page 87.
19.Perform the following task or tasks to solve the problem:
vMake sure that the power switch is turned to the on position.
vMake sure that there is power at the ac outlet and no circuit breaker has tripped.
86System Storage DS3200 Storage Subsystem: Installation, User’s, and Maintenance Guide