Removing a hard disk drive
To remove a
Note: The hard disk drive comes installed in a drive tray. Do not attempt to detach the drive from the tray.
1.Use Table 9 on page 110 to record the location and identify the hard disk drives. Record this information so that you can replace the hard disk drives in the same bays from which you removed them.
2.Read the safety information that begins on page xi and “Best practices guidelines” on page 6.
Attention: Never remove a hard disk drive when its green activity LED is flashing. Remove a drive only when its amber status LED is lit (not flashing), when the drive is inactive (activity LED is off), or when the DS3200 is turned off.
3.Remove the hard disk drive.
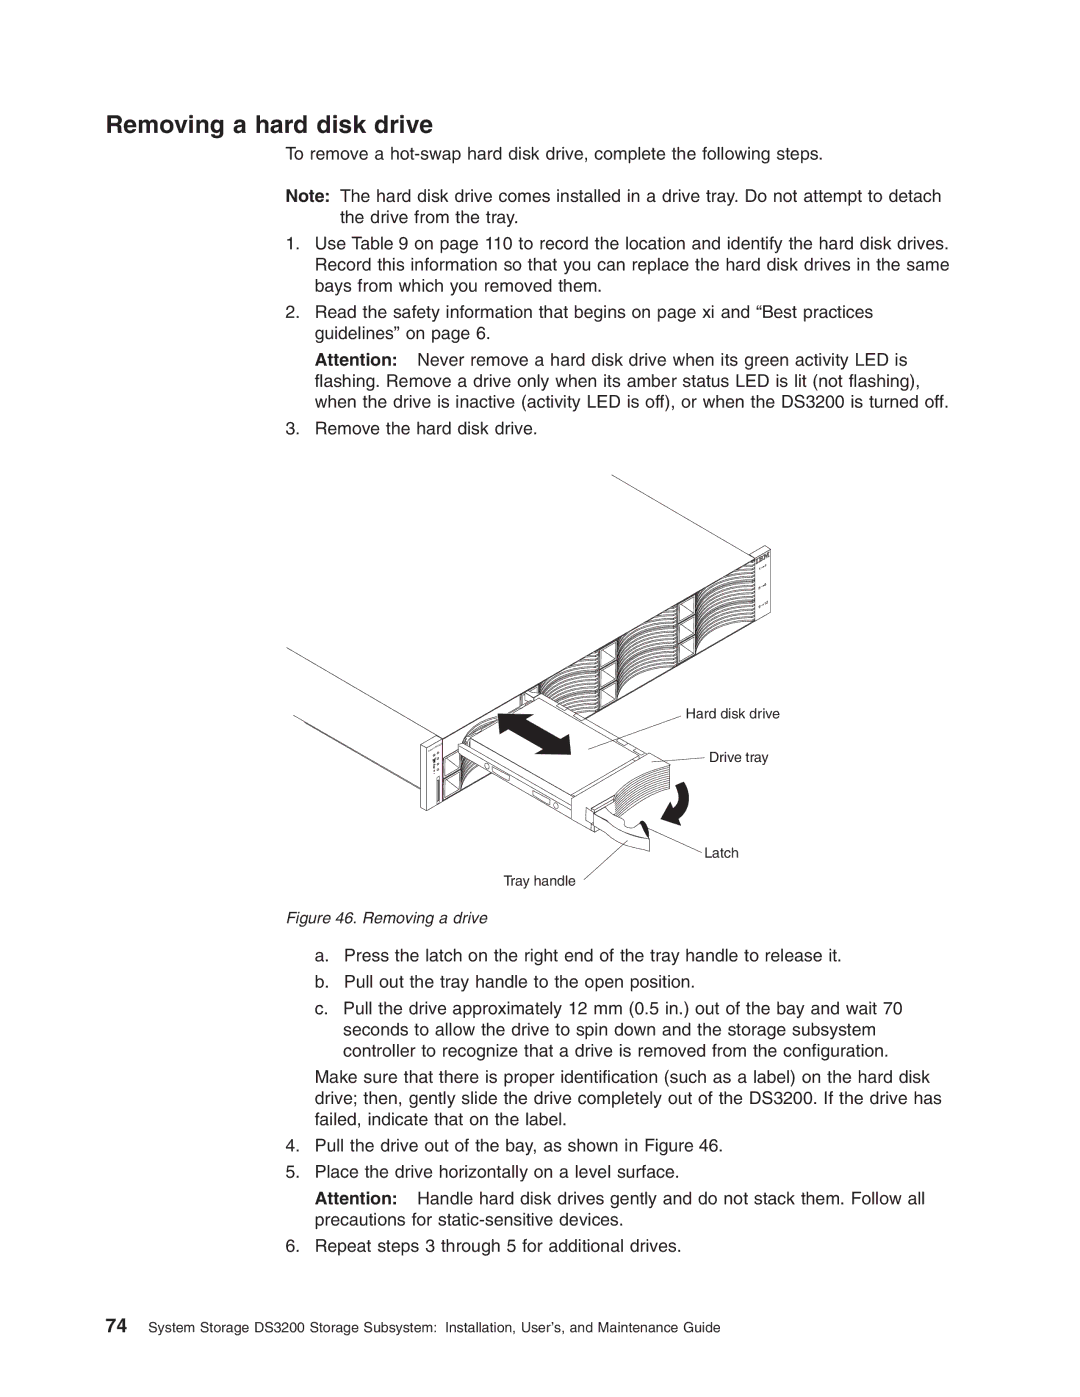
Hard disk drive
Drive tray
Latch
Tray handle
Figure 46. Removing a drive
a.Press the latch on the right end of the tray handle to release it.
b.Pull out the tray handle to the open position.
c.Pull the drive approximately 12 mm (0.5 in.) out of the bay and wait 70 seconds to allow the drive to spin down and the storage subsystem controller to recognize that a drive is removed from the configuration.
Make sure that there is proper identification (such as a label) on the hard disk drive; then, gently slide the drive completely out of the DS3200. If the drive has failed, indicate that on the label.
4.Pull the drive out of the bay, as shown in Figure 46.
5.Place the drive horizontally on a level surface.
Attention: Handle hard disk drives gently and do not stack them. Follow all precautions for
6.Repeat steps 3 through 5 for additional drives.
74System Storage DS3200 Storage Subsystem: Installation, User’s, and Maintenance Guide