1If the cords are covered with insulation, remove a short section of insulation at the end of each cord by twisting and pulling it off.
2Hold the clamp of the speaker terminal.
3Insert the end of the speaker cord into the
terminal.
Match the polarity of the speaker terminals: Red cord to red terminal ª and black cord to black terminal ·.
4Release your finger from the clamp.
IMPORTANT:
•Use only speakers with the same speaker impedance as indicated by the speaker terminals on the rear of the unit.
•DO NOT connect more than one speaker to one speaker terminal.
To remove the speaker grilles
The speaker grilles are removable as the illustration below.
![]() Speaker grille
Speaker grille
English
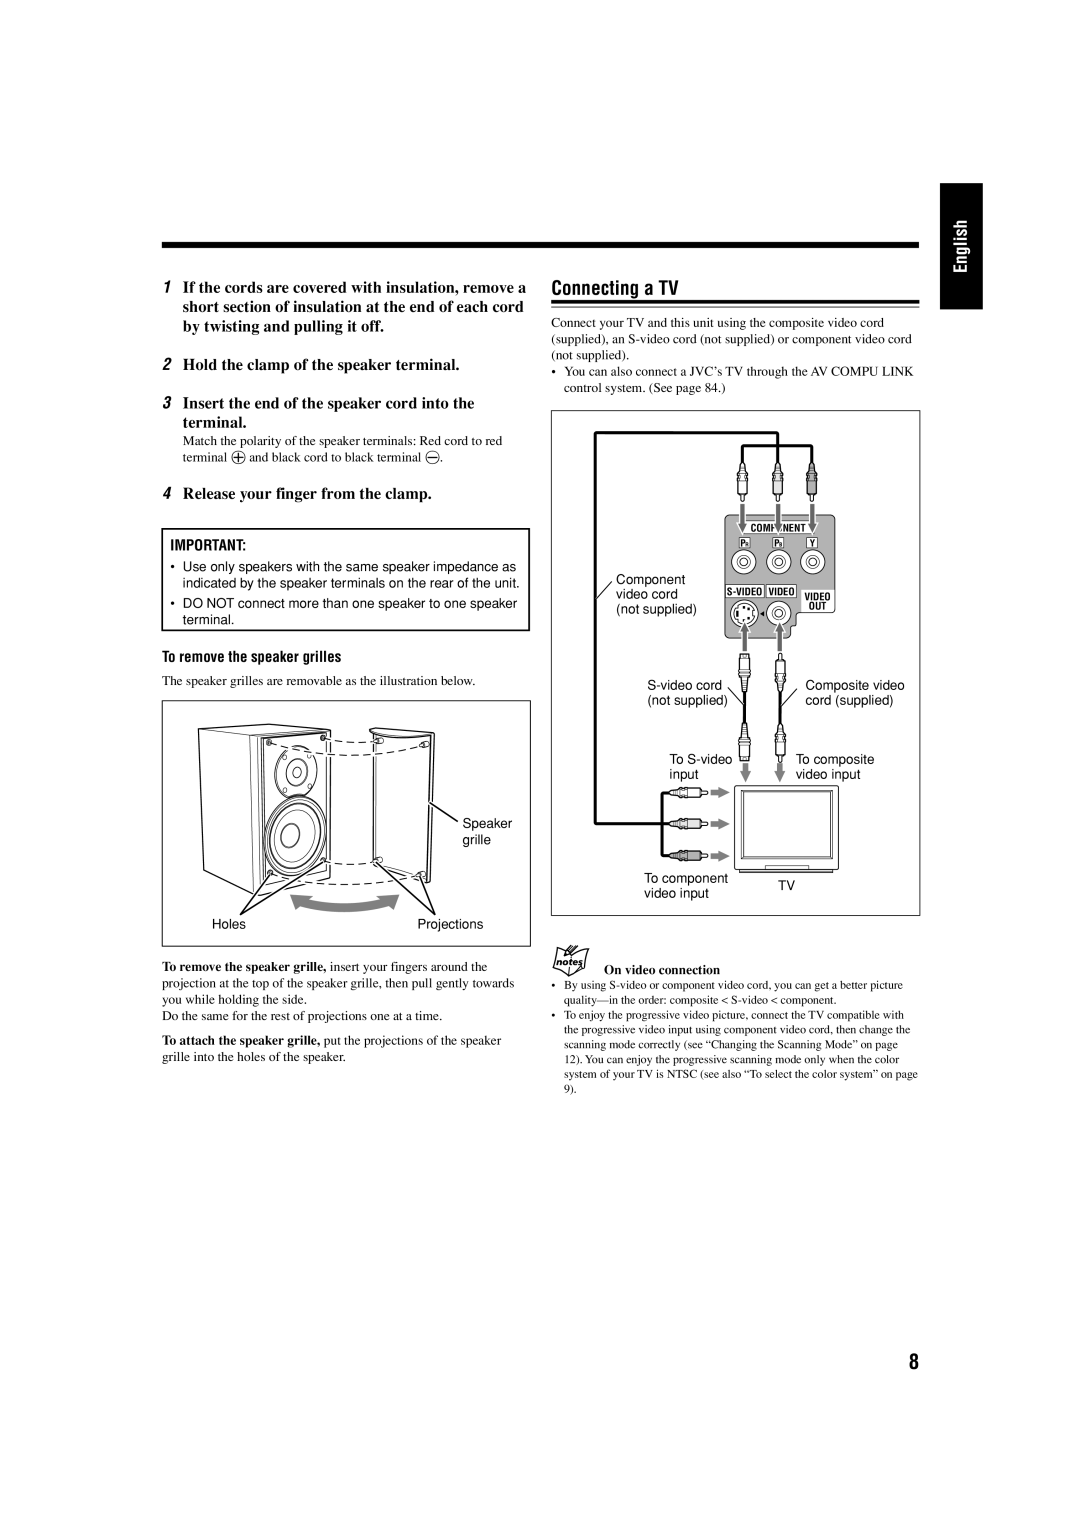
Connecting a TV
Connect your TV and this unit using the composite video cord (supplied), an
•You can also connect a JVC’s TV through the AV COMPU LINK control system. (See page 84.)
COMPONENT
| PR | PB | Y |
Component | VIDEO |
| |
video cord | VIDEO | ||
(not supplied) |
|
| OUT |
Composite video | |
(not supplied) | cord (supplied) |
To | To composite |
input | video input |
To component
Holes | Projections |
video input
TV
To remove the speaker grille, insert your fingers around the projection at the top of the speaker grille, then pull gently towards you while holding the side.
Do the same for the rest of projections one at a time.
To attach the speaker grille, put the projections of the speaker grille into the holes of the speaker.
On video connection
•By using
•To enjoy the progressive video picture, connect the TV compatible with the progressive video input using component video cord, then change the scanning mode correctly (see “Changing the Scanning Mode” on page
12). You can enjoy the progressive scanning mode only when the color system of your TV is NTSC (see also “To select the color system” on page 9).
8