Operation
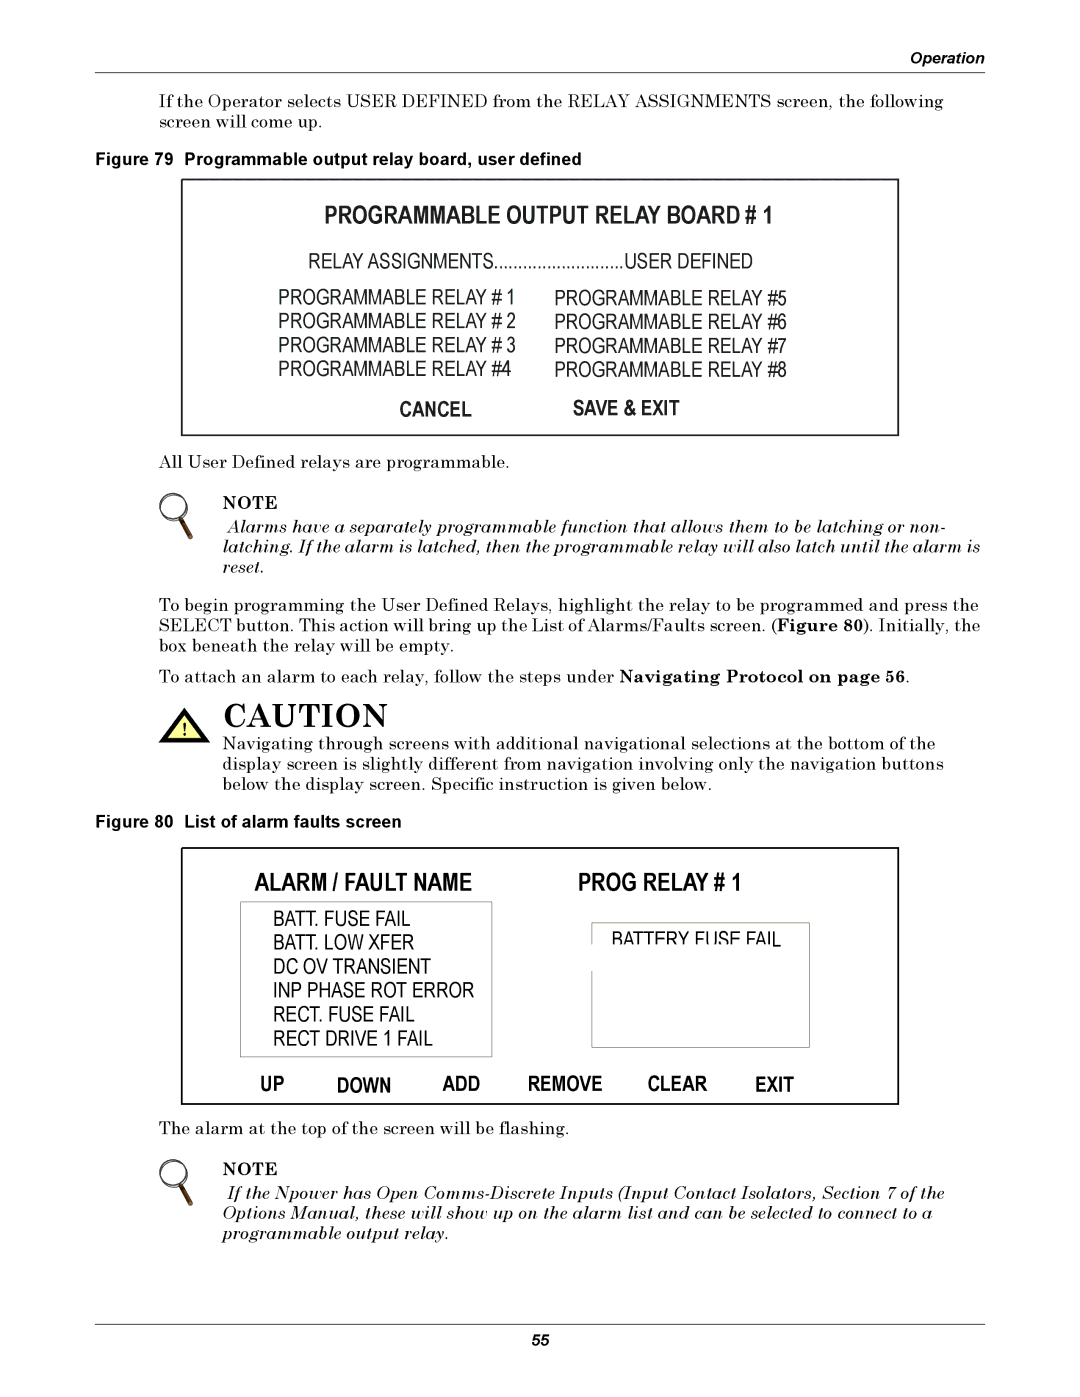
If the Operator selects USER DEFINED from the RELAY ASSIGNMENTS screen, the following screen will come up.
Figure 79 Programmable output relay board, user defined
PROGRAMMABLE OUTPUT RELAY BOARD # 1
RELAY ASSIGNMENTS | USER DEFINED |
PROGRAMMABLE RELAY # 1 PROGRAMMABLE RELAY # 2 PROGRAMMABLE RELAY # 3 PROGRAMMABLE RELAY #4
CANCEL
PROGRAMMABLE RELAY #5 PROGRAMMABLE RELAY #6 PROGRAMMABLE RELAY #7 PROGRAMMABLE RELAY #8
SAVE & EXIT
All User Defined relays are programmable.
NOTE
Alarms have a separately programmable function that allows them to be latching or non- latching. If the alarm is latched, then the programmable relay will also latch until the alarm is reset.
To begin programming the User Defined Relays, highlight the relay to be programmed and press the SELECT button. This action will bring up the List of Alarms/Faults screen. (Figure 80). Initially, the box beneath the relay will be empty.
To attach an alarm to each relay, follow the steps under Navigating Protocol on page 56.
! CAUTION
Navigating through screens with additional navigational selections at the bottom of the display screen is slightly different from navigation involving only the navigation buttons below the display screen. Specific instruction is given below.
Figure 80 List of alarm faults screen
ALARM / FAULT NAME | PROG RELAY # 1 |
BATT. FUSE FAIL
BATT. LOW XFER
DC OV TRANSIENT
INP PHASE ROT ERROR RECT. FUSE FAIL RECT DRIVE 1 FAIL
BATTERY FUSE FAIL
UP DOWN ADD REMOVE CLEAR EXIT
The alarm at the top of the screen will be flashing.
NOTE
If the Npower has Open
55
