Setup Wizard
| Setup Wizard | step1. After connecting the cameras and the monitors, turn | |
The setup wizard is displayed when the unit is turned on | on the MAIN switch on the rear panel and wait until | ||
the ACCESS indicator is turned off, then press the | |||
for the first time. The Wizard enables a quick setup. | |||
POWER button on the front panel. | |||
|
| ||
|
| • The <Setup Wizard> screen appears. | |
•Only when the unit is turned on for the first time, the setup wizard screen is displayed automatically. It is not displayed next time the unit is turned on.
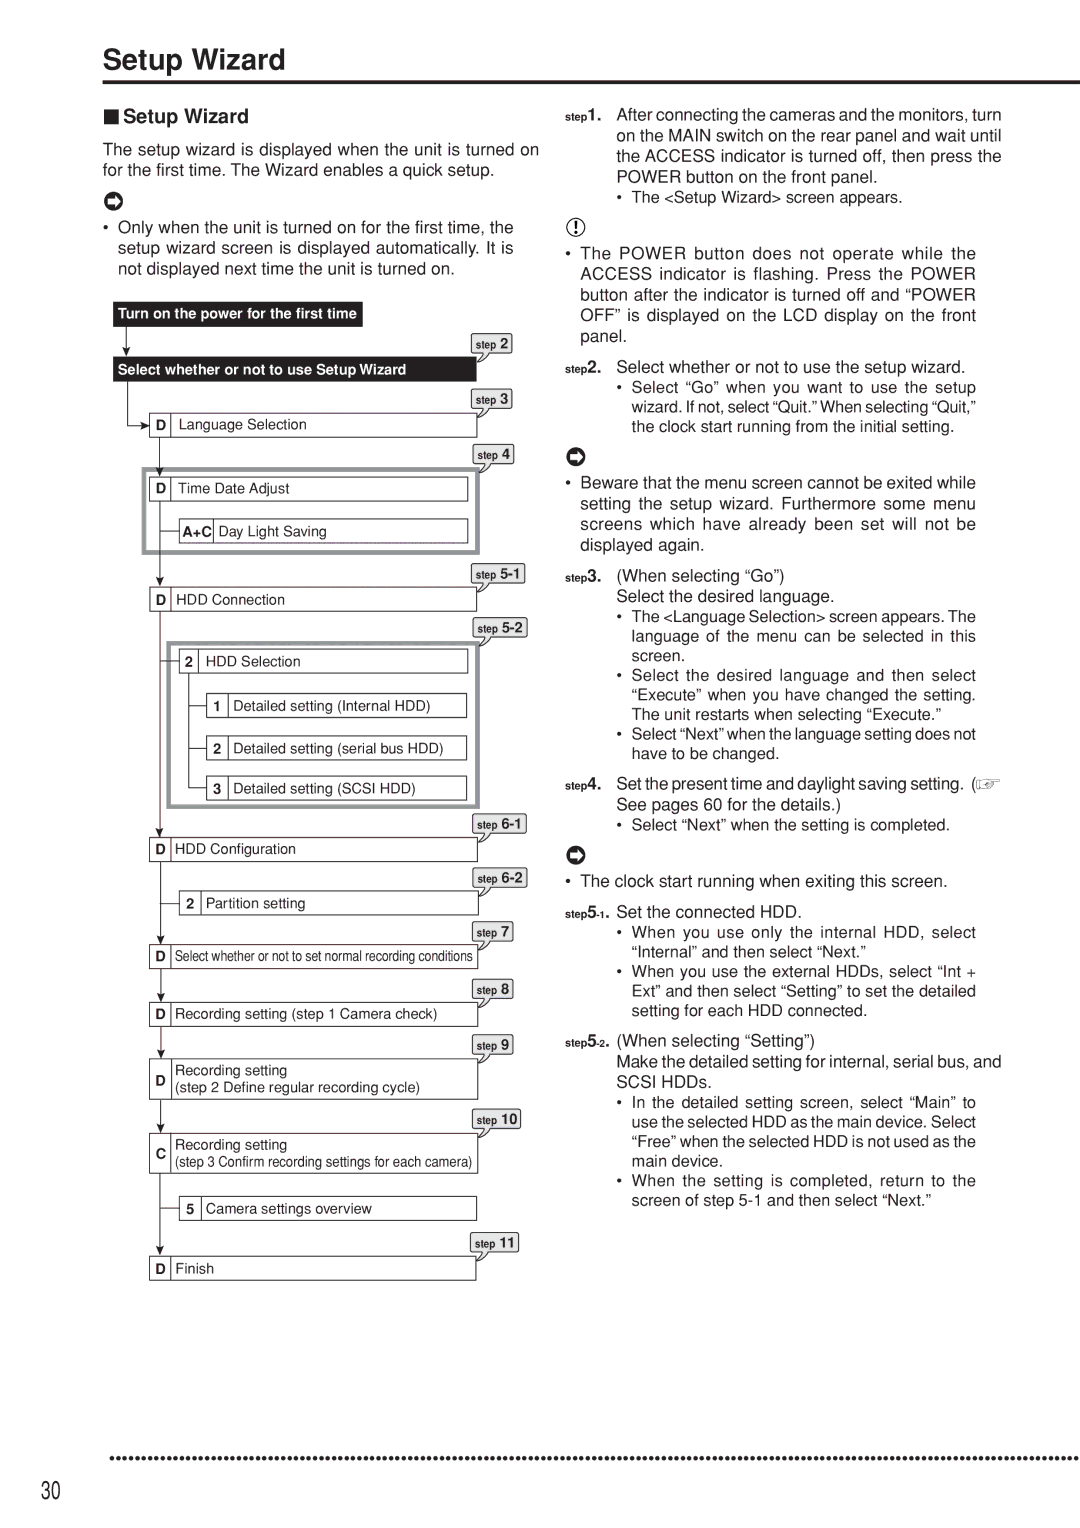
Turn on the power for the first time
step 2
Select whether or not to use Setup Wizard
step 3
![]() D Language Selection
D Language Selection
step 4
D | Time Date Adjust |
| A+C Day Light Saving |
| step |
D HDD Connection | |
|
| step |
2 | HDD Selection | |
| 1 | Detailed setting (Internal HDD) |
| 2 | Detailed setting (serial bus HDD) |
| 3 | Detailed setting (SCSI HDD) |
|
| step |
D HDD Configuration | ||
|
| step |
2 | Partition setting | |
step 7
DSelect whether or not to set normal recording conditions
step 8
DRecording setting (step 1 Camera check)
step 9
Recording setting
D(step 2 Define regular recording cycle)
step 10
Recording setting
C (step 3 Confirm recording settings for each camera)
5 Camera settings overview
step 11
DFinish
•The POWER button does not operate while the ACCESS indicator is flashing. Press the POWER button after the indicator is turned off and “POWER OFF” is displayed on the LCD display on the front panel.
step2. Select whether or not to use the setup wizard.
•Select “Go” when you want to use the setup wizard. If not, select “Quit.” When selecting “Quit,” the clock start running from the initial setting.
•Beware that the menu screen cannot be exited while setting the setup wizard. Furthermore some menu screens which have already been set will not be displayed again.
step3. (When selecting “Go”) Select the desired language.
•The <Language Selection> screen appears. The language of the menu can be selected in this screen.
•Select the desired language and then select “Execute” when you have changed the setting. The unit restarts when selecting “Execute.”
•Select “Next” when the language setting does not have to be changed.
step4. Set the present time and daylight saving setting. (![]() See pages 60 for the details.)
See pages 60 for the details.)
•Select “Next” when the setting is completed.
•The clock start running when exiting this screen.
•When you use only the internal HDD, select “Internal” and then select “Next.”
•When you use the external HDDs, select “Int + Ext” and then select “Setting” to set the detailed setting for each HDD connected.
Make the detailed setting for internal, serial bus, and SCSI HDDs.
•In the detailed setting screen, select “Main” to use the selected HDD as the main device. Select “Free” when the selected HDD is not used as the main device.
•When the setting is completed, return to the screen of step
•••••••••••••••••••••••••••••••••••••••••••••••••••••••••••••••••••••••••••••••••••••••••••••••••••••••••••••••••••••••••••••••••••••••••••••••••••••••••
30