Major operations and their functions
![]() Front view
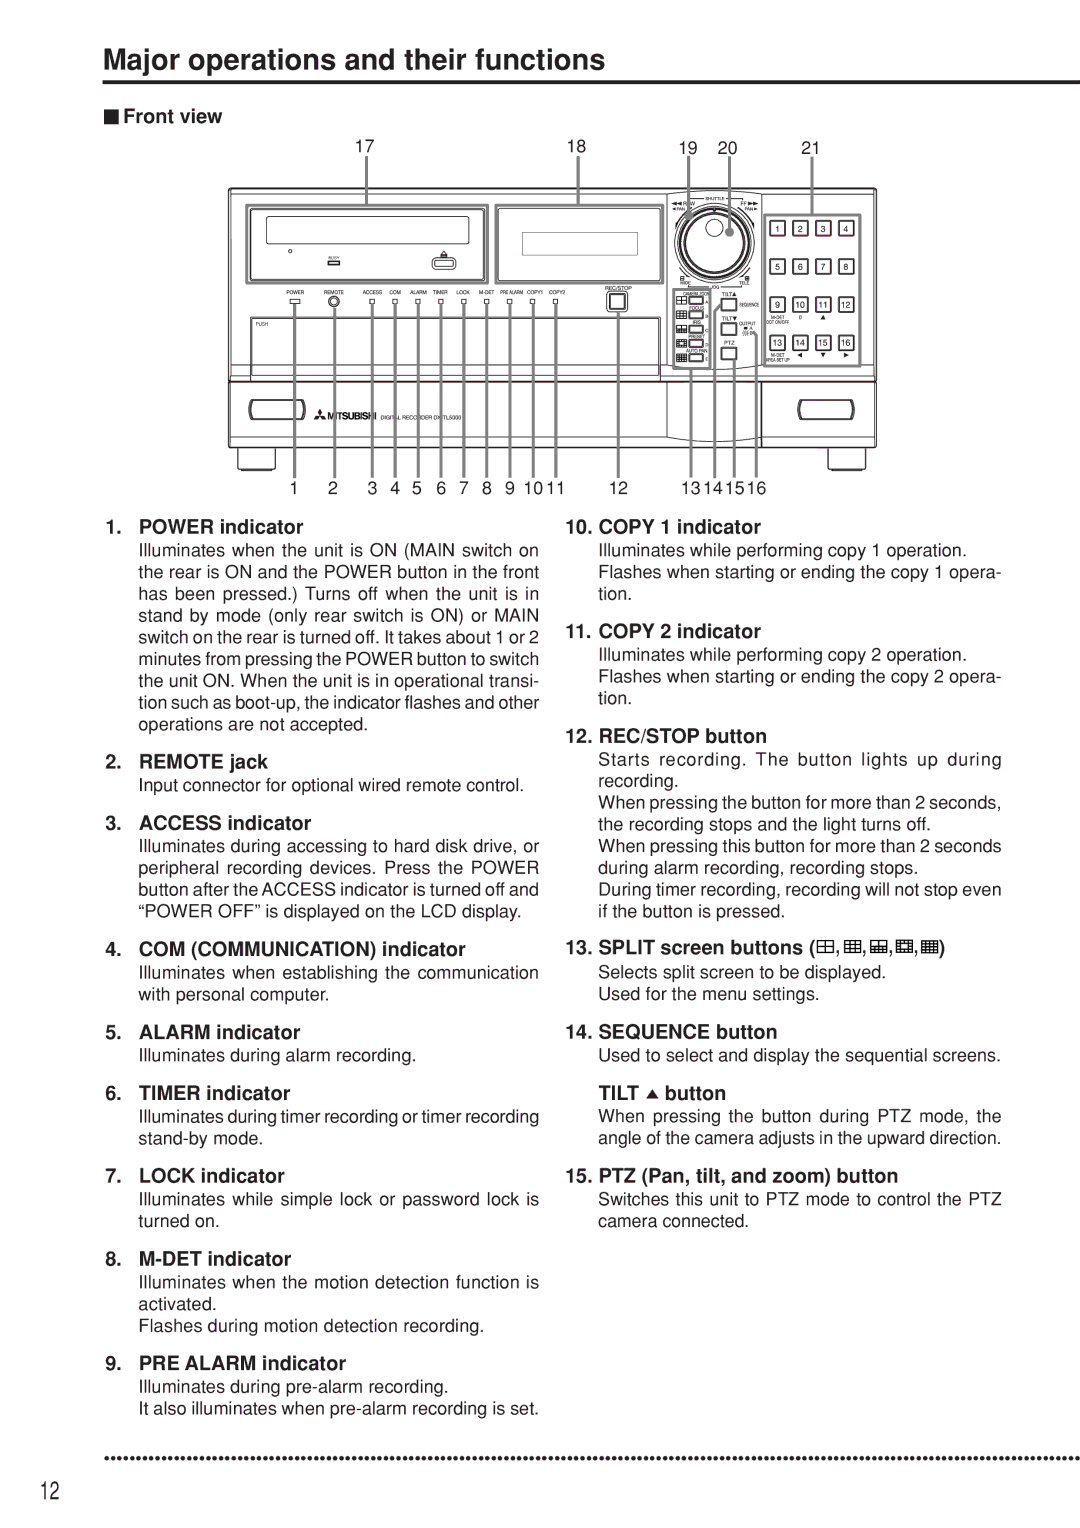
Front view
17 | 18 | 19 | 20 | 21 | ||
|
|
|
|
|
|
|
|
|
|
|
|
|
|
|
|
|
|
|
|
|
| BUSY |
|
|
|
|
|
|
|
|
|
PUSH |
|
|
|
|
|
|
|
|
|
|
1 | 2 | 3 | 4 | 5 | 6 | 7 | 8 | 9 10 11 | 12 | 13 14 15 16 |
1.POWER indicator
Illuminates when the unit is ON (MAIN switch on the rear is ON and the POWER button in the front has been pressed.) Turns off when the unit is in stand by mode (only rear switch is ON) or MAIN switch on the rear is turned off. It takes about 1 or 2 minutes from pressing the POWER button to switch the unit ON. When the unit is in operational transi- tion such as
2.REMOTE jack
Input connector for optional wired remote control.
3.ACCESS indicator
Illuminates during accessing to hard disk drive, or peripheral recording devices. Press the POWER button after the ACCESS indicator is turned off and “POWER OFF” is displayed on the LCD display.
10.COPY 1 indicator
Illuminates while performing copy 1 operation. Flashes when starting or ending the copy 1 opera- tion.
11.COPY 2 indicator
Illuminates while performing copy 2 operation. Flashes when starting or ending the copy 2 opera- tion.
12.REC/STOP button
Starts recording. The button lights up during recording.
When pressing the button for more than 2 seconds, the recording stops and the light turns off.
When pressing this button for more than 2 seconds during alarm recording, recording stops.
During timer recording, recording will not stop even if the button is pressed.
4.COM (COMMUNICATION) indicator
Illuminates when establishing the communication with personal computer.
13.SPLIT screen buttons (![]() ,
, ![]() ,
, ![]() ,
,![]() ,
,![]() )
)
Selects split screen to be displayed. Used for the menu settings.
5. | ALARM indicator | 14. SEQUENCE button |
| Illuminates during alarm recording. | Used to select and display the sequential screens. |
6. | TIMER indicator | TILT button |
Illuminates during timer recording or timer recording
When pressing the button during PTZ mode, the angle of the camera adjusts in the upward direction.
7. LOCK indicator | 15. PTZ (Pan, tilt, and zoom) button |
Illuminates while simple lock or password lock is turned on.
Switches this unit to PTZ mode to control the PTZ camera connected.
8.M-DET indicator
Illuminates when the motion detection function is activated.
Flashes during motion detection recording.
9.PRE ALARM indicator
Illuminates during
It also illuminates when
••••••••••••••••••••••••••••••••••••••••••••••••••••••••••••••••••••••••••••••••••••••••••••••••••••••••••••••••••••••••••••••••••••••••••••••••••••••••••
12