Operation examples (continued)
 Operation example 3
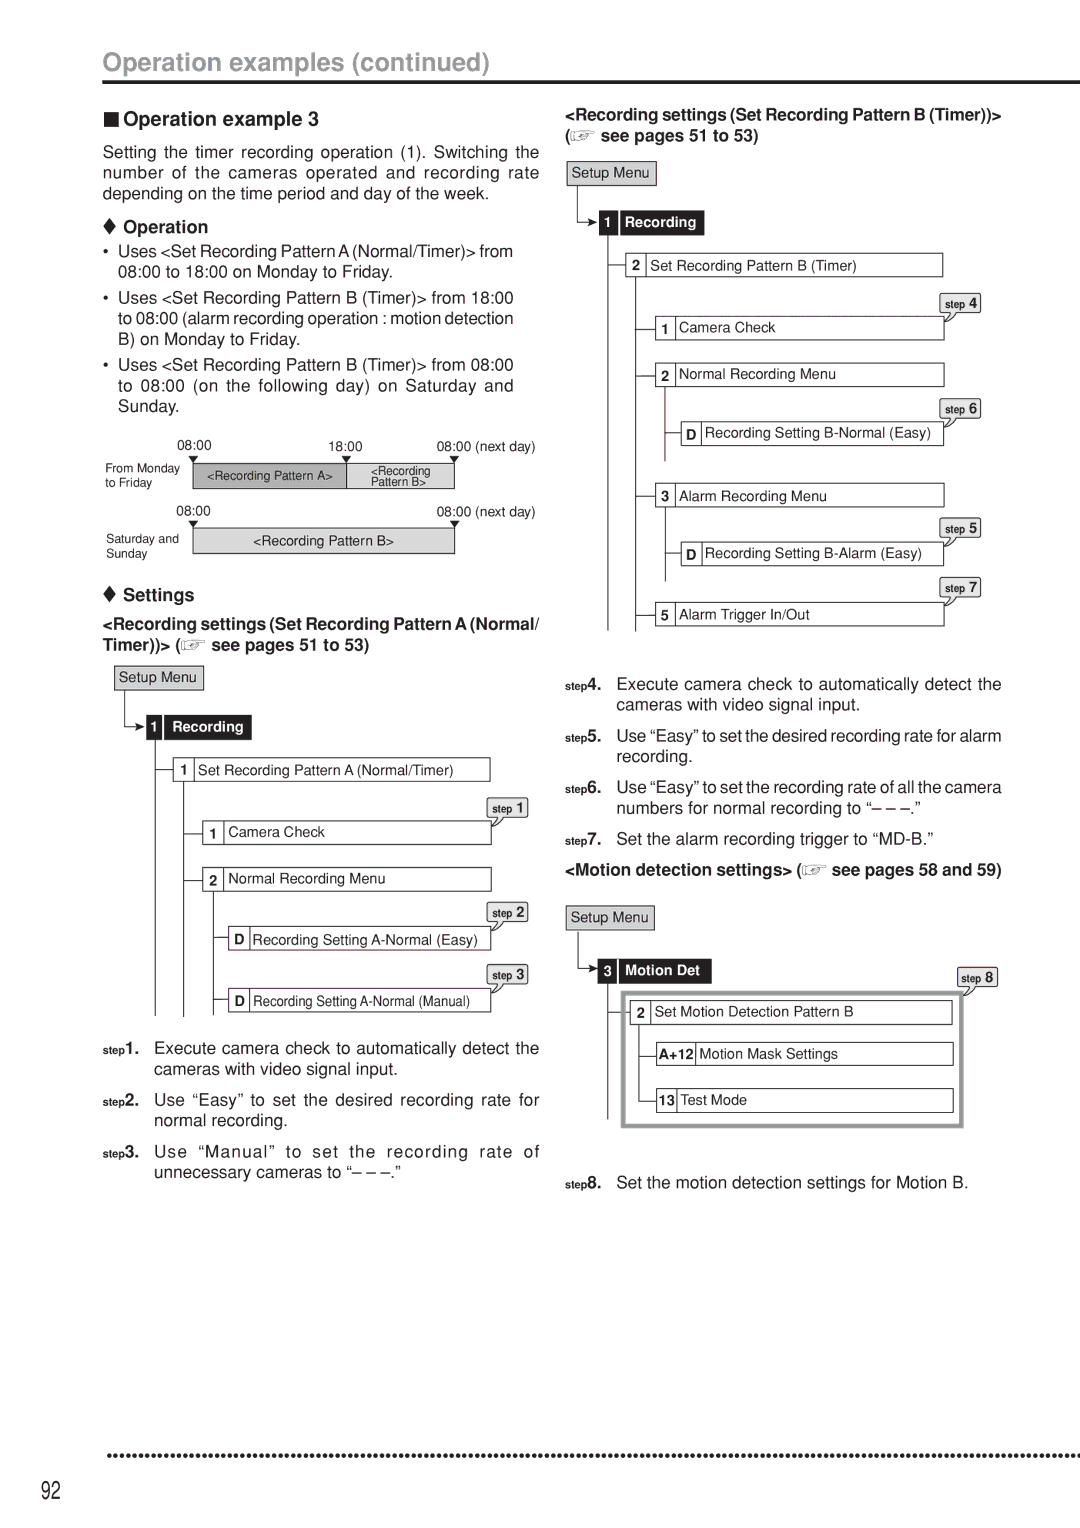
Setting the timer recording operation (1). Switching the number of the cameras operated and recording rate depending on the time period and day of the week.
 Operation
•Uses <Set Recording Pattern A (Normal/Timer)> from 08:00 to 18:00 on Monday to Friday.
•Uses <Set Recording Pattern B (Timer)> from 18:00 to 08:00 (alarm recording operation : motion detection B) on Monday to Friday.
•Uses <Set Recording Pattern B (Timer)> from 08:00 to 08:00 (on the following day) on Saturday and Sunday.
| 08:00 | 18:00 |
| 08:00 (next day) | |||
From Monday |
|
|
|
|
|
| |
<Recording Pattern A> |
| <Recording |
|
| |||
to Friday |
|
| Pattern B> |
|
| ||
|
|
|
|
|
| ||
| 08:00 |
|
|
| 08:00 (next day) | ||
Saturday and |
|
|
|
|
| ||
| <Recording Pattern B> |
|
| ||||
Sunday |
|
|
|
|
|
|
|
|
|
|
|
|
|
| |
![]() Settings
Settings
<Recording settings (Set Recording Pattern A (Normal/ Timer))> (![]() see pages 51 to 53)
see pages 51 to 53)
Setup Menu

 1 Recording
1 Set Recording Pattern A (Normal/Timer)
step 1
1Camera Check
2Normal Recording Menu
step 2
DRecording Setting
step 3
DRecording Setting
step1. Execute camera check to automatically detect the cameras with video signal input.
step2. Use “Easy” to set the desired recording rate for normal recording.
step3. Use “Manual” to set the recording rate of unnecessary cameras to “– –
<Recording settings (Set Recording Pattern B (Timer))> (![]() see pages 51 to 53)
see pages 51 to 53)
Setup Menu

 1 Recording
![]() 2 Set Recording Pattern B (Timer)
2 Set Recording Pattern B (Timer)
step 4
1Camera Check
2Normal Recording Menu
step 6
DRecording Setting
3Alarm Recording Menu
step 5
DRecording Setting
step 7
5Alarm Trigger In/Out
step4. Execute camera check to automatically detect the cameras with video signal input.
step5. Use “Easy” to set the desired recording rate for alarm recording.
step6. Use “Easy” to set the recording rate of all the camera numbers for normal recording to “– –
step7. Set the alarm recording trigger to
<Motion detection settings> ( see pages 58 and 59)
Setup Menu
3 | Motion Det | step 8 |
|
|
![]() 2 Set Motion Detection Pattern B
2 Set Motion Detection Pattern B
![]() A+12
A+12 ![]() Motion Mask Settings
Motion Mask Settings
![]() 13 Test Mode
13 Test Mode
step8. Set the motion detection settings for Motion B.
••••••••••••••••••••••••••••••••••••••••••••••••••••••••••••••••••••••••••••••••••••••••••••••••••••••••••••••••••••••••••••••••••••••••••••••••••••••••••
92