Protect Data | User Menu |
 Protect Data
Up to 500 specified areas can be locked preventing acci- dental deletion of important data. Only the data in the main device can be locked. When the main device is partitioned, the data in the normal and alarm areas can be locked.
User Menu
 5 Protect Data
steps 1, 2
![]() 1 Protect Recorded Data
1 Protect Recorded Data
step 3
![]() 2 Protected Data Information
2 Protected Data Information
step 4
![]() 3 Change Protected Data Settings
3 Change Protected Data Settings
step1. Set the start and end points of the data to be locked.
•The data in the area which is currently set to be played back (normal or alarm) can be locked.
•The points are set by the bookmark. Select the desired book mark number.
 See page 88 for registering a book mark.
step2. Select “Protect.”
•The data is locked in 512 MB unit. The registered date and time will be the start or end point of the one or more data blocks which including the specified book mark number, so they may not be similar to the date and time of the specified book mark.
step3. To check the locked data, select the <Protected Data Information>.
•Select the area to be displayed in the <Select Source Device> (User Menu![]() Search).
Search).
Search: Displays the picture of the start point of the selected area.
Check: Checks the device in which the locked area is recorded.
step4. To cancel the lock, select “Disable” of the desired area in the screen of <Change Protected Data Settings>.
Search: Displays the picture of the start point of the selected area.
•The data cannot be locked when the start and end times are not set in order.
•The data of the long
in search by alarm list. (![]() See page 100.)
See page 100.)
•When deleting the main device data including the locked data, the locked data is also deleted.
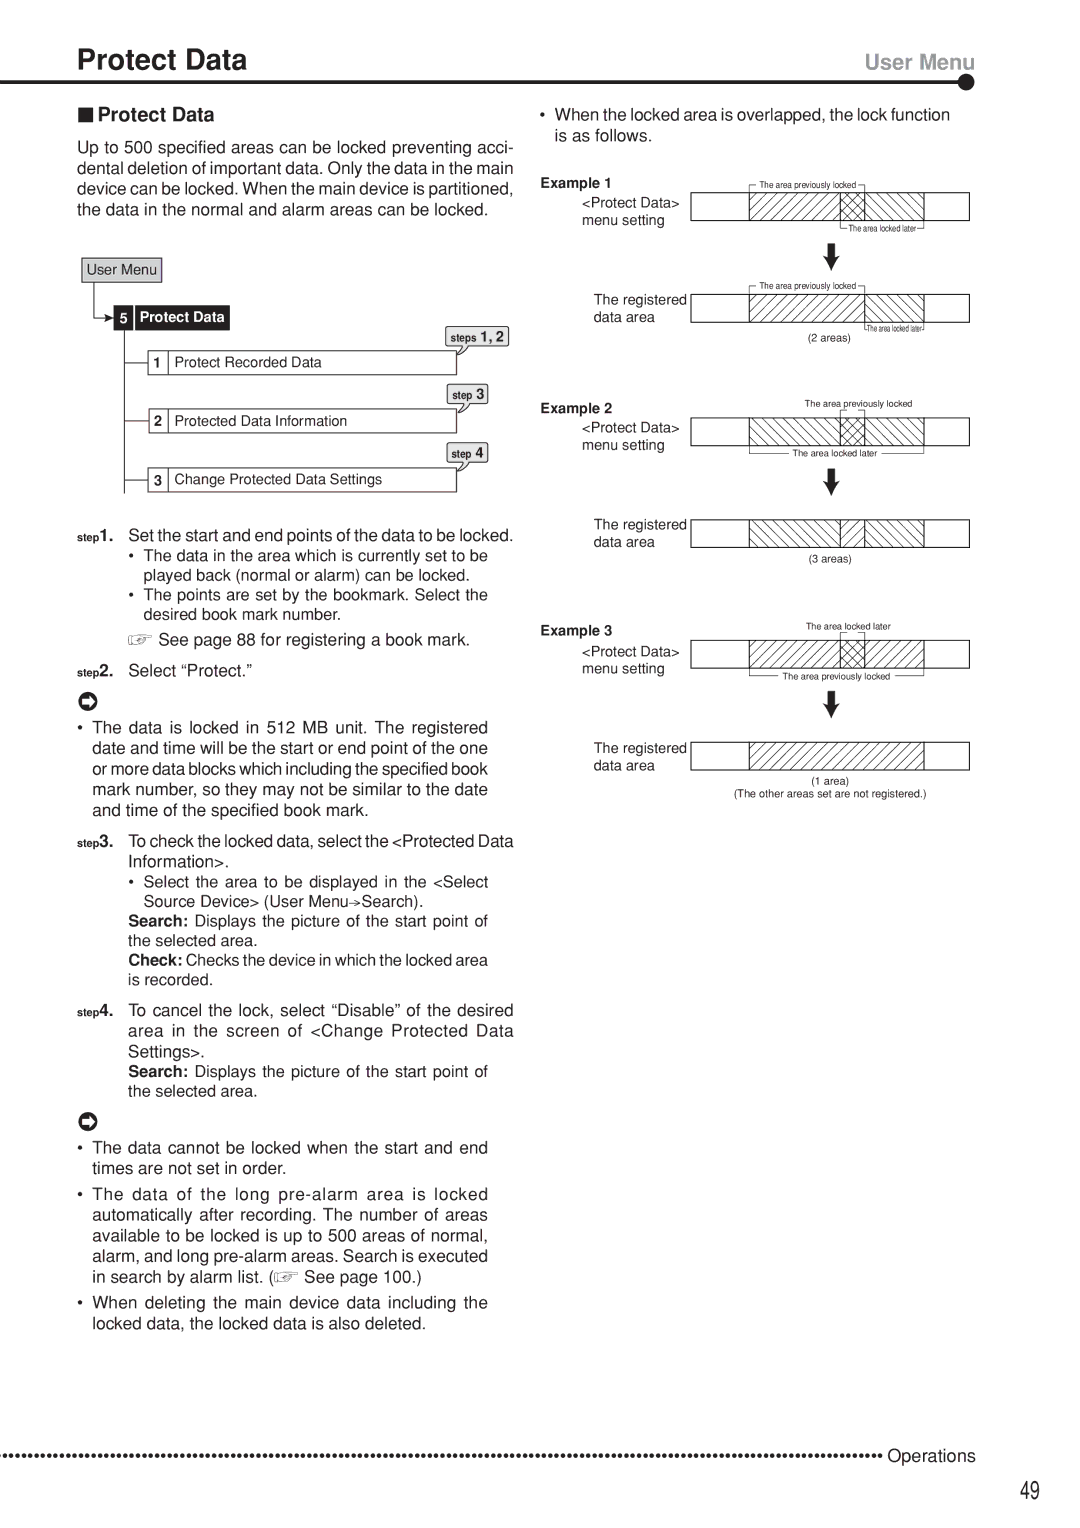
•When the locked area is overlapped, the lock function is as follows.
Example 1 | The area previously locked |
<Protect Data> |
|
menu setting | The area locked later |
| |
| The area previously locked |
The registered |
|
data area | The area locked later |
| |
| (2 areas) |
Example 2 | The area previously locked |
| |
<Protect Data> |
|
menu setting | The area locked later |
| |
The registered |
|
data area |
|
| (3 areas) |
Example 3 | The area locked later |
| |
<Protect Data> |
|
menu setting | The area previously locked |
|
The registered data area
(1 area)
(The other areas set are not registered.)
•••••••••••••••••••••••••••••••••••••••••••••••••••••••••••••••••••••••••••••••••••••••••••••••••••••••••••••••••••••••••••••••••••••••••••• Operations
49