Basic Hardware Installation
1.Connect the monitor to the VGA connector.
2.Connect the PS/2 keyboard to the Keyboard connector.
3.Connect the PS/2 mouse to the Mouse connector.
4.If you are ready to use a network connection, connect a CAT5 UTP cable to the Ethernet connector.
5.Connect the power adapter cable to the Power connector.
6.Plug the power adapter AC cord into an AC outlet.
7.You are ready to use the Terminal now.
Mounting the Terminal
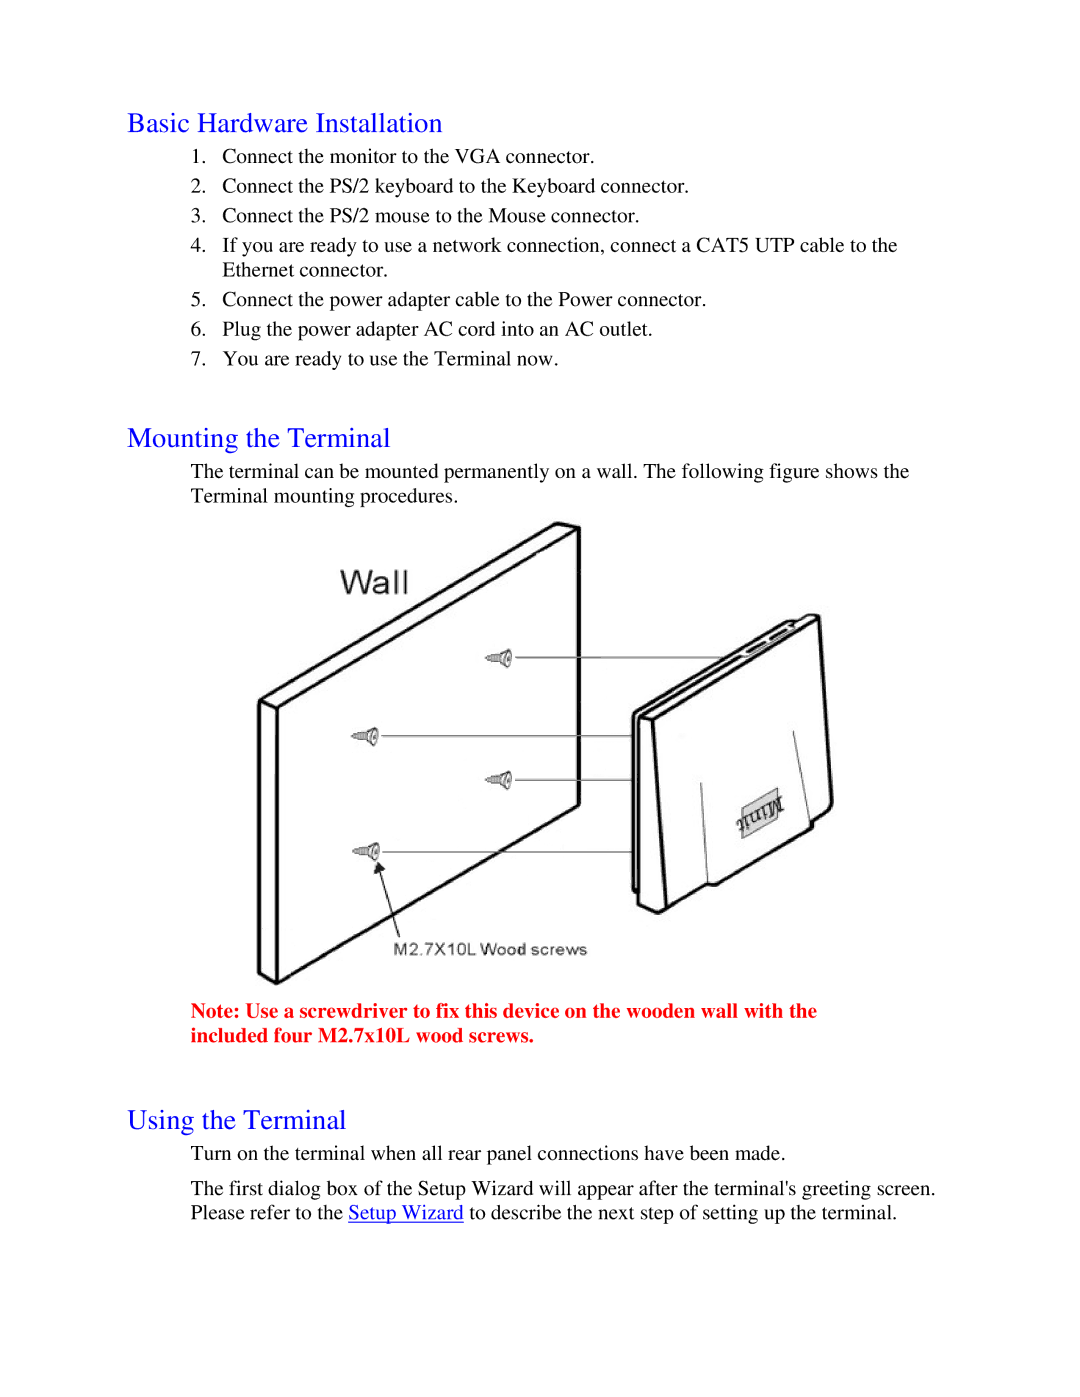
The terminal can be mounted permanently on a wall. The following figure shows the Terminal mounting procedures.
Note: Use a screwdriver to fix this device on the wooden wall with the included four M2.7x10L wood screws.
Using the Terminal
Turn on the terminal when all rear panel connections have been made.
The first dialog box of the Setup Wizard will appear after the terminal's greeting screen. Please refer to the Setup Wizard to describe the next step of setting up the terminal.