Starting a Session
There are three ways to start a NLynx emulation session.
Method 1. Autostart a Session on Power Up
Using the “Connection Startup Dialog Box”, you can
1.From the terminal desktop, click on the “Connection Manager” icon (shown below) to bring up the “Terminal Connection Manager” setup window. This is the same as selecting Start > Programs > Connection Manager from the Taskbar Menu.
2.Once the Connection Manager window is open, select the Configure tab.
3.Select a session that you want to Startup when the MinIT6000 is turned on and click on the "Startup" button.
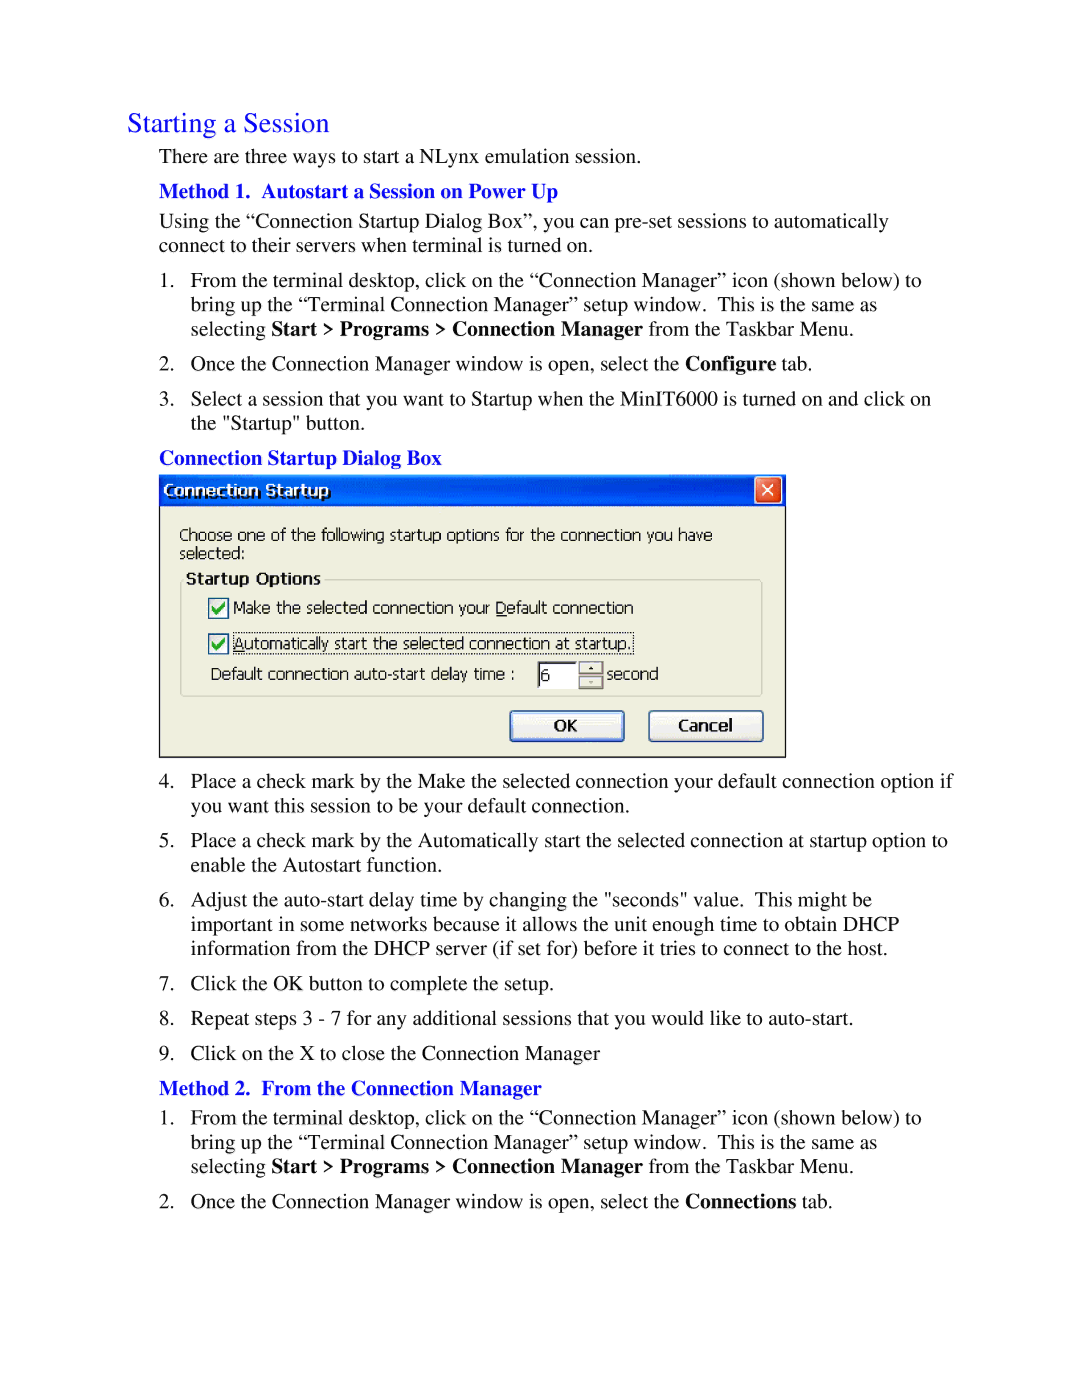
Connection Startup Dialog Box
4.Place a check mark by the Make the selected connection your default connection option if you want this session to be your default connection.
5.Place a check mark by the Automatically start the selected connection at startup option to enable the Autostart function.
6.Adjust the
7.Click the OK button to complete the setup.
8.Repeat steps 3 - 7 for any additional sessions that you would like to
9.Click on the X to close the Connection Manager
Method 2. From the Connection Manager
1.From the terminal desktop, click on the “Connection Manager” icon (shown below) to bring up the “Terminal Connection Manager” setup window. This is the same as selecting Start > Programs > Connection Manager from the Taskbar Menu.
2.Once the Connection Manager window is open, select the Connections tab.
