Operating Instructions
2.4.4Alarm Recording
When the signal of an alarm that is attached to the camera is detected, alarm recording starts.
Set the alarm detection method for individual cameras (see page 31).
Alarm recording only operates when the JPEG format is selected. If the
1.Select the camera to record from the
•A red frame is displayed around the selected camera.
•To select multiple cameras, click the camera images while holding down the [Ctrl] key. A blue frame is displayed around the selected cameras.
(A red frame is displayed around the focus camera.) See page 74 instructions on selecting cameras.
2.Select an alarm type from the menu that is displayed by clicking ![]() .
.
•The focus camera and other selected cameras are set for alarm recording.
•![]() is displayed in the
is displayed in the
•To stop recording, select a camera to stop and click ![]() .
.
•You can select [Alarm/Sensor Recording] → [Start All]/[Start Alarm1/ Sensor]/[Start Alarm2] or [Stop Recording] from the [Recording] on the menu bar.
Note
•When you want to stop recording, always click ![]() , or select
, or select
When ![]() is displayed in the notification area, the recording software is running (see page 9).
is displayed in the notification area, the recording software is running (see page 9).
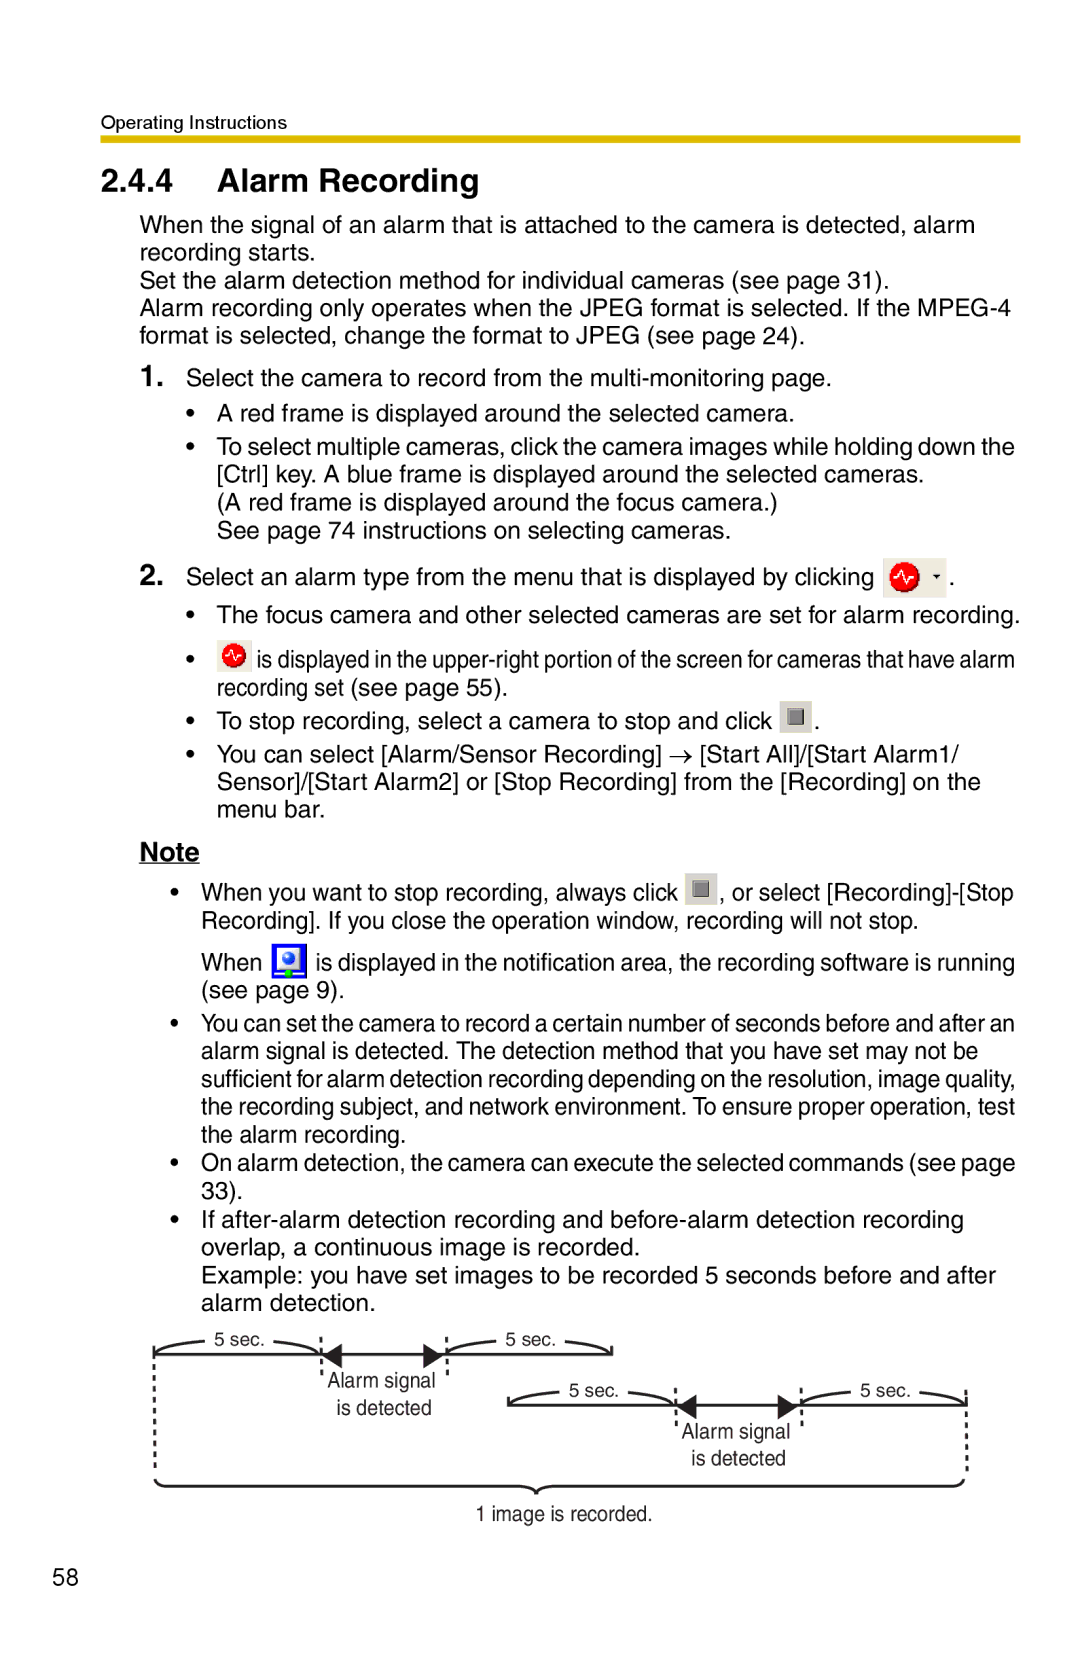
•You can set the camera to record a certain number of seconds before and after an alarm signal is detected. The detection method that you have set may not be sufficient for alarm detection recording depending on the resolution, image quality, the recording subject, and network environment. To ensure proper operation, test the alarm recording.
•On alarm detection, the camera can execute the selected commands (see page 33).
•If
Example: you have set images to be recorded 5 seconds before and after alarm detection.
5 sec.5 sec.
Alarm signal |
|
| 5 sec. | 5 sec. |
|
is detected |
|
|
| ||
|
|
| Alarm signal | ||
|
|
|
| ||
|
|
|
| is detected | |
| 1 image is recorded. |
|
| ||
58