1. Introduction and Installation
1.6.2 Replacing the ink film
To ensure that the unit operates properly, we recommend the use of Panasonic replacement film. See page 9 for accessory information.
LWe cannot be responsible for any damage to the unit or degradation of print quality which may occur from the use of
1Open the covers (see steps 1 to 3 on page 13).
2Remove the used core (1) and used ink film (2).
1
2
3Remove the stoppers (1) and tags (2) from the new ink film (3).
2
1
3
1
4Insert the ink film and close the covers (see steps 4 to 7 on page 13).
1.7 Paper tray
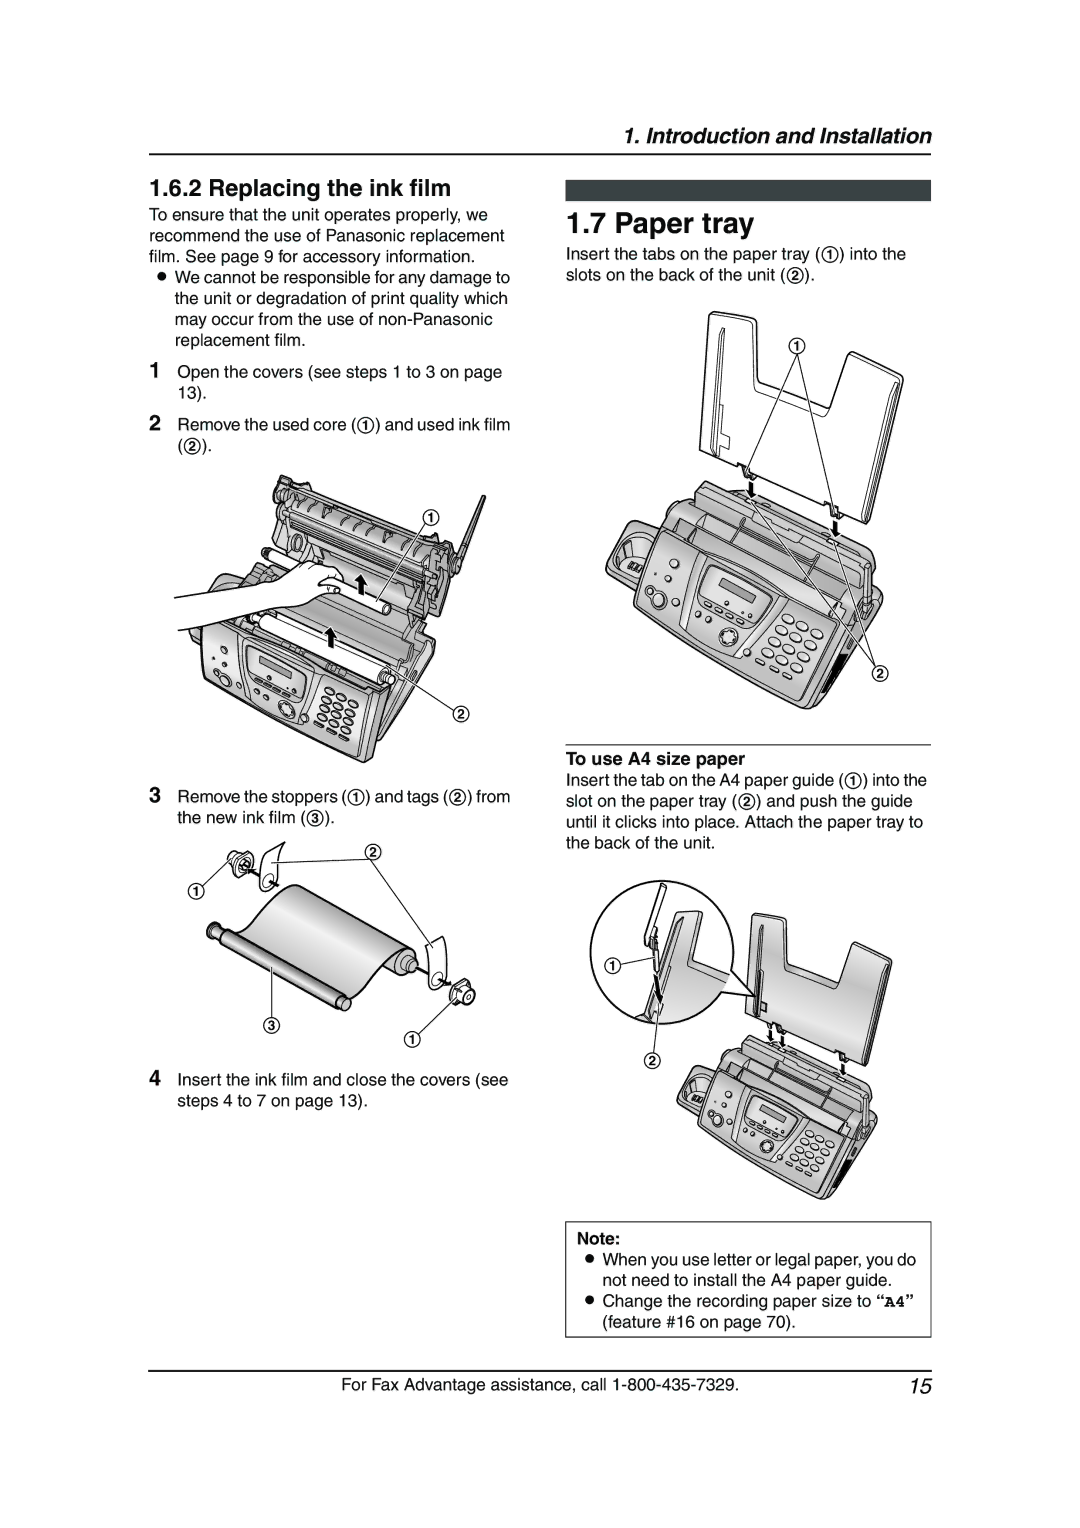
Insert the tabs on the paper tray (1) into the slots on the back of the unit (2).
1
2
To use A4 size paper
Insert the tab on the A4 paper guide (1) into the slot on the paper tray (2) and push the guide until it clicks into place. Attach the paper tray to the back of the unit.
1![]()
2
Note:
LWhen you use letter or legal paper, you do not need to install the A4 paper guide.
LChange the recording paper size to “A4” (feature #16 on page 70).
For Fax Advantage assistance, call | 15 |