Install the Emulation Boot Diskette
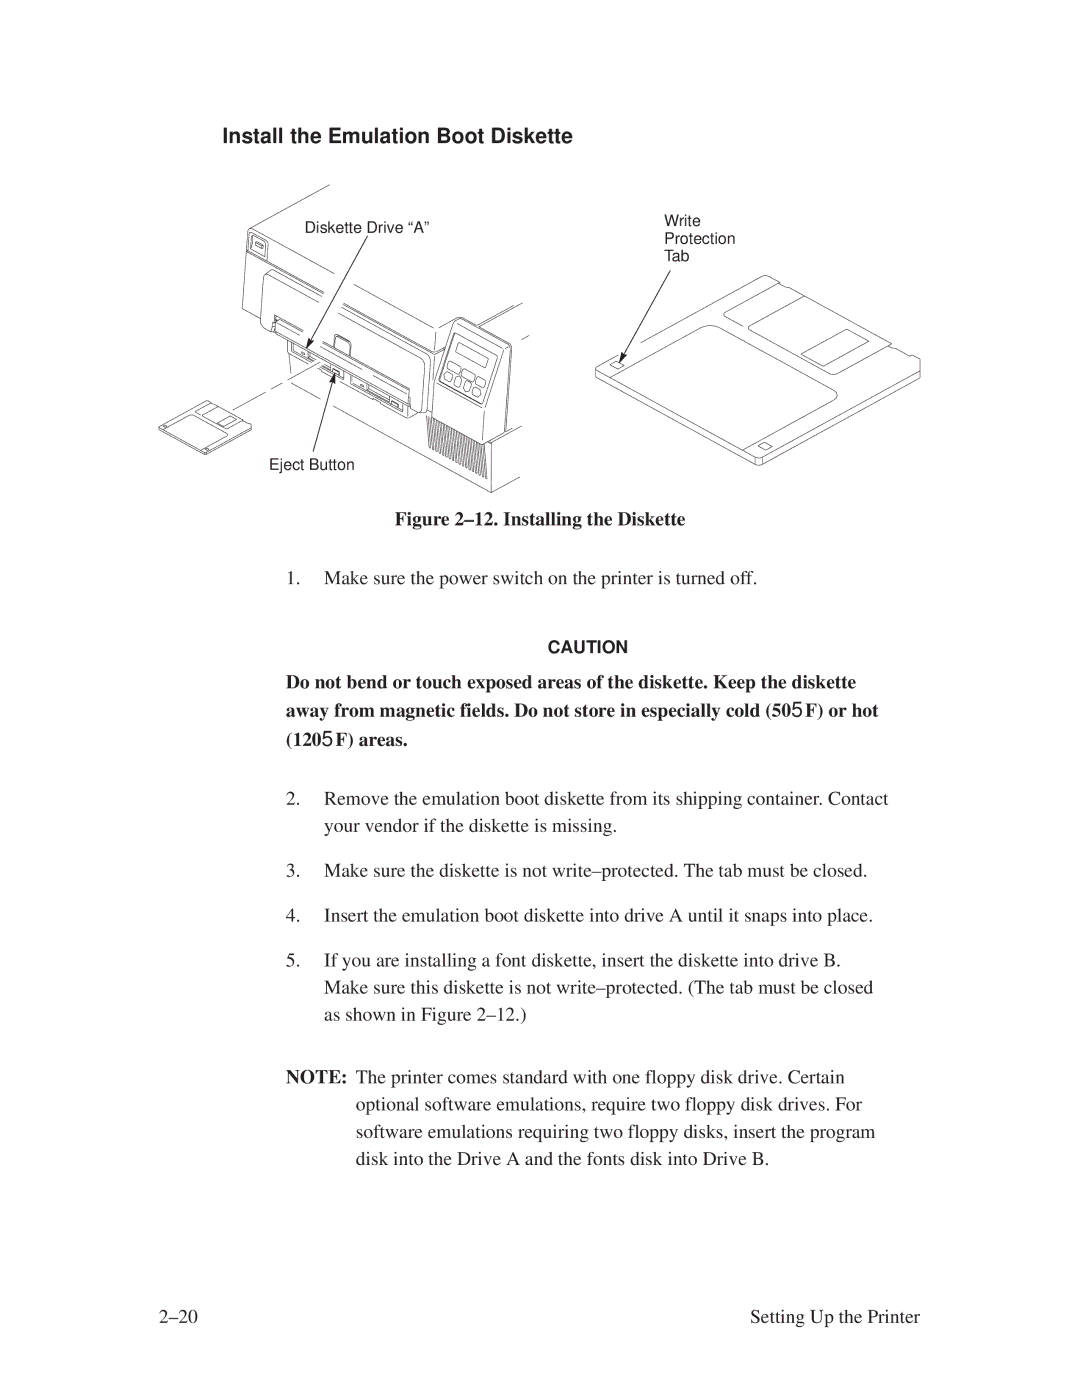
Diskette Drive ªAº | Write | |
Protection | ||
| ||
| Tab |
Eject Button
Figure 2±12. Installing the Diskette
1.Make sure the power switch on the printer is turned off.
CAUTION
Do not bend or touch exposed areas of the diskette. Keep the diskette away from magnetic fields. Do not store in especially cold (50° F) or hot (120° F) areas.
2.Remove the emulation boot diskette from its shipping container. Contact your vendor if the diskette is missing.
3.Make sure the diskette is not write±protected. The tab must be closed.
4.Insert the emulation boot diskette into drive A until it snaps into place.
5.If you are installing a font diskette, insert the diskette into drive B. Make sure this diskette is not write±protected. (The tab must be closed as shown in Figure 2±12.)
NOTE: The printer comes standard with one floppy disk drive. Certain optional software emulations, require two floppy disk drives. For software emulations requiring two floppy disks, insert the program disk into the Drive A and the fonts disk into Drive B.
2±20 | Setting Up the Printer |