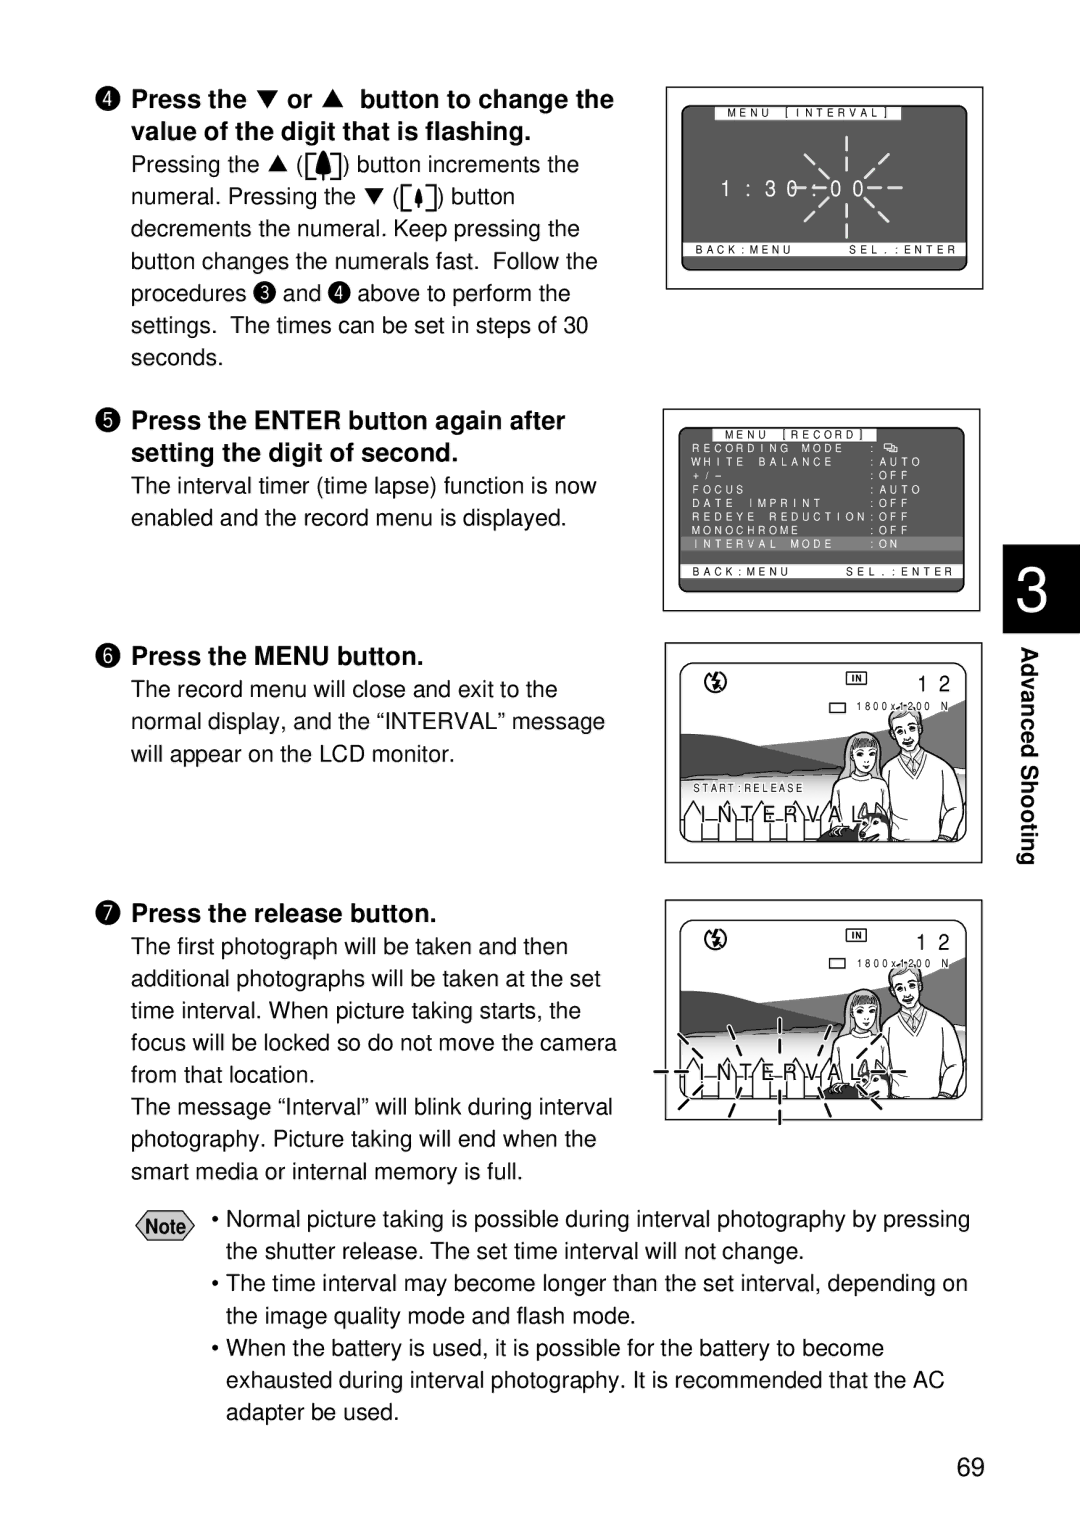
rPress the ▼ or ▲ button to change the value of the digit that is flashing.
Pressing the ▲ (![]()
![]()
![]() ) button increments the numeral. Pressing the ▼ (
) button increments the numeral. Pressing the ▼ (![]()
![]()
![]() ) button decrements the numeral. Keep pressing the
) button decrements the numeral. Keep pressing the
button changes the numerals fast. Follow the procedures e and r above to perform the settings. The times can be set in steps of 30 seconds.
MENU [INTERVAL] | |
1:30:00 | |
BACK:MENU | SEL.:ENTER |
tPress the ENTER button again after setting the digit of second.
The interval timer (time lapse) function is now enabled and the record menu is displayed.
MENU [RECORD]
RECORDING MODE | : | |
WHITE | BALANCE | :AUTO |
+/– |
| :OFF |
FOCUS |
| :AUTO |
DATE | IMPRINT | :OFF |
REDEYE REDUCTION:OFF | ||
MONOCHROME | :OFF | |
INTERVAL MODE | :ON | |
|
|
|
BACK:MENU | SEL.:ENTER | |
3
yPress the MENU button.
The record menu will close and exit to the normal display, and the “INTERVAL” message will appear on the LCD monitor.
12
1800x1200 N
START:RELEASE
INTERVAL![]()
![]()
![]()
![]()
Advanced Shooting
uPress the release button.
The first photograph will be taken and then additional photographs will be taken at the set time interval. When picture taking starts, the focus will be locked so do not move the camera from that location.
The message “Interval” will blink during interval photography. Picture taking will end when the smart media or internal memory is full.
12
1800x1200 N
INTERVA![]() L
L![]()
![]()
![]()
Note | • Normal picture taking is possible during interval photography by pressing | |
the shutter release. The set time interval will not change. | ||
|
•The time interval may become longer than the set interval, depending on the image quality mode and flash mode.
•When the battery is used, it is possible for the battery to become exhausted during interval photography. It is recommended that the AC adapter be used.
69
